Think of your backyard as a blank canvas, waiting for a stroke of genius. You can transform it with DIY garden paths that guide and charm. Start by picking a style, like a stone mosaic or gravel walkway, each taking about a weekend to build with basic tools. Grab a shovel, measure a 3-foot width, and let’s lay the groundwork—there’s more to uncover as you shape your space!
Contents
Stone Mosaic Path
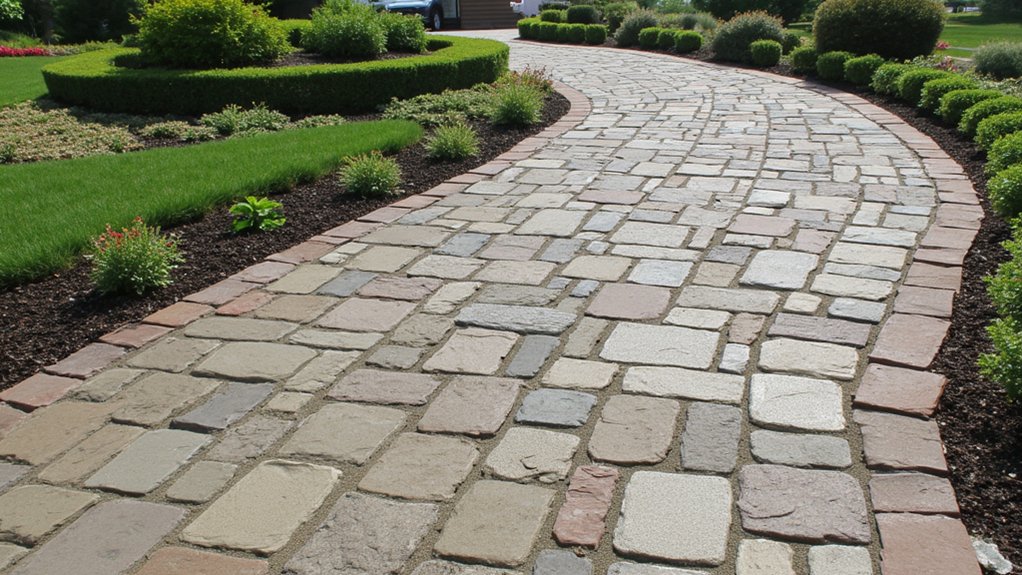
Hey, let’s plunge into crafting a stunning stone mosaic path for your garden! You’ve got this, and I’m here to help. Start by sketching your path’s layout, aiming for a 3-foot width for easy walking.
Next, gather flat stones in varied sizes, about 2-4 inches wide, and some mortar mix. Clear the path area, dig down 4 inches, and level the soil. Lay a 2-inch base of sand, then start placing stones in your design, pressing them firmly.
Mix mortar per package instructions, spread it between stones with a trowel, and smooth it out. Let it cure for 48 hours, avoiding foot traffic. Clean excess mortar with a damp cloth before it hardens. There ya go, a unique path awaits!
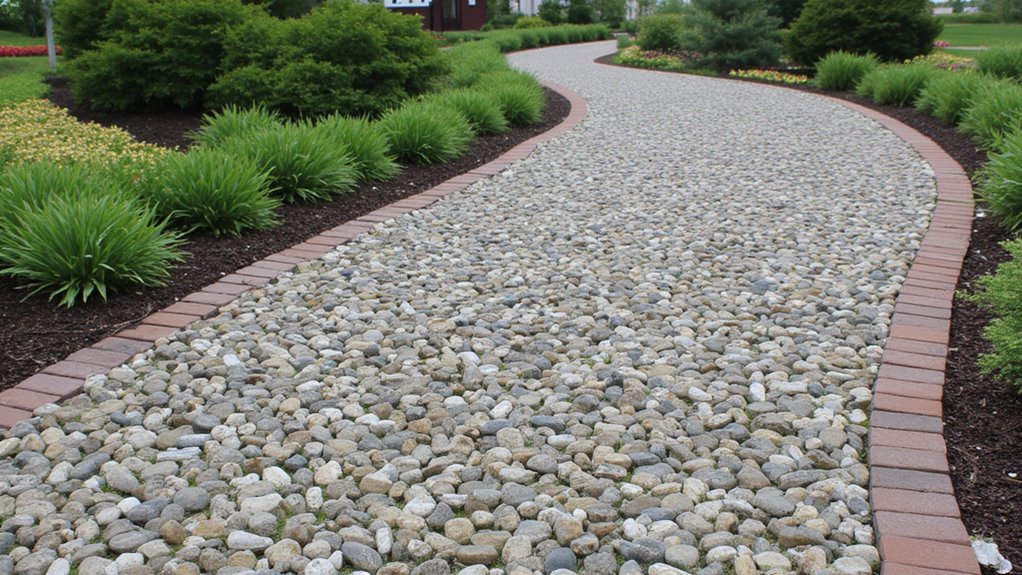
Gravel Walkway Design
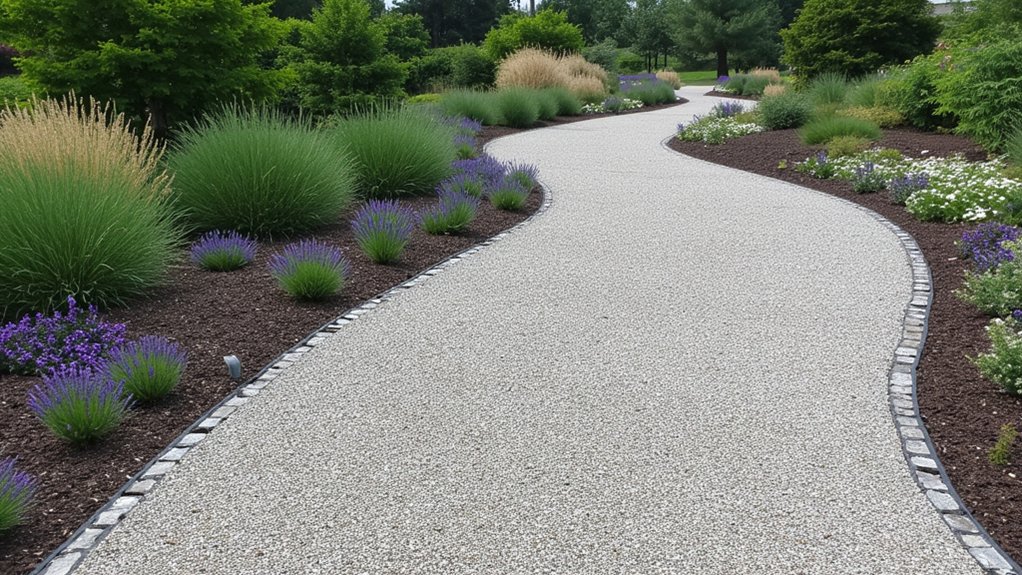
Let’s switch gears and talk about creating a gravel walkway for your garden. It’s a simple, budget-friendly option that adds charm with minimal effort. You’ll need basic tools and a weekend to get it done.
First, mark your path’s outline using string or spray paint, aiming for a width of 3-4 feet. Dig down about 4 inches, removing grass and roots, to create a stable base. Then, lay a weed barrier fabric to prevent unwanted growth.
Next, add a 2-inch layer of crushed stone as your foundation, compacting it tightly with a tamper. Top it with 2 inches of pea gravel, spreading it evenly. Rake it smooth, and you’re set with a crisp, functional walkway in just two days.
Wooden Boardwalk Path
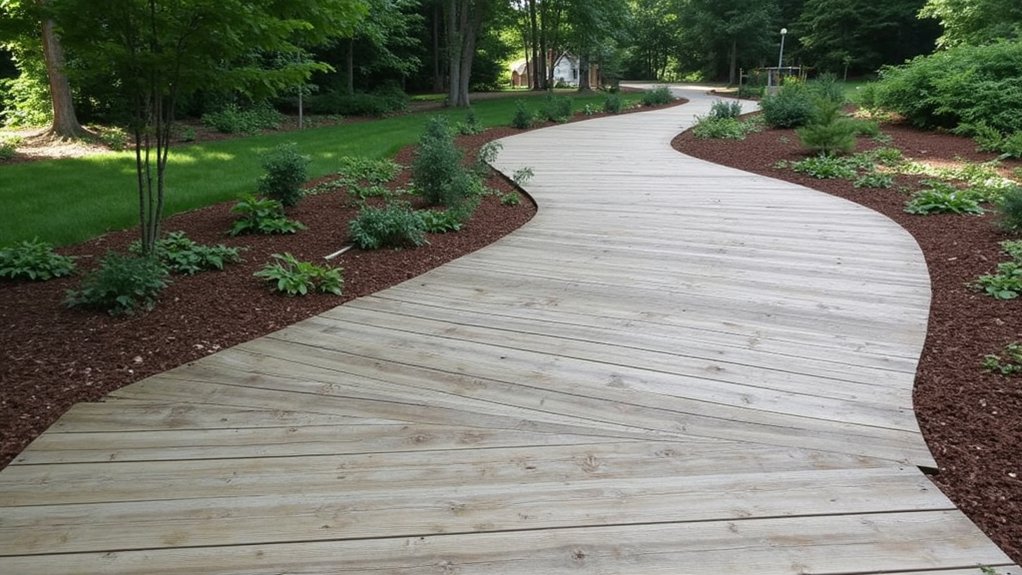
Imagine transforming your garden with a rustic wooden boardwalk path. It’s a charming, natural addition that’s easier to build than you’d think. Let’s get started on this weekend project.
First, measure your path area, aiming for a width of about 3 feet for comfort. Gather pressure-treated lumber, cut into 6-foot planks, and grab some gravel for a base. You’ll need screws, a drill, and stakes too. Lay gravel 2 inches deep for drainage, then level it.
Next, place your planks side by side, securing them to crossbeams every 2 feet with screws. Check alignment with a level, adjusting as needed. In just 6-8 hours, you’ve got a sturdy path. Walk on it, and enjoy your backyard’s new vibe!
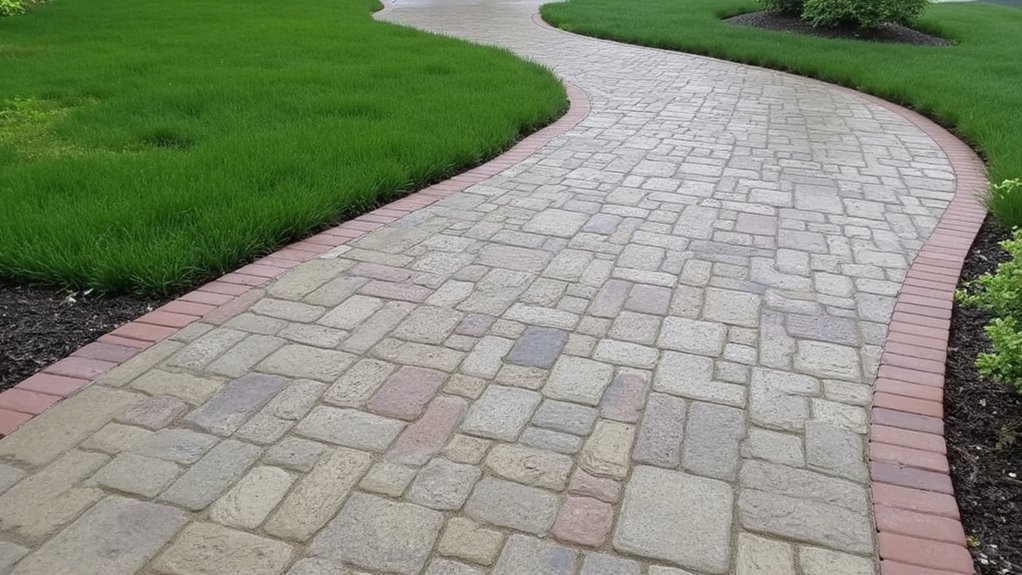
Brick Herringbone Path
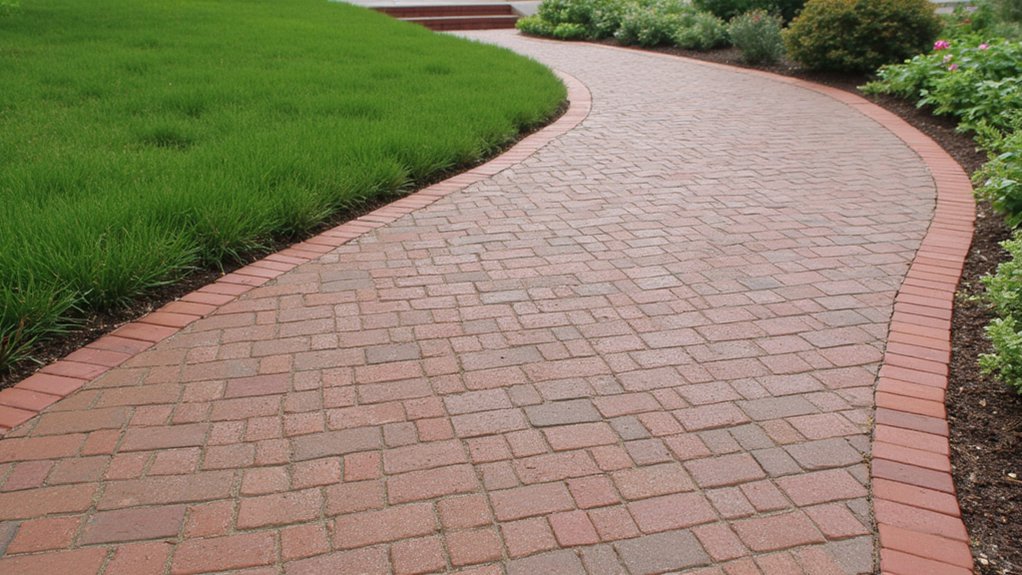
Ready for a classic twist in your garden? A brick herringbone path adds timeless charm to your backyard. You’ll love how it transforms a plain space.
Start by marking your path’s outline, aiming for a width of about 3 feet. Grab some standard red bricks—roughly 500 for a 10-foot-long path—and lay a 4-inch base of compacted gravel for stability. Next, spread a 1-inch layer of sand, smoothing it out.
Arrange the bricks in a zigzag herringbone pattern, starting at one corner. Place each brick at a 45-degree angle, fitting them snugly. Work in small sections, about 2 feet at a time, to keep it neat. Finally, sweep sand into the gaps, locking everything tight. You’ve got this!
Stepping Stone Trail
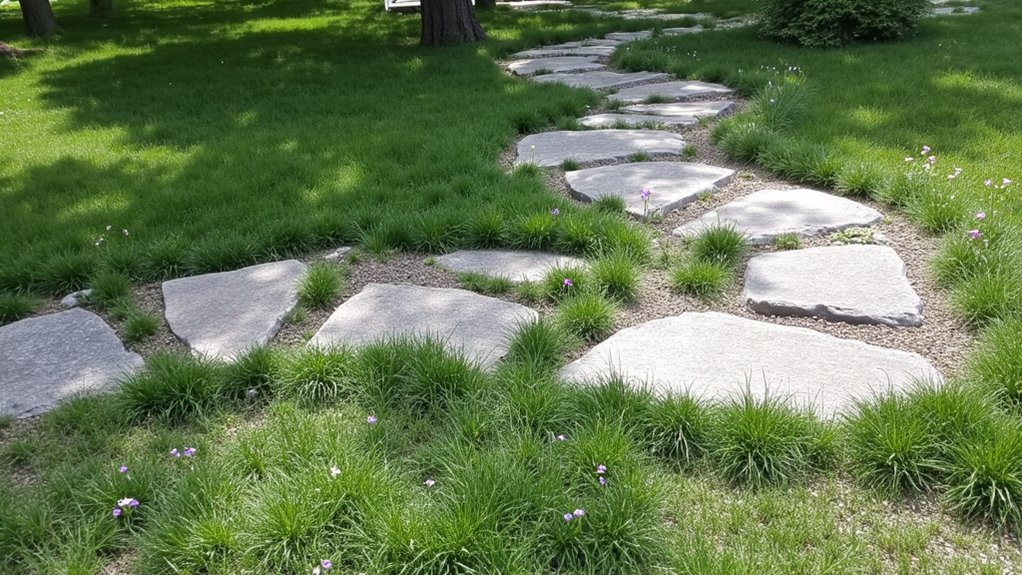
While a brick path offers structure, a stepping stone trail brings a natural, relaxed vibe to your garden. You can create this look easily, and it’s pretty forgiving if you’re not a pro.
Start by planning your path’s route, curving it naturally through your yard for a whimsical touch. Grab flat stones, about 18-24 inches wide, from a local quarry or garden store, ensuring they’re at least 2 inches thick for stability. Dig shallow holes, roughly 3 inches deep, spacing them 12-18 inches apart for comfy steps.
Next, set each stone in place, checking they’re level with a small hand tool. Add gravel or soil around them to secure everything. In just a weekend, you’ve got a charming trail!
Concrete Stamped Path
Three creative ways exist to craft a concrete stamped path, and it’s a fantastic option for durability. You’ll love how it withstands weather and wear. Let’s explore the first method: using pre-made stamp mats. Pour a 4-inch thick concrete base, let it set for 30 minutes, then press brick-patterned mats firmly into the surface.
Next up, try hand-carving designs for a personal touch. After pouring, wait 20 minutes, grab a trowel, and etch simple lines or curves before it hardens. Finally, consider color additives. Mix a concrete dye, like earthy brown, into your batch before pouring a 3-foot-wide path. Spread it evenly, stamp within an hour, and cure for 7 days. There you go—your backyard’s transformed with style!
Pebble Art Path
Let’s shift gears from concrete paths and explore a charming alternative with a pebble art path. You’ve got a chance to get creative here, crafting a unique walkway that’s all yours.
Start by marking your path’s outline with string, aiming for a width of about 3 feet. Gather smooth pebbles, roughly 1-2 inches in diameter, from a local supplier or nature spot. Lay a 2-inch base of sand within your marked area, then arrange the pebbles in patterns—think spirals or waves—for visual flair.
Work in small sections, pressing pebbles firmly into the sand every 6 inches to secure them. Spend a weekend on this, and you’ll transform your backyard with a personal, artsy touch. Keep it simple, yet striking!
Recycled Glass Path

If you’re hunting for a sustainable twist on garden paths, consider crafting a recycled glass path. It’s a unique, eco-friendly option that adds a subtle shimmer to your backyard. You’ll repurpose old glass bottles or jars, turning waste into beauty.
Start by collecting clean, broken glass pieces—aim for about 10 pounds for a 3-foot by 2-foot path. Wear gloves, and carefully crush the glass into small, safe fragments, roughly ¼ inch in size. Next, lay a 2-inch base of sand in your path area, then spread the glass evenly over it.
Seal it with a clear, outdoor resin, applying a thin layer with a brush. Let it dry for 24 hours. Now, you’ve got a sparkling, sustainable path!
Pallet Wood Path

Ever thought about using old pallets for a rustic garden path? You’ve likely got some lying around, or you can snag them cheap from local warehouses. They’re perfect for a sturdy, budget-friendly walkway.
Start by collecting 5-6 pallets, ideally 48 inches by 40 inches, to cover a decent stretch. Disassemble them using a crowbar, pulling apart the slats carefully to avoid splits. Lay the wooden slats flat along your path, spacing them 2 inches apart for drainage.
Next, secure each slat with stakes, hammering them into the ground every 12 inches along the edges. Sand the wood lightly for a smoother look, and seal it with weatherproof sealant. In just a weekend, you’ll have a charming, functional path!
Corkscrew Willow Path
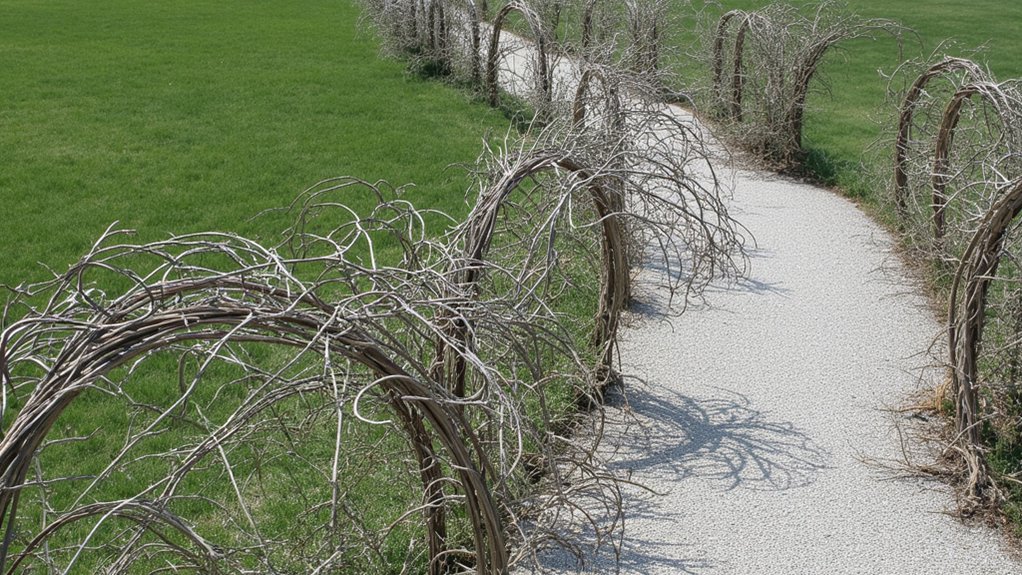
While brainstorming unique garden path ideas, consider crafting a striking corkscrew willow path. It’s a standout, natural design that twists through your backyard. You’ll love how the curly branches add quirky charm.
Start by sourcing corkscrew willow branches, ideally 3-5 feet long, from a local nursery or online. Cut them to uniform lengths, about 4 feet, for consistency. Next, mark your path’s route, aiming for a 2-foot width, and clear any debris.
Then, plant the branches upright, spacing them 6 inches apart, along both edges. Push them 8-12 inches into the soil for stability. Over 2-3 weeks, they’ll root if kept moist. Finally, fill the path with gravel, roughly 2 inches deep, for a neat, walkable surface.