Hey, isn’t it funny how you noticed aphids on your roses right after planting them? Let’s tackle this pesky problem together. Start by introducing ladybugs—release about 1,500 in the evening near infested plants, ensuring pollen-rich flowers are nearby for their food. There’s more to explore with sprays and tricks, so stick around to uncover other solid ways to protect your garden from these tiny invaders.
Ladybug Introduction
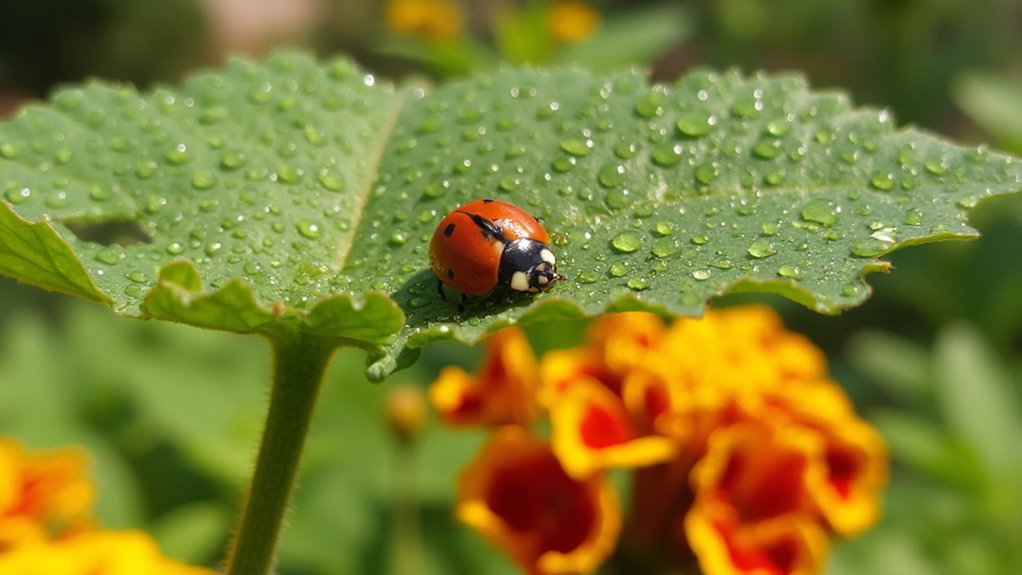
Hey there, let’s talk about a nifty little helper in your garden—ladybugs! These tiny, spotted critters are natural aphid predators. You’ll love how they munch on those pesky bugs without any fuss.
Here’s how to get started with them. Buy about 1,500 ladybugs—that’s enough for a 1,000-square-foot garden—from a local nursery or online. Release them at dusk, near aphid-infested plants, so they settle in overnight. Make sure you’ve got pollen-rich flowers, like marigolds, nearby to keep them happy.
Don’t just dump them and hope for the best, though. Lightly mist the plants with water before release; it helps ladybugs stick around. Check back in a week, and you’ll likely see fewer aphids. Keep it simple, and let nature work!
Neem Oil Application

Let’s plunge into another solid trick for tackling aphids—using neem oil. This natural pesticide, derived from the neem tree, messes with aphids’ hormones, stopping them from feeding or reproducing.
First, grab a bottle of pure neem oil from a garden store. Mix 2 teaspoons of it with 1 quart of water, and add a drop of dish soap to help it blend. Shake it well in a spray bottle, making sure it’s fully combined.
Now, spray this mix directly on affected plants, hitting the undersides of leaves where aphids hide. Do this early in the morning or late evening to avoid burning the foliage. Repeat every 7 days until you see those pesky bugs disappear for good.
Soap Spray Solution
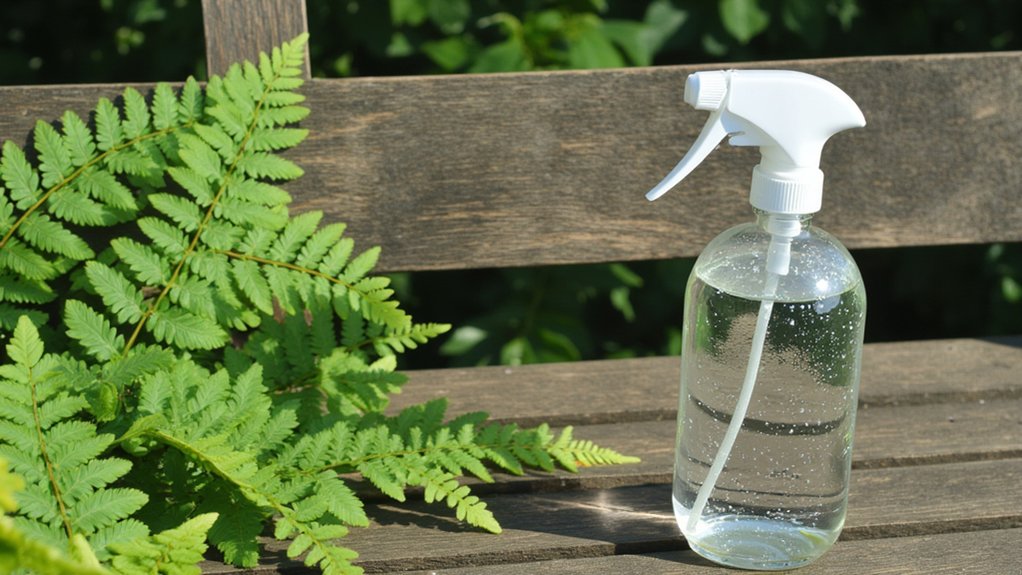
Moving on to another handy method, consider whipping up a soap spray solution to tackle those aphids. It’s a simple, effective trick you can make at home.
Mix 1 tablespoon of liquid dish soap—unscented works best—with 1 quart of water in a spray bottle. Shake it gently, ensuring the soap dissolves completely, before you start spraying.
Target the undersides of leaves where aphids hide, and coat them thoroughly. Do this early in the morning or late afternoon, avoiding midday heat, to prevent leaf burn.
Repeat every 2-3 days for a couple of weeks, checking for aphids each time. If you spot stragglers, hit ‘em again. This solution disrupts their feeding, so stick with it, and you’ll see results soon.
Companion Planting Strategy
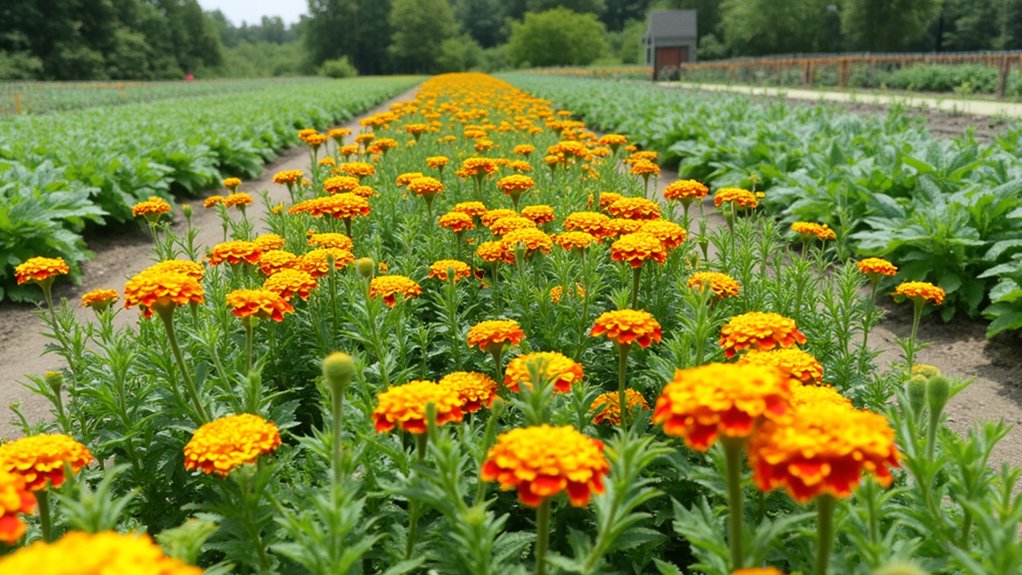
Ready for another smart way to fend off aphids? Try companion planting, a clever strategy to protect your garden. You’re basically pairing plants that help each other out, like best buddies.
Plant marigolds near your veggies, especially tomatoes or peppers, about 12 inches apart. Their strong scent repels aphids, keeping your crops safer. It’s a natural barrier, no chemicals needed.
You can also grow nasturtiums as a trap crop. Place them 2-3 feet from your main plants; aphids love them and will flock there instead. Check weekly, and remove infested leaves to control the pests.
Lastly, consider planting chives or onions nearby, roughly 10 inches from vulnerable plants. Their odor confuses aphids, reducing infestations. See, nature’s got your back!
Garlic Spray Method
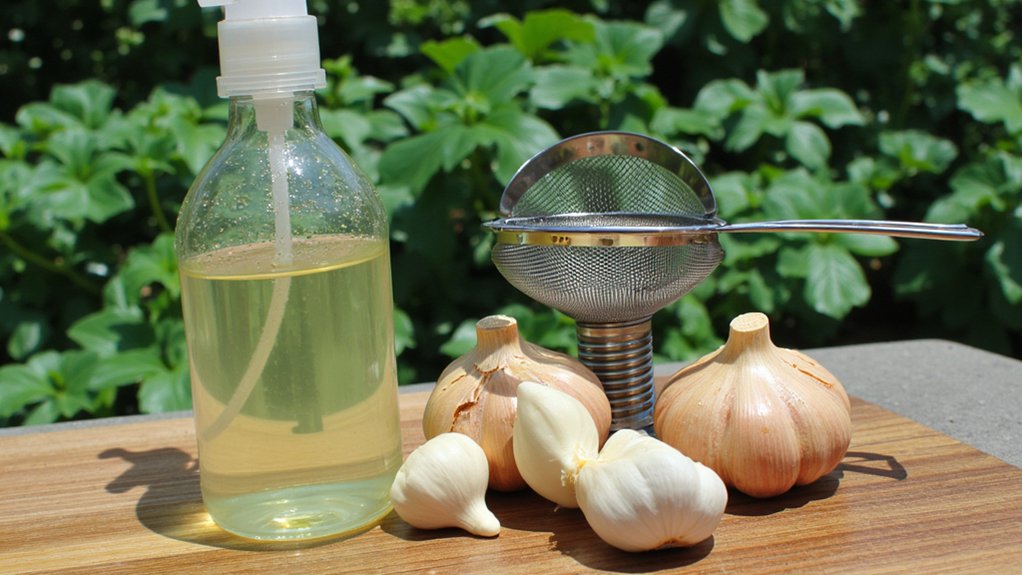
While companion planting works wonders, another effective trick to deter aphids is using a homemade garlic spray. You’ve got this! It’s simple to make and works by repelling those pesky bugs with its strong scent.
Start by crushing 5-6 garlic cloves, then mix them with 1 quart of water in a container. Let it steep for 24 hours, covered, to maximize the potency. Strain the mixture into a spray bottle, and you’re ready to go.
Apply the spray directly to your plants’ leaves, especially the undersides where aphids hide, every 3-4 days. Make sure you cover all areas, as consistency is key. Reapply after rain, since it can wash off. This natural method’s a clever, budget-friendly way to protect your garden!
Hose Water Blast
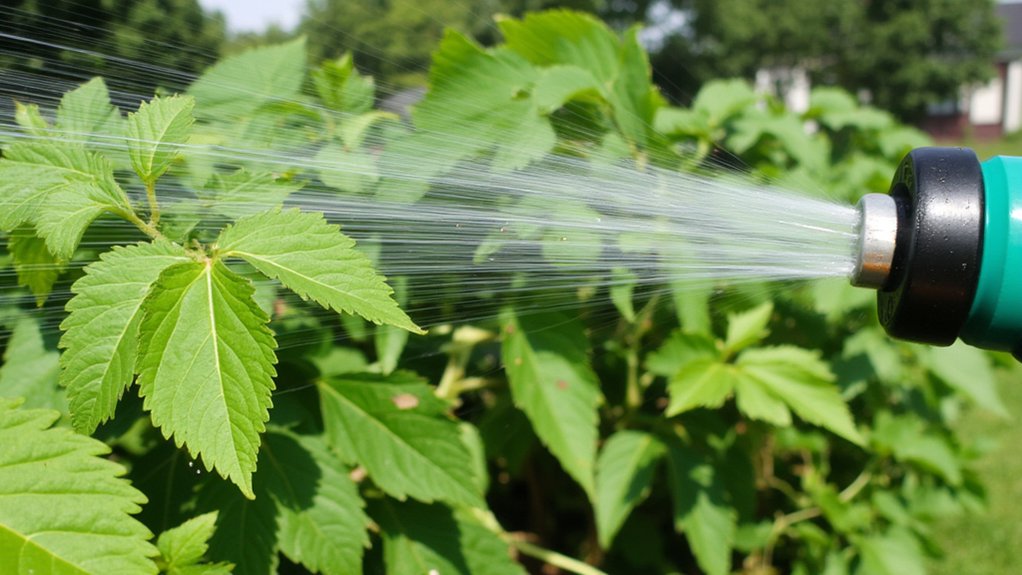
Another great trick to tackle aphids is the hose water blast, a super simple method. Grab your garden hose, set it to a strong, steady stream, and get ready to knock those pests off. Aim directly at the infested plants, focusing on the undersides of leaves where aphids hide.
Make certain you’re using a nozzle with a jet setting for maximum impact. Spray early in the morning, around 7 or 8 AM, so plants dry out before nightfall, preventing mold. Hit each affected area for about 10-15 seconds, checking to verify aphids are dislodged. Repeat every 2-3 days if you spot more bugs. It’s a quick fix, no chemicals needed, just water and a little elbow grease.
Reflective Mulch Technique
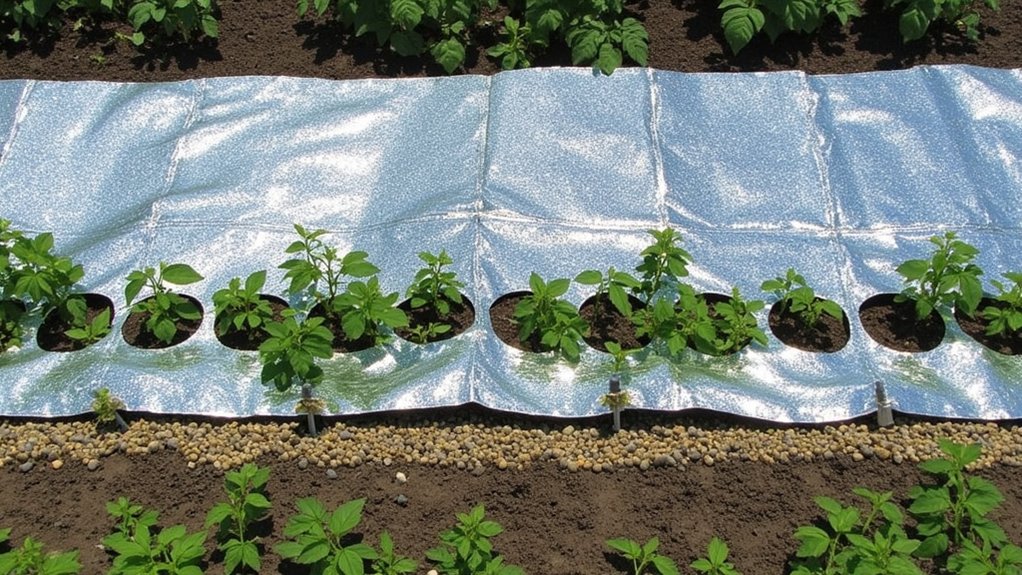
Let’s switch gears from blasting aphids with water to a clever strategy using the reflective mulch technique. This method’s pretty slick, and it’ll mess with those tiny pests.
Here’s how you do it: grab some reflective mulch, like silver polyethylene sheeting, about 2-3 feet wide. Lay it around your plants, shiny side up, securing it with rocks or stakes. Aphids get confused by the reflected light, thinking it’s another plant or sky, so they steer clear.
Make sure you cover the soil completely, leaving small holes for your plants to poke through. Install it early in the season, ideally before aphids show up, to maximize protection. Check it weekly for tears, replacing sections as needed, and keep those bugs guessing!
Diatomaceous Earth Application
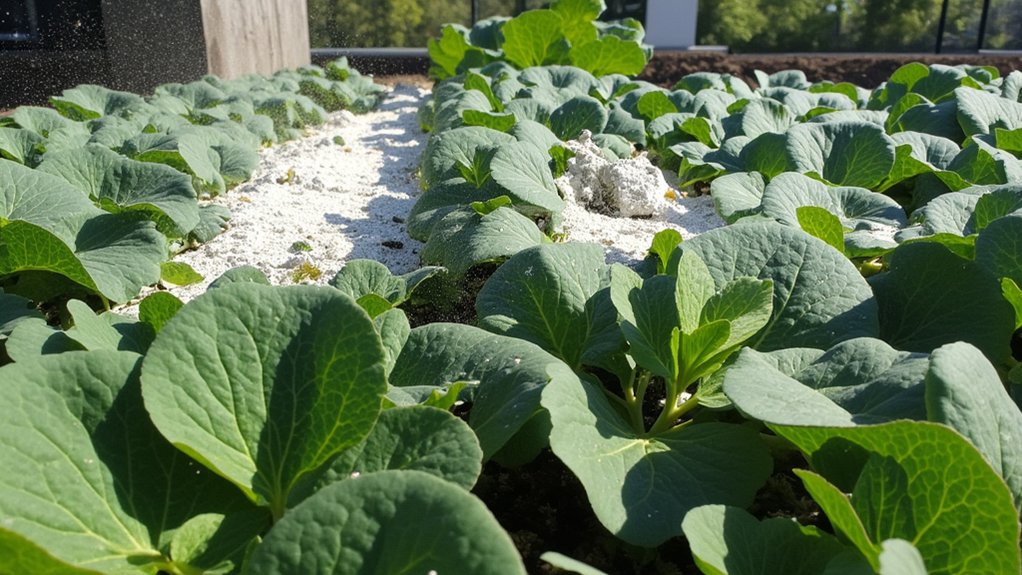
If you’re looking for a natural way to tackle aphids, try diatomaceous earth, a powdery substance that’s pure magic against pests. It’s made from fossilized algae, and it works by dehydrating insects on contact. Trust me, it’s a game-changer.
Sprinkle a thin layer, about 1/8 inch thick, around the base of your plants, focusing on aphid hotspots. Use food-grade diatomaceous earth, and wear a mask while applying it to avoid inhaling the dust. Reapply every 7-10 days, especially after rain, since water washes it away.
Check your plants daily for aphid activity, and target stems and undersides of leaves with a light dusting. Keep at it consistently, and you’ll see those pests disappear fast.
Sticky Trap Deployment
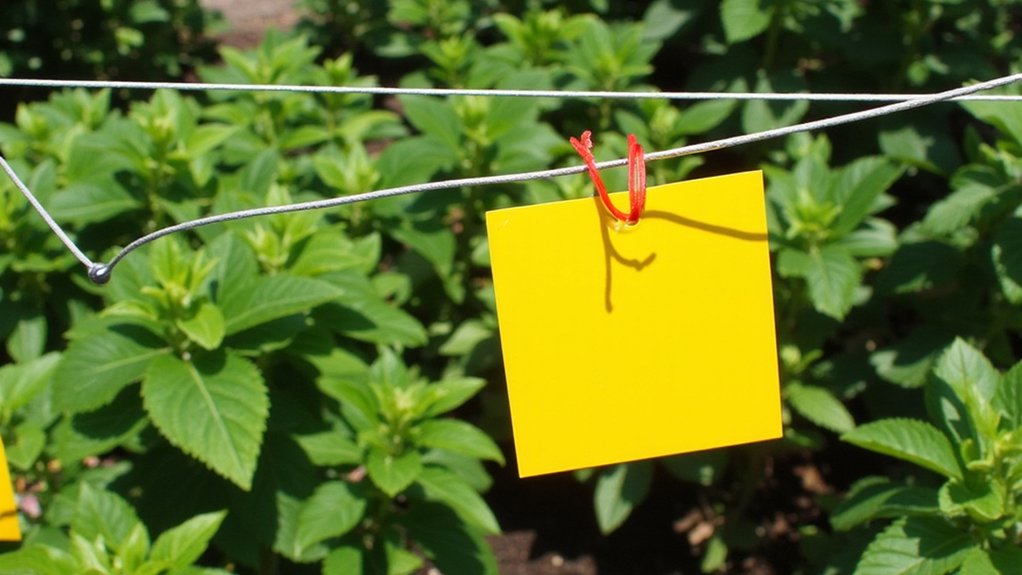
Grab some sticky traps to outsmart those pesky aphids in your garden. These bright yellow traps, coated with a sticky adhesive, attract aphids like a magnet. Hang them near your plants, about 6-12 inches above the soil, for best results.
Now, place 2-3 traps per 100 square feet of garden space, ensuring even coverage. Check them every 3-4 days, replacing traps when they’re covered in bugs or lose stickiness, usually after 1-2 weeks. This keeps the aphid population in check without much hassle.
Don’t skimp on positioning; put traps near aphid hotspots, like tender shoots or undersides of leaves. Monitor regularly, and you’ll see fewer aphids bugging your plants. It’s a simple, effective trick!
Pruning Infested Areas
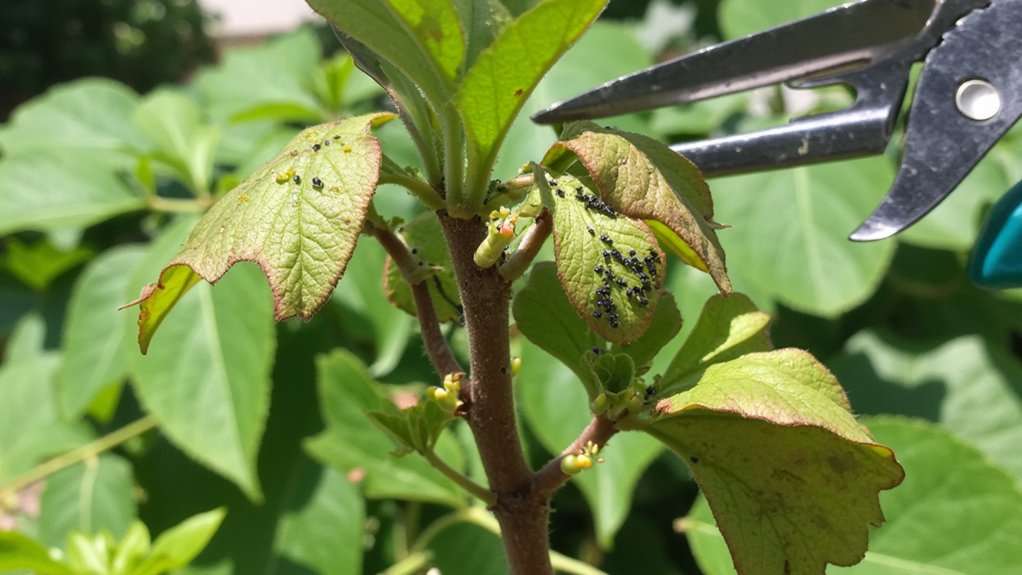
Start tackling aphid problems by pruning infested areas of your garden. Grab some sharp, clean shears, and don’t hesitate to act fast. Look closely for clusters of aphids, often hiding under leaves or near tender stems.
First, cut away any heavily infested parts, focusing on sections with visible damage or sticky residue. Dispose of these clippings in a sealed bag, not your compost, to prevent spreading. Aim to prune at least 2-3 inches below the affected area for safety.
Check your plants daily for a week after pruning, since aphids multiply quickly. If you spot new clusters, repeat the process without delay. A little vigilance now saves you from a bigger headache later, trust me. Keep those shears handy!