You’ll cut stems, watch roots grow, and multiply your collection when you master Monstera propagation. This technique transforms one plant into many, costs nothing beyond your time, and creates perfect gifts for fellow plant enthusiasts. Whether you’re working with water propagation that shows daily progress or soil methods that build stronger root systems, timing matters more than you’d expect. The secret lies in understanding when your Monstera’s growth hormones peak, but most people miss this essential window entirely.
Contents
- 1 Why Every Plant Parent Should Propagate Monstera
- 2 Choosing the Right Propagation Method for Your Needs
- 3 Perfect Timing for Monstera Propagation Success
- 4 Essential Tools and Materials for Propagation
- 5 Step-by-Step Cutting and Rooting Process
- 6 Caring for Your New Monstera Cuttings
- 7 Transplanting and Long-Term Growth Tips
Why Every Plant Parent Should Propagate Monstera
While many houseplant enthusiasts collect plants by purchasing them, propagating your Monstera offers a rewarding alternative that benefits both your wallet and well-being. You’ll experience significant mental health benefits as you nurture new growth, creating a therapeutic gardening ritual that improves mood and concentration.
The aesthetic benefits extend beyond saving money. Your propagated cuttings enhance home decor with stunning tropical foliage, transforming living spaces into lush environments. Multiple new plants from one parent creates impressive displays throughout your home.
This cost-effective method lets you expand your collection without spending additional funds while sharing plants with fellow enthusiasts.
Choosing the Right Propagation Method for Your Needs
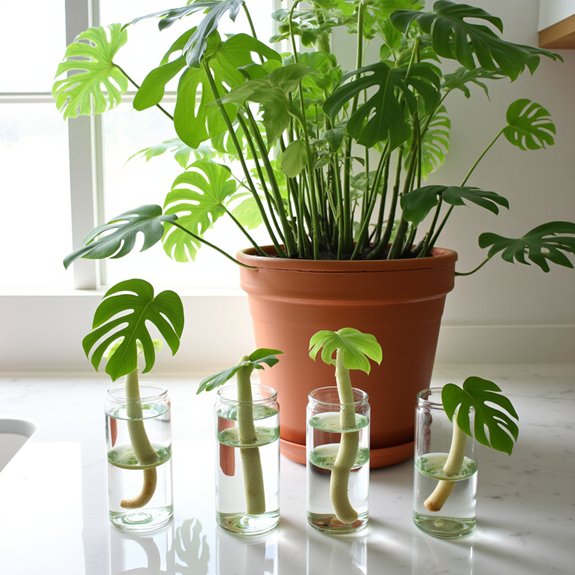
How do you decide which propagation method suits your specific situation and experience level? Water rooting offers clear advantages for beginners since you’ll watch roots develop through glass containers. This method requires minimal supplies, just filtered water and a clean vase.
Soil rooting produces stronger root systems from the start, making transplanting easier later. However, you can’t monitor progress visually, which might stress new plant parents. Choose water rooting if you’re starting out or want decorative displays. Pick soil rooting for faster establishment and stronger plants.
Perfect Timing for Monstera Propagation Success
Since seasonal considerations directly impact your Monstera’s growth patterns, spring and summer offer the perfect propagation window. During these warmer months, your plant’s natural growth hormones are most active, encouraging faster root development and stronger cutting establishment.
Early spring provides ideal conditions by avoiding temperature extremes while maintaining consistent warmth. You can propagate year-round, but expect slower root growth during cooler months, which may complicate transplanting later.
Winter propagation isn’t impossible, just less reliable. Your cuttings will take longer to establish roots, and the change from water to soil becomes trickier when growth slows.
Essential Tools and Materials for Propagation
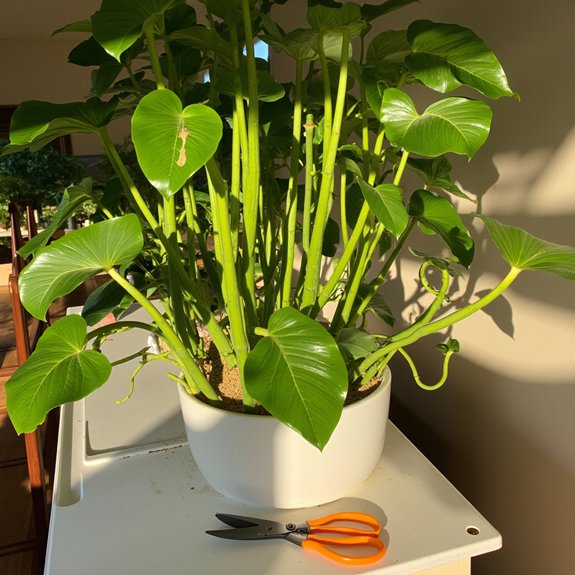
The right tools make Monstera propagation straightforward, turning what seems complicated into a simple weekend project. You’ll need sharp pruning shears or a craft knife for clean cuts that heal quickly. Clean your tools with rubbing alcohol to prevent bacterial spread.
Essential supplies include a tall, clear glass or vase for water rooting, allowing you to monitor root development. For soil propagation techniques, grab well-draining potting mix amended with perlite. A healthy parent plant free of pests is vital.
These basic materials cost under twenty dollars and last for multiple propagation sessions.
Step-by-Step Cutting and Rooting Process
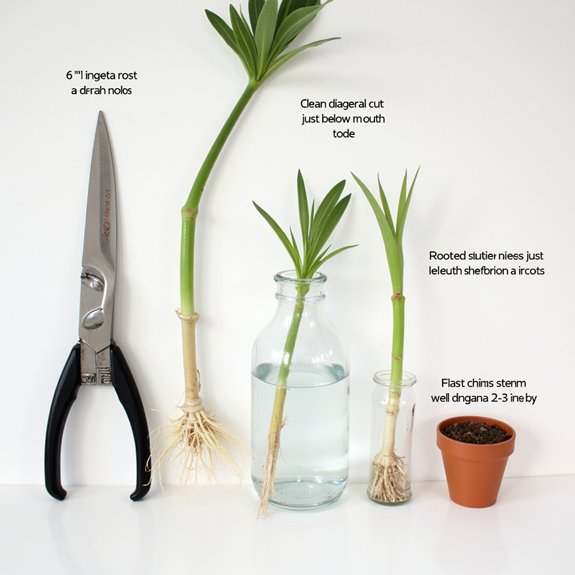
Four simple steps transform your Monstera cutting into a thriving new plant, starting with making the perfect cut. Use sharp, clean pruning shears to slice below a node at a 45-degree angle. These cutting techniques guarantee healthy tissue and prevent bacterial infections.
Choose your rooting medium carefully. Water rooting lets you monitor progress, while soil creates stronger roots immediately. For water, submerge only the node, keeping leaves above the waterline. Change water weekly to prevent bacteria buildup.
Soil rooting requires well-draining mix with perlite. Plant the cutting, water thoroughly, then maintain consistent moisture without waterlogging.
Caring for Your New Monstera Cuttings
Daily attention keeps your Monstera cuttings healthy during their vulnerable first weeks. Monitor water changes every 3-5 days, replacing cloudy water immediately to prevent bacterial growth. Place cuttings near bright, indirect light—avoid harsh afternoon sun that’ll scorch delicate leaves. Maintain humidity levels around 60-70% using a pebble tray or humidifier for ideal growth observation. Watch for tiny pests like spider mites on leaf undersides during daily checks. Skip nutrient feeding until roots reach one inch long, then use diluted liquid fertilizer monthly. Gentle leaf care means wiping dust weekly. Pruning tips aren’t necessary until established growth appears.
Transplanting and Long-Term Growth Tips
When your Monstera cutting’s roots reach 1-2 inches long, it’s ready for transplanting into soil. Choose a container with drainage holes, fill with well-draining potting mix, and create a hole for your cutting. Gently spread the roots outward to prevent bundling, then water immediately after planting.
For growth maintenance, keep your transplanted cutting in bright, indirect light. Water when the top inch of soil feels dry, typically every 5-7 days. Don’t worry if growth seems slow initially—this adjustment period is normal. These transplanting tips guarantee your new Monstera develops strong roots and healthy foliage over time.