When my prayer plant outgrew its pot last spring, I discovered just how easy propagation can be with the right technique. If you’ve got a thriving Maranta or Calathea at home, you’ll be happy to know that turning one plant into many isn’t just possible – it’s surprisingly straightforward. Whether you’re looking to expand your collection or share with friends, there’s more than one way to multiply these striking houseplants without risking their signature leaf movements.

Understanding Prayer Plant Varieties and Growth Patterns
Prayer plants, scientifically known as Marantaceae, come in several stunning varieties that share distinctive folding habits. You’ll commonly find Calathea, Maranta, and Stromanthe species, each with unique leaf patterns and colors. These tropical beauties raise their leaves at night and lower them during the day, mimicking hands in prayer.
Most prayer plants grow from underground rhizomes, spreading horizontally as they mature. You’ll notice they typically reach 6-12 inches in height, with some varieties extending up to 2 feet. Their growth pattern makes them perfect candidates for division propagation, while their nodes allow for successful stem cuttings.
Essential Tools and Materials for Successful Propagation
Three essential tools will set you up for successful prayer plant propagation: sharp, clean pruning shears, clear glass containers, and well-draining potting mix.
You’ll need pruning shears with sterilized blades to make clean 45-degree cuts without crushing the stems. Choose containers that are 4-6 inches deep, with enough room for roots to develop. Fill them with a moisture-retaining mix of 60% peat moss and 40% perlite.
Additional supplies include rooting hormone powder, plastic wrap for humidity domes, and a spray bottle for misting. Don’t forget plant markers to track propagation dates and a thermometer to monitor temperatures, which should stay between 65-80°F.
Step-by-Step Division Method for Prayer Plants
Before dividing your prayer plant, you’ll want to select a mature, healthy specimen that’s at least 12 inches wide with multiple stems. When you’re ready to divide, gently remove the entire plant from its pot and carefully shake off excess soil to expose the root system. Using clean, sharp scissors or pruning shears, separate the plant into sections where natural divisions occur in the root ball, ensuring each section has both healthy stems and roots.
Choose Healthy Parent Plant
Selecting the right parent plant stands as your most essential first step for successful prayer plant division. Look for a mature specimen that’s at least 2 years old with multiple healthy stems and vibrant, unmarred leaves.
Your ideal parent plant should display strong color patterns, firm stems, and no signs of disease or pest damage. If you notice yellow leaves, brown spots, or wilting, it’s best to wait until the plant recovers before propagating.
Check the root system by gently lifting the plant from its pot. You’ll want to see white, firm roots without any mushy or brown sections. The plant should have at least 3-4 distinct growth points for successful division.
Divide Without Root Damage
While your prayer plant’s roots may appear delicate, proper division technique makes the process straightforward and safe. Start by gently removing the entire plant from its pot, then rinse the roots with lukewarm water to remove excess soil.
Using clean, sharp scissors, identify natural separation points where the plant’s stems and roots form distinct clumps. Carefully untangle the roots with your fingers, working from the outside inward. When you spot a clear division point, cut through with a swift, clean motion.
Each divided section should have at least three healthy stems and plenty of roots. Trim any damaged, mushy, or dead roots before repotting.
Water Propagation Techniques and Tips
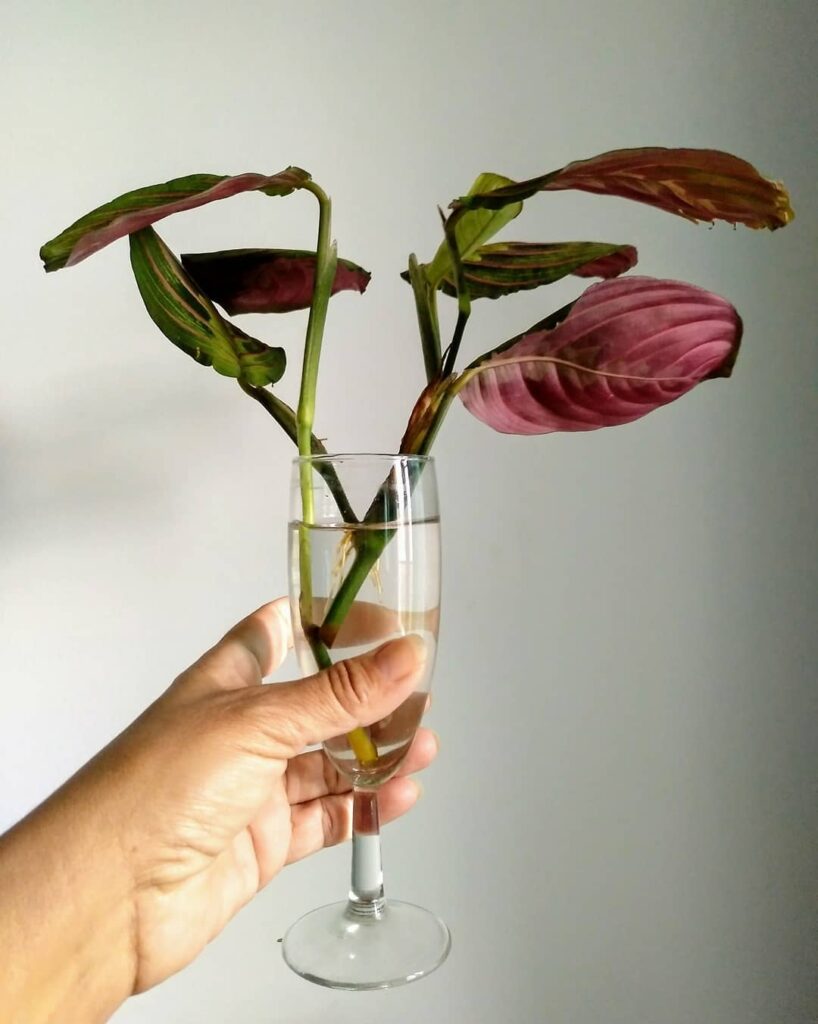
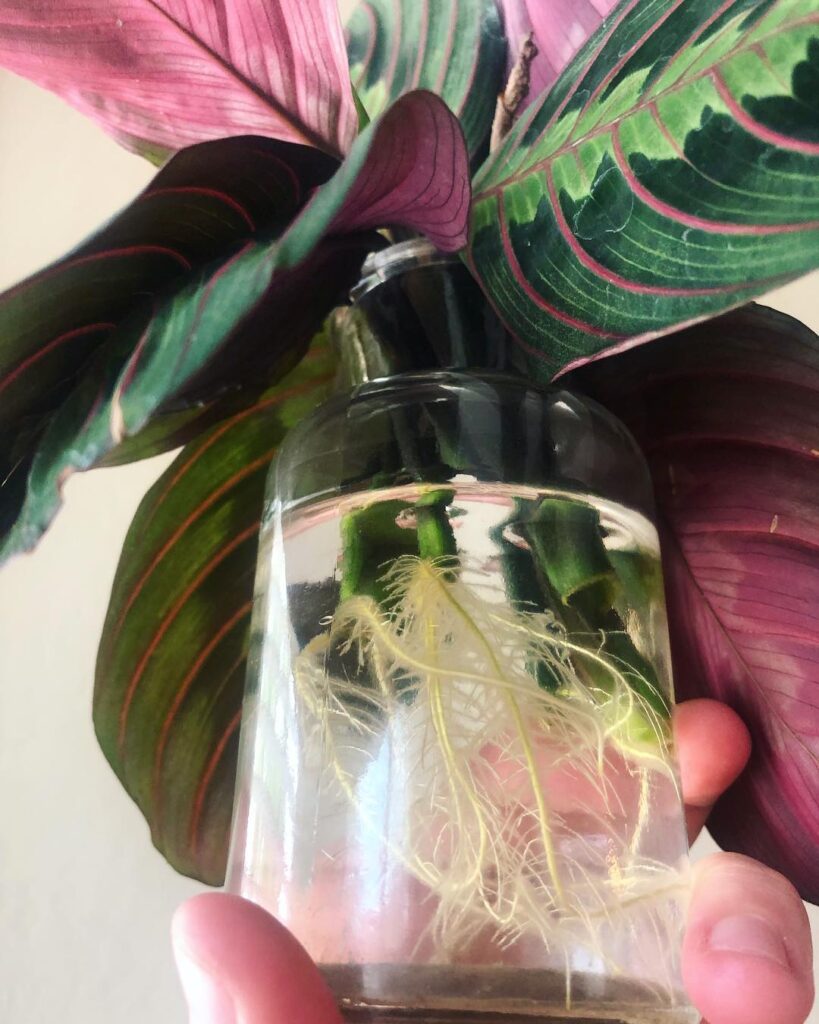
Water propagation offers one of the most reliable methods for multiplying your prayer plant collection. You’ll need to select healthy stems with at least two nodes and cut them just below a node using clean, sharp scissors.
Fill a clear glass container with room-temperature water and submerge the nodes while keeping the leaves above water. Change the water every 3-4 days to prevent bacterial growth, and place the container in bright, indirect light.
Within 2-3 weeks, you’ll notice tiny white roots emerging from the nodes. Once these roots reach 2-3 inches long, it’s time to transplant your cuttings into well-draining potting soil.
Common Propagation Problems and Solutions
Despite following proper techniques, prayer plant propagation can encounter several common obstacles that may slow or halt the growth process. You’ll often face issues like stem rot from overwatering, failed root development, or yellowing leaves on your cuttings.
If you notice stem rot, immediately remove affected sections and dip the healthy portion in cinnamon powder, which acts as a natural fungicide. For stubborn cuttings that won’t root, try dipping them in rooting hormone and increasing humidity by covering with a clear plastic bag.
Yellowing leaves typically indicate either too much direct sunlight or nutrient deficiency. Move cuttings to indirect light and add a weak liquid fertilizer solution (1/4 strength) monthly.
Caring for Your Newly Propagated Prayer Plants
Your newly propagated prayer plants will thrive in bright, indirect light with humidity levels between 60-75% and temperatures around 65-80°F. You’ll need to check the soil moisture every 2-3 days, keeping it consistently damp but not waterlogged, and mist the leaves regularly if your home’s humidity drops below ideal levels. If you notice brown leaf tips or edges, it’s likely due to low humidity or tap water sensitivity, so consider using filtered water and placing your plants on humidity trays filled with pebbles and water.
Ideal Growing Conditions
Once propagated successfully, prayer plants need specific conditions to thrive in their new environment. Keep temperatures between 65-80°F (18-27°C), and maintain humidity levels above 60% using a pebble tray or humidifier. A spot with bright, indirect light is essential for healthy growth.
Your prayer plant will flourish in well-draining potting soil with a pH between 5.5 and 6.0. Water when the top inch of soil feels dry, but don’t let it become waterlogged. Feed your plant monthly during growing season with a balanced, water-soluble fertilizer diluted to half-strength.
Keep your plant away from drafts and heating vents, as sudden temperature changes can cause leaf damage.
Dealing With Problems
Several common issues can affect newly propagated prayer plants during their first few weeks of growth. Watch for yellowing leaves, which often indicate overwatering or poor drainage. If you notice this, reduce watering frequency and guarantee your pot has adequate drainage holes.
Brown leaf tips typically signal low humidity or mineral buildup from tap water. You’ll want to mist the plant daily and switch to filtered water. For pest problems like spider mites or mealybugs, isolate the affected plant immediately and treat with neem oil solution every 5-7 days.
Root rot can develop if soil stays too wet. Check roots monthly – healthy ones should be firm and white.