If you’ve ever wished for the exotic beauty of orchids but lack the space for full-sized specimens, miniature orchids offer the perfect solution. These compact treasures, typically under 6 inches tall, pack all the sophisticated charm of their larger cousins into a desktop-friendly format. While their diminutive size might fool you, they’re not just scaled-down versions of standard orchids – they’re distinct species with unique care requirements that can transform even the smallest corner into your personal tropical paradise.

Contents
- 1 What Makes an Orchid “Miniature”?
- 2 Popular Miniature Orchid Species for Beginners
- 3 Creating the Perfect Growing Environment
- 4 Essential Care Tips and Growing Requirements
- 5 Mounting and Display Options
- 6 Common Challenges and Solutions
- 7 Propagation Methods for Tiny Treasures
- 8 Seasonal Care and Blooming Cycles
- 9 Building a Diverse Mini Orchid Collection
What Makes an Orchid “Miniature”?
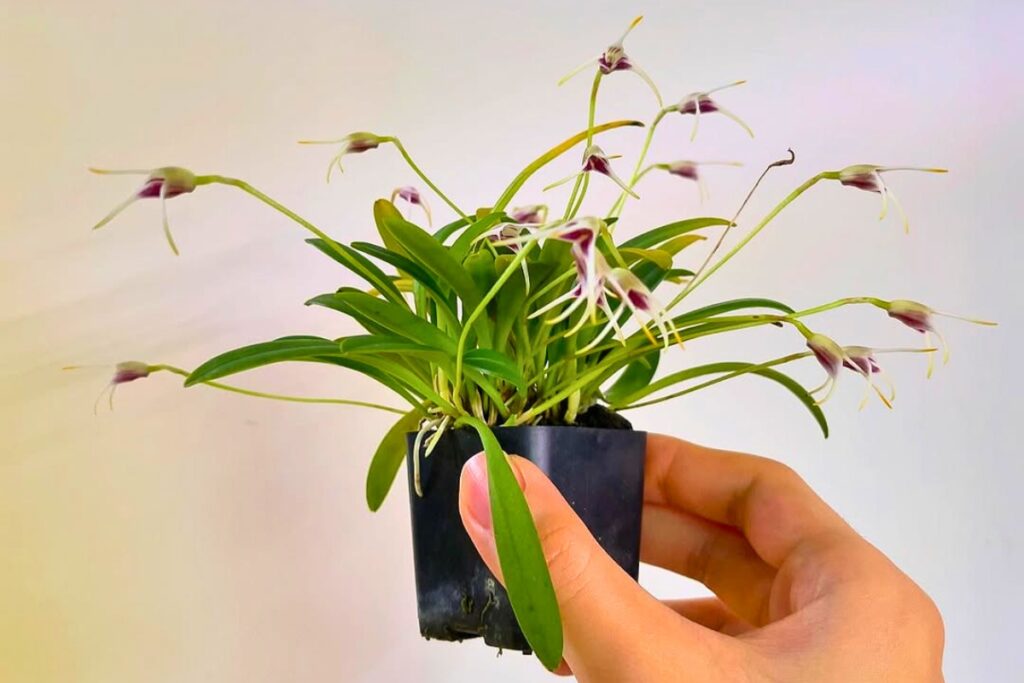
Size defines miniature orchids, with these compact beauties typically measuring less than 6 inches in height at maturity, including both leaves and flower spikes. You’ll find that these petite plants often have flowers smaller than a penny, though some can stretch to an inch across.
What truly sets miniature orchids apart isn’t just their diminutive size, but their complete growth pattern. Their leaves, pseudobulbs, and root systems maintain proportionally smaller dimensions throughout their lifecycle. When you’re identifying a true miniature, you’ll notice that mature specimens won’t exceed 15 centimeters in any direction, making them perfect for windowsills and terrariums.
Popular Miniature Orchid Species for Beginners

If you’re ready to start growing miniature orchids, several beginner-friendly species need just 4-6 inches of growing space on a windowsill or under lights. The Lepanthopsis astrophora, known as the “tiny star orchid,” and Pleurothallis grobyi are two excellent starter species that’ll thrive in typical home conditions without fussy care requirements. You’ll find these compact beauties adapt well to terrarium culture, requiring only moderate humidity and temperatures between 65-80°F to flourish.
Easy Care Starter Species
Whether you’re new to orchid growing or limited on space, several miniature orchid species offer the perfect entry point into this fascinating hobby. Start with Sophronitis coccinea, a bright red beauty that thrives in moderate light and stays under 4 inches tall.
The Lepanthopsis astrophora, nicknamed “Tiny Stars,” produces clusters of quarter-inch purple flowers and adapts well to terrarium conditions. You’ll find it grows best when mounted on cork bark with 60-70% humidity.
For windowsill growing, try Pleurothallis grobyi. This 3-inch plant produces delicate yellow-green flowers throughout the year and tolerates temperature fluctuations between 60-80°F without complaint.
Growing Space Requirements
Many popular miniature orchid species can thrive in surprisingly compact spaces, making them perfect for modern living environments. You’ll need just 4-6 inches of shelf space for most mini orchids, with varieties like Sophronitis cernua requiring only 3 inches.
When planning your growing area, allow 6-8 inches of vertical clearance for smaller species and up to 12 inches for larger miniatures like Cattleya walkeriana. You can fit 8-10 mini orchids in the same space that one standard Phalaenopsis would occupy.
Most mini orchids grow well under LED lights, which you can mount just 6-8 inches above the plants, saving even more space.
Creating the Perfect Growing Environment
Success with miniature orchids depends heavily on recreating their natural rainforest habitat conditions. You’ll need to maintain humidity between 60-80%, which you can achieve using humidity trays or small humidifiers near your plants.
Temperature control is vital – keep daytime temperatures between 70-85°F and allow a 10-15°F drop at night. Place your orchids where they’ll receive bright, indirect light, about 2-3 feet from an east or north-facing window.
Air circulation is essential, but avoid direct drafts. Use a small fan on low setting to prevent stagnant air, which can lead to fungal issues. Monitor these conditions with a digital hygrometer-thermometer combo device.
Essential Care Tips and Growing Requirements
Your miniature orchids will thrive when you carefully balance their core growing requirements of light, humidity, water, and nutrients. While these tiny beauties need bright, indirect light and humidity levels between 60-80%, you’ll also want to establish a regular watering schedule that lets the growing medium partially dry between sessions. The right growing medium, typically a mix of fine-grade bark, perlite, and sphagnum moss, creates the perfect foundation for healthy roots and sustainable growth.
Light and Humidity Needs
Properly balancing light and humidity levels stands as the cornerstone of successful miniature orchid care. You’ll want to place your orchids in bright, indirect light, about 3-4 feet from an east-facing window for ideal exposure without risking leaf burn.
Maintain humidity between 60-80% by using a humidity tray or small humidifier. Simply place pebbles in a shallow tray, add water just below the stones’ surface, and set your orchid’s pot on top.
During winter months, when indoor air gets dry, you’ll need to mist your miniature orchids 2-3 times daily, focusing on the area around the plants rather than directly on the leaves.
Water and Fertilizer Requirements
Beyond maintaining proper light and humidity, mastering the water and fertilizer balance forms the backbone of miniature orchid care. Water your minis when the growing medium feels barely damp, typically every 3-5 days, using room-temperature water.
Apply a balanced, water-soluble orchid fertilizer at quarter strength (¼ teaspoon per gallon) every other watering during the growing season. During winter’s rest period, reduce fertilizing to once monthly.
Never let water collect in the crown or between leaves, as this can lead to rot. Instead, water early in the day and guarantee good air circulation. If you’re unsure about watering, it’s better to underwater than overwater these delicate beauties.
Choosing Suitable Growing Media
Three key factors determine the ideal growing medium for miniature orchids: aeration, moisture retention, and root support. You’ll find that a mix of fine-grade bark (1/8 to 1/4 inch), perlite, and sphagnum moss creates a favorable environment for your tiny treasures.
For epiphytic miniatures, you’ll want a ratio of 3:1:1 (bark:perlite:moss), while terrestrial varieties thrive in a 2:2:1 mix. Don’t use standard potting soil, as it’ll suffocate the roots. Instead, consider adding charcoal chips for extra drainage and natural purification.
When repotting, gently rinse the old medium from roots and trim any dead material before placing in fresh mix.
Mounting and Display Options
Displaying miniature orchids requires thoughtful consideration of their unique mounting needs and growth habits. You’ll find success mounting these tiny beauties on cork bark, tree fern plaques, or driftwood pieces that measure 3-6 inches across.
For vertical displays, secure your orchids using thin fishing line or copper wire, ensuring there’s a 1/4-inch gap between the roots and mounting surface. You can create eye-catching arrangements by grouping 3-4 miniatures on a single 8×10-inch mount.
If you’re working with enclosed spaces, try mounting your orchids in glass terrariums or wardian cases, which help maintain 70-80% humidity while protecting delicate blooms.
Common Challenges and Solutions
Growing miniature orchids can present several unique hurdles that’ll test your gardening skills. You’ll often face challenges with overwatering, as their tiny root systems are sensitive to moisture levels. When you notice yellowing leaves or rotting roots, reduce watering to once every 7-10 days.
Light management can be tricky, too. If your orchids develop reddish leaves, they’re getting too much sun. Move them 12-18 inches back from windows or add a sheer curtain filter.
Pest control requires extra vigilance since spider mites and mealybugs love these compact plants. Inspect weekly and treat immediately with neem oil or insecticidal soap at quarter strength.
Propagation Methods for Tiny Treasures
Successful propagation of miniature orchids requires mastering several specialized techniques that’ll work with their delicate nature. You’ll need to focus on division, keiki development, or seed propagation as your primary methods.
Division works best when you’ve got a healthy plant with multiple growths. Wait until you see at least four pseudobulbs, then separate them using a sterile blade at a 45-degree angle. Each division must have its own roots and leaves to thrive.
For keiki propagation, you can apply keiki paste to a dormant eye on the flower spike. Within 2-3 months, you’ll see tiny plantlets forming, which you can remove when their roots reach 2-3 inches.
Seasonal Care and Blooming Cycles
Since miniature orchids follow distinct seasonal patterns, you’ll need to adjust your care routine throughout the year to match their natural cycles. Most species enter their growth phase in spring and summer, requiring increased watering and weekly fertilizing at quarter-strength.
During fall, reduce watering by 30% and stop fertilizing to prepare your orchids for winter dormancy. You’ll notice slower growth and yellowing leaves, which is normal. Many miniatures bloom in late winter or early spring.
Monitor temperatures carefully – maintain 65-75°F during growth periods and drop to 55-65°F at night during the rest phase to trigger blooming.
Building a Diverse Mini Orchid Collection
The journey into miniature orchid collecting often starts with a single enchanting species, but you’ll soon discover a vast world of fascinating varieties. Begin with easy-to-grow genera like Phalaenopsis, measuring under 6 inches, before advancing to more challenging species.
Create diversity by selecting orchids with different blooming seasons. You’ll want to include spring-flowering Sophronitis, summer-blooming Masdevallia, and winter-flowering Lepanthes. Each genus requires specific care conditions, so group similar species together.
Start with 3-5 plants, spacing new additions 2-3 months apart to develop proper care routines. Focus on mastering each species’ requirements before expanding your collection.
