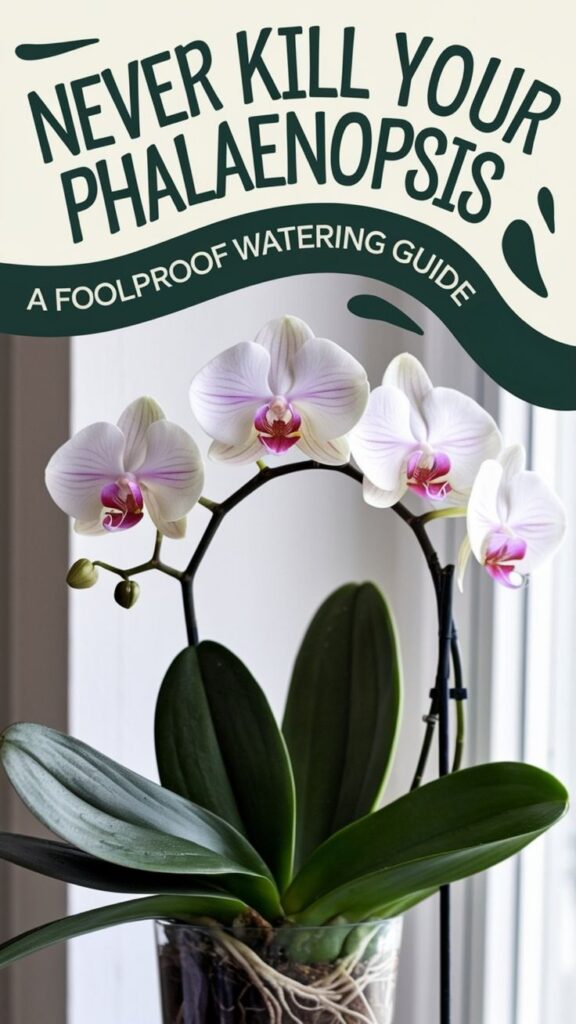
If you’ve ever felt like you need a Ph.D. in horticulture just to keep your Phalaenopsis orchid alive, you’re not alone. You’ll find that watering these elegant plants doesn’t have to be complicated, though it does require attention to detail. While many orchid owners mistakenly drown their plants with daily watering, you can master the right technique by understanding two simple methods and a few key principles that’ll transform your orchid care routine.
Contents
Understanding Phalaenopsis Water Needs
While Phalaenopsis orchids don’t need constant watering, they require consistent moisture to thrive. You’ll want to maintain humidity levels between 50-70% and guarantee proper airflow around your plants to prevent root rot.
In their natural habitat, these orchids receive water from morning dew and brief tropical showers. Your indoor orchid’s watering needs will vary based on several factors, including pot size, growing medium, and your home’s climate.
During active growth, you’ll typically need to water every 7-10 days. In winter, reduce watering to every 10-14 days. The key is to check your orchid’s roots – they’ll appear silvery-gray when they’re ready for water.
Signs Your Orchid Needs Water
You’ll know your orchid needs water when its roots shift from vibrant green to silvery-white, a key indicator that moisture levels are dropping. The plant’s leaves will also give you clear signals, becoming wrinkled and limp instead of firm and upright when they’re thirsty. Making a habit of checking both root color and leaf firmness helps you establish the perfect watering rhythm for your Phalaenopsis.
Root Color Changes
Observing your orchid’s root color changes provides one of the most reliable indicators of its watering needs. Healthy, well-hydrated roots appear plump and bright green, while roots needing water turn silvery-white or grayish.
You’ll notice these changes most easily in roots growing outside the pot or through clear containers. When a healthy green root shifts to silvery-white, it’s time to water. If you spot yellow, brown, or black roots, they’re likely rotting from overwatering.
Don’t confuse dried velamen (the spongy outer root layer) with rot. Velamen naturally appears whitish when dry but turns green again after watering, acting like a moisture indicator.
Wrinkled Limp Leaves
Beyond root health, your orchid’s leaves tell a clear story about its hydration needs. When your Phalaenopsis isn’t getting enough water, its leaves will become wrinkled, limp, and leathery to the touch.
Check the leaves by gently bending them – healthy leaves should feel firm and resilient. If they’re soft and pliable, that’s a sure sign your orchid’s thirsty. You’ll notice the wrinkles most prominently on the underside of leaves, starting from the base.
Don’t wait until leaves show severe wrinkling, as this can stress your plant. Instead, monitor leaf firmness every 4-5 days, especially during warmer months when water needs increase.
Best Watering Methods and Techniques
While several watering techniques exist for Phalaenopsis orchids, two methods stand out as particularly effective: the soaking method and the running water method.
For the soaking method, submerge your orchid’s pot in room-temperature water for 10-15 minutes, allowing the roots to absorb moisture. Ascertain the water level reaches just below the crown to prevent rot.
The running water method involves holding your plant under gentle tap water for 30 seconds, letting it drain completely between waterings. You’ll want to direct the water flow specifically at the roots while avoiding the leaves and crown.
Both techniques work well, but soaking tends to provide more thorough hydration for severely dry plants.
Choosing the Right Water Type
The type of water you use for your Phalaenopsis orchid can make a significant difference in its health and growth. While tap water might seem convenient, it often contains chlorine, fluoride, and dissolved minerals that can build up in your orchid’s roots over time. You’ll get better results using filtered or rainwater, which more closely matches the natural conditions these tropical plants evolved to thrive in, reducing the risk of mineral deposits and promoting healthier growth.
Tap Vs Filtered Water
Selecting appropriate water for your Phalaenopsis orchid can make a significant difference in its health and blooming success. While tap water‘s convenience is tempting, it often contains chlorine, fluoride, and dissolved minerals that can harm your orchid over time.
Filtered water’s your best bet, as it removes most harmful chemicals while retaining beneficial minerals. If you’re using tap water, let it sit out for 24 hours to allow chlorine to evaporate. Alternatively, you can invest in a reverse osmosis system, though it’s not strictly necessary for most home growers.
Avoiding Hard Water Issues
Hard water presents unique challenges for Phalaenopsis orchids, often leaving unsightly mineral deposits on leaves and potentially damaging root systems. You’ll need to take extra precautions if your water contains high mineral content.
To combat hard water issues, you can install a water softener or use filtered water with a TDS (Total Dissolved Solids) reading below 200 ppm. If that’s not possible, let your tap water sit out for 24 hours before using it, allowing some minerals to settle.
When watering, avoid splashing the leaves, and wipe them down monthly with a solution of 1 part white vinegar to 4 parts water to remove any existing deposits.
Common Watering Mistakes to Avoid
When caring for Phalaenopsis orchids, numerous watering mistakes can quickly lead to root rot or dehydration. Don’t overwater your orchid by following a rigid schedule; instead, check the potting medium and roots to determine when it’s time to water.
Never let water collect between the leaves or in the crown, as this can cause bacterial rot. You’ll want to water in the morning, giving your orchid time to dry before nightfall, and avoid using ice cubes, which can shock the roots.
Don’t forget to empty the drainage tray within 30 minutes after watering, and never mist the flowers, as this can cause spotting and premature wilting.
Seasonal Adjustments for Watering
Beyond avoiding common watering mistakes, you’ll need to adapt your orchid’s watering routine throughout the year. During summer’s active growing season, water every 4-5 days when temperatures exceed 75°F. In winter, reduce watering to every 7-10 days as your orchid enters a natural rest period.
Humidity levels also affect your watering schedule. In dry winter months, supplement with light misting or a humidity tray. During humid summers, you’ll want to improve air circulation and potentially reduce watering frequency to prevent root rot.
Monitor your orchid’s roots closely during seasonal changes, adjusting your schedule based on their appearance and environmental conditions.
Watering Tools and Equipment Essentials
Several essential tools make proper orchid watering much simpler and more effective. You’ll need a watering can with a narrow spout, allowing precise control when directing water to the roots. A spray bottle with adjustable nozzle settings helps mist leaves and maintain humidity.
For accurate moisture testing, invest in a moisture meter with a probe that’s at least 6 inches long. You’ll also want clear plastic pots with drainage holes, which let you monitor root health and prevent waterlogging.
Don’t forget about water quality tools – a TDS meter to check mineral content and a pH meter to guarantee your water’s acidity falls between 5.5 and 6.5.