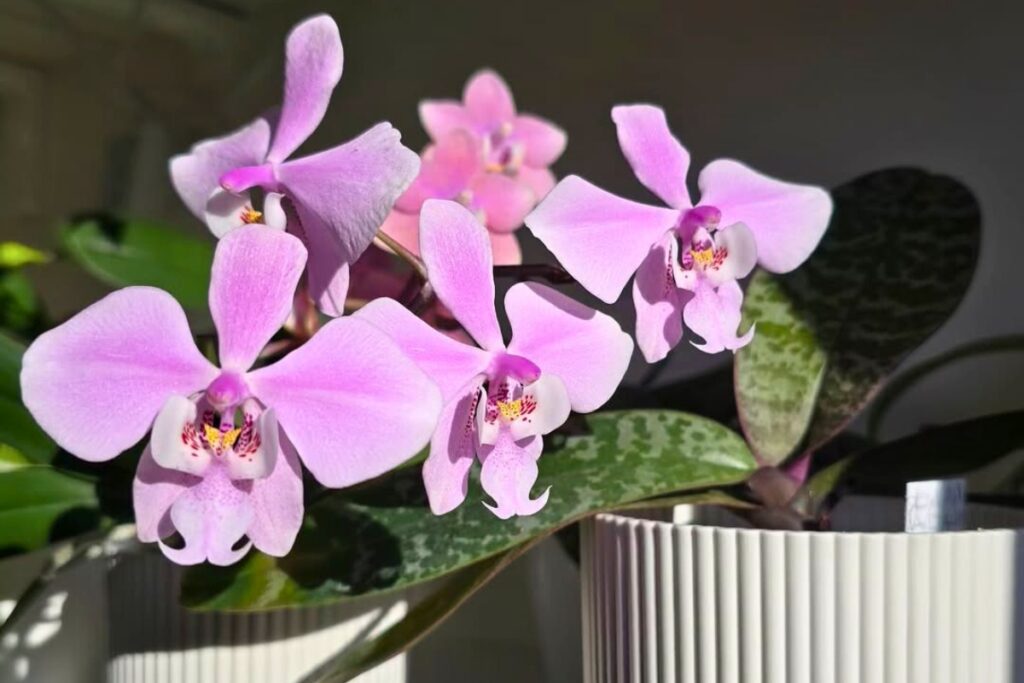
While you might think leaving your Phalaenopsis orchids behind is a recipe for disaster, you’ll be relieved to know these resilient plants can thrive during your absence with proper preparation. You’ll need to establish a strategic care routine at least 48 hours before departure, focusing on three critical factors: watering timing, humidity control, and temperature stability. The success of your orchids’ survival depends entirely on how well you execute these pre-travel preparations, and there’s a specific sequence you’ll want to follow.
Contents
- 1 Assessing Your Orchid’s Current Health Status
- 2 Watering Techniques Before Departure
- 3 Creating the Perfect Humidity Environment
- 4 Setting Up Proper Lighting Conditions
- 5 Temperature Control Methods During Your Absence
- 6 Automated Care Systems and Tools
- 7 Natural Support Methods for Extended Trips
- 8 Pre-Travel Pest Prevention Strategies
- 9 Emergency Care Instructions for Plant Sitters
- 10 Post-Travel Recovery and Maintenance Steps
Assessing Your Orchid’s Current Health Status
Before packing your Phalaenopsis orchid for travel, you’ll need to carefully evaluate its current health condition. Check for any signs of disease, pests, or stress by examining the leaves, roots, and flowers. Yellow or brown spots, wilting, or unusual markings could indicate problems that require attention before transport.
Look closely at the growing medium’s moisture level, as it shouldn’t be too wet or completely dry. You’ll want the potting mix slightly damp, about 2-3 days after watering. Inspect the plant’s stability in its pot, ensuring roots are firmly anchored and not loose or rotting.
Watering Techniques Before Departure
Since proper hydration affects your orchid’s travel resilience, timing your pre-trip watering is essential. Water your Phalaenopsis thoroughly 24-48 hours before departure, ensuring the potting medium is evenly moist but not waterlogged.
Check the drainage holes for any excess water and empty the catch tray completely. You’ll want to avoid water pooling during transport, which can lead to root rot. If you’re using moss as a growing medium, gently squeeze it to verify it’s only damp, not sopping wet.
For trips longer than a week, consider placing 3-4 ice cubes on top of the medium before leaving – they’ll melt slowly, providing gradual hydration.
Creating the Perfect Humidity Environment
Maintaining proper humidity levels complements your watering schedule when traveling with Phalaenopsis orchids. You’ll need to create a microclimate that maintains 50-70% humidity, which you can achieve using a humidity tray or sealed plastic bag setup.
For short trips of 3-7 days, place pebbles in a shallow tray, add water to just below the stones’ surface, and set your orchid pot on top. For longer journeys, create a temporary greenhouse by wrapping your plant in a clear plastic bag with small air holes, securing it loosely around the pot’s base with a twist tie.
Setting Up Proper Lighting Conditions
When traveling with your Phalaenopsis orchid, proper lighting conditions make the difference between a thriving plant and a stressed one. Place your orchid 3-5 feet from an east or north-facing window, avoiding direct sunlight which can scorch the leaves.
If you’re staying in a room without ideal natural light, you’ll need to supplement with artificial lighting. Position a LED grow light 12-18 inches above your orchid for 12-14 hours daily. Look for lights with a color temperature between 5000-6500K.
During car travel, don’t let your orchid sit in direct sun through windows. Use a sheer curtain or positioning between seats to provide filtered light.
Temperature Control Methods During Your Absence
Temperature fluctuations can devastate your Phalaenopsis orchid while you’re away. To maintain ideal conditions, set your thermostat between 65-80°F (18-27°C), with no more than a 15-degree variation between day and night temperatures.
Position your orchid away from drafty windows, air vents, and exterior doors. You’ll want to create a microclimate using a humidity tray filled with pebbles and water, which helps stabilize both moisture and temperature.
For extended trips, consider installing a smart thermostat you can monitor remotely, or place your orchid in a room with naturally stable temperatures, like a bathroom or basement, provided there’s adequate light.
Automated Care Systems and Tools
Several automated care systems can keep your Phalaenopsis orchid thriving during your travels. Self-watering globes, which you’ll want to fill with filtered water, can maintain moisture for up to 14 days. Just insert the globe 3 inches deep into slightly damp soil at a 45-degree angle.
Smart plant sensors, like the Sustee or SONKIR models, monitor soil moisture and connect to your phone, alerting you when levels drop below 40%. For humidity control, install a programmable humidifier with a built-in hygrometer, setting it to maintain 50-70% humidity through timed misting cycles every 4-6 hours.
Natural Support Methods for Extended Trips
Natural methods provide reliable backup support for your traveling orchid care routine. Place clay pebbles or natural wool wicks in the pot’s drainage holes to regulate moisture flow, then position your orchid on a humidity tray filled with 1-2 inches of pebbles and water.
Create a self-watering system by inserting cotton rope between the pot’s drainage holes and a water reservoir below. You’ll want to use 1/4-inch thick cotton rope, cut to 8-10 inches. Test the setup three days before departure to verify proper water absorption rates.
For 2-3 week trips, cluster your orchids together to create a natural humidity zone, maintaining 50-60% moisture levels.
Pre-Travel Pest Prevention Strategies
Before packing your Phalaenopsis orchid for travel, you’ll need to thoroughly inspect the leaves, roots, and growing medium for signs of common pests like mealybugs, spider mites, and scale insects. If you spot any unwanted visitors, treat your orchid with natural remedies such as neem oil or insecticidal soap at least one week before departure. To prevent pest problems from affecting your other plants while you’re away, it’s important to isolate the traveling orchid in a separate room for 48-72 hours before your trip, allowing time to confirm it’s pest-free.
While preparing your Phalaenopsis orchid for travel, thorough pest inspection prevents unwanted hitchhikers from causing problems during transit. Examine the leaf undersides, crown, and growing media with a magnifying glass for signs of spider mites, mealybugs, or scale insects.
Don’t forget to check hidden spots where pests love to hide – between leaf joints, near bloom spikes, and inside potting media crevices. Use a small flashlight to illuminate dark areas, and gently separate leaves to inspect overlapping sections.
If you spot anything suspicious, isolate the plant and treat it with appropriate pest control measures at least 7-10 days before travel.
Natural Pest Control Methods
Once you’ve identified potential pest concerns, implementing chemical-free pest control offers a safer way to prepare your orchid for travel. Start by wiping down leaves with a cotton ball dipped in rubbing alcohol, which eliminates many common pests like mealybugs and scale insects.
Create natural barriers by sprinkling diatomaceous earth around your orchid’s pot, and place sticky traps nearby to catch flying insects. You can also make a neem oil solution (1 teaspoon per quart of water) and spray it lightly on leaves 48 hours before travel.
For extra protection, isolate your orchid in a clear plastic bag with small ventilation holes, keeping pests out while maintaining humidity.
Isolate Before Departure
To properly quarantine your Phalaenopsis orchid, you’ll need to establish an isolation period of 7-10 days before any travel plans. Place your orchid in a bright room, at least 6 feet away from other houseplants, and carefully inspect it for any signs of pests or disease.
During isolation, keep the temperature between 65-80°F and maintain moderate humidity. Check the leaves, stems, and potting medium daily, using a magnifying glass to spot tiny pests. If you notice any issues, treat them immediately with appropriate remedies before moving the plant.
This quarantine period guarantees you won’t spread potential problems to your plant-sitter’s collection while you’re away.
Emergency Care Instructions for Plant Sitters
Plant sitters should keep three critical care instructions readily available when watching your Phalaenopsis orchid. First, they’ll need proper watering guidance: only water when the potting medium feels dry 1 inch below the surface, using room-temperature water.
Second, guarantee they understand light requirements – keep your orchid 3 feet from east or north-facing windows, never in direct sunlight. If leaves feel warm, they should move the plant back.
Third, provide temperature parameters. Your orchid needs 65-80°F during the day and no lower than 60°F at night. They shouldn’t place it near drafts, vents, or fruit bowls.
Post-Travel Recovery and Maintenance Steps
Once you’ve returned home with your phalaenopsis orchid, examine the leaves, roots, and flowers for any signs of stress or damage from the journey. You’ll want to remove any broken stems or yellowed leaves, making clean cuts with sterilized scissors to prevent infection. Return your orchid to its usual growing spot and resume your normal watering schedule, but hold off on fertilizing for at least two weeks to avoid overwhelming the recovering plant.
Inspect For Travel Damage
After your orchid reaches its destination, carefully remove all packing materials and inspect the entire plant for signs of travel-related stress or damage. Look closely at the leaves for tears, cracks, or bruising, and check if any flowers or buds have fallen off during transport.
Examine the potting media to guarantee it hasn’t shifted or compacted. If you notice any broken roots or stems, trim them with sterilized scissors at a 45-degree angle. Document any damage with photos, especially if the plant was shipped from a vendor.
Check the crown and leaf joints for signs of rot or water accumulation, as moisture can become trapped during transit.
Return To Normal Care
To help your Phalaenopsis recover from its journey, gradually reintroduce normal watering and lighting conditions over 3-5 days. Check soil moisture levels every morning, and don’t water until the top inch feels dry. Place your orchid in filtered light, avoiding direct sun exposure for the first week.
Resume your regular fertilizing schedule on the second week, using a balanced 20-20-20 orchid formula at quarter-strength. If you’ve been away during winter, maintain temperatures between 65-80°F. Monitor your plant’s leaves for signs of stress, such as yellowing or wrinkling, and adjust care accordingly. Within two weeks, your orchid should be fully acclimated to its routine.