Welcome to the wonderful world of billbergia! If you’re looking for an easy-care houseplant with stunning foliage, billbergia is a great choice. With its vibrant colors and diverse shapes, it’s sure to add beauty and character to any room in your home. In this guide, we’ll take a deep dive into everything you need to know about caring for and propagating billbergia plants. So let’s get started!
When it comes to care and propagation, billbergias are pretty low maintenance. They don’t require much effort or time—just basic basics like regular watering and occasional pruning will keep them healthy and happy. Plus they’re perfect for beginner gardeners who want something that won’t be too demanding on their schedule. I’m here to tell you that once you have the fundamentals down pat, growing these beautiful plants can become a rewarding hobby that brings lots of joy and satisfaction.
In this comprehensive guide, we’ll cover all the essential information you need when taking care of your billbergia plants: from light requirements and soil types to fertilizing schedules and best practices for successful propagation techniques. Whether you’re new to gardening or already have some experience under your belt, there should be plenty of useful tips here that will help ensure thriving plants in no time at all!
What is Billbergia?
Billbergia is a genus of bromeliads that is native to Brazil and can also be found from central Mexico to northern Argentina. This genus is divided into two subgenera, helicodea and billbergia. The subgenus billbergia is the most commonly found in cultivation and has flowers with slightly bent petals at the tips. On the other hand, the helicodea petals coil back like a spring.
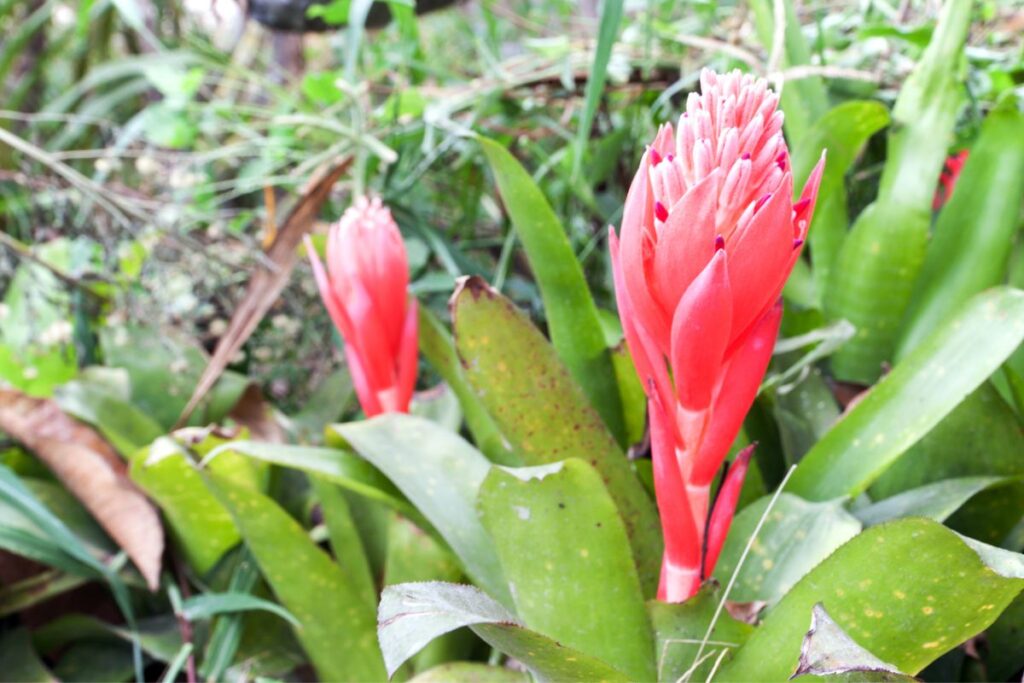
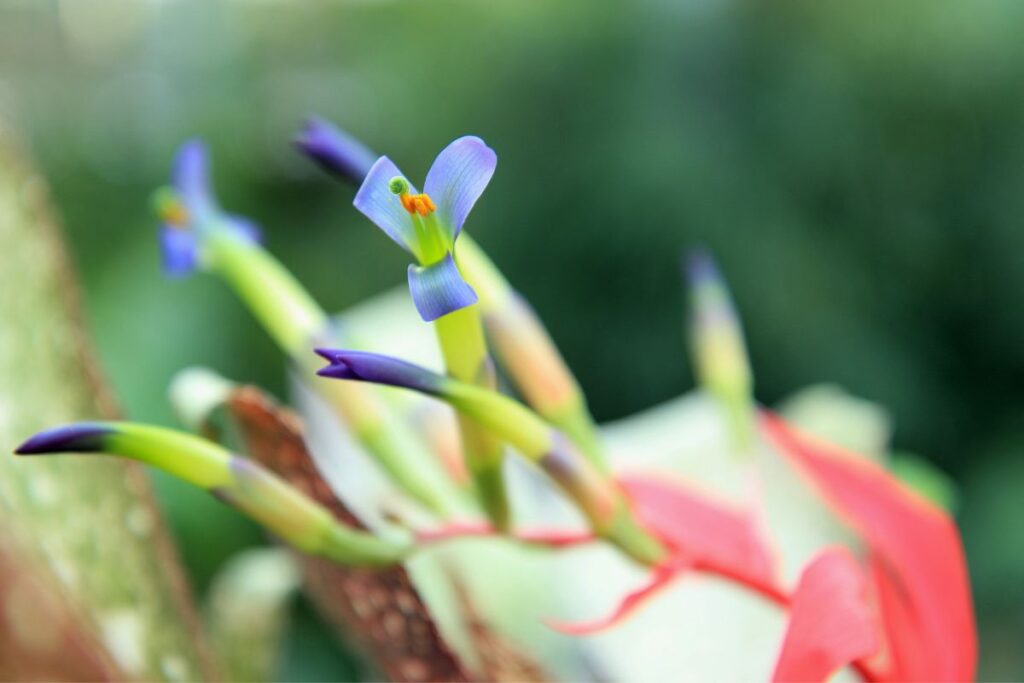
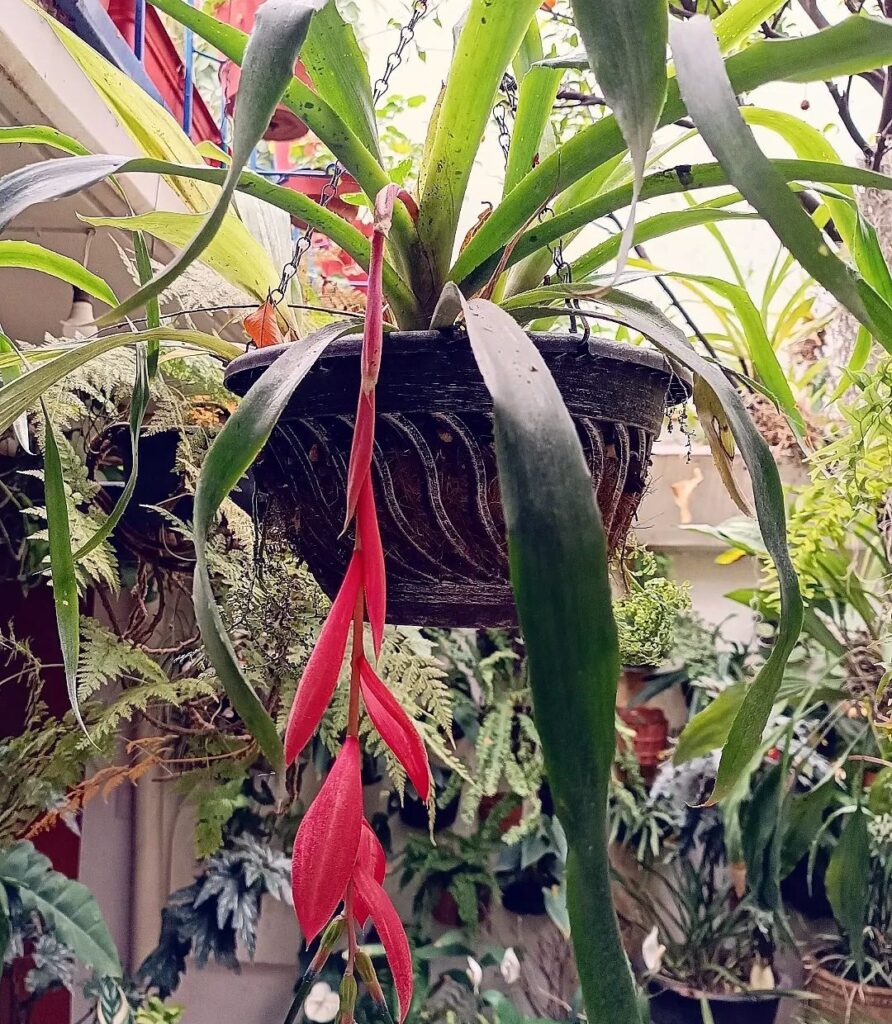
One of the most popular Billbergia varieties is the Billbergia nutans, which has green to silvery green leaves and beautiful pendant flowers that are typically of varying shades of pink. When touched, the flowers release nectar, earning it the common name “queen’s tears.” Another popular variety is the Billbergia ‘Casa Blanca’, which has deep green leaves with beautiful white mottling and erect inflorescence with pink bracts and bluish flowers. It is recommended for beginner bromeliad growers.
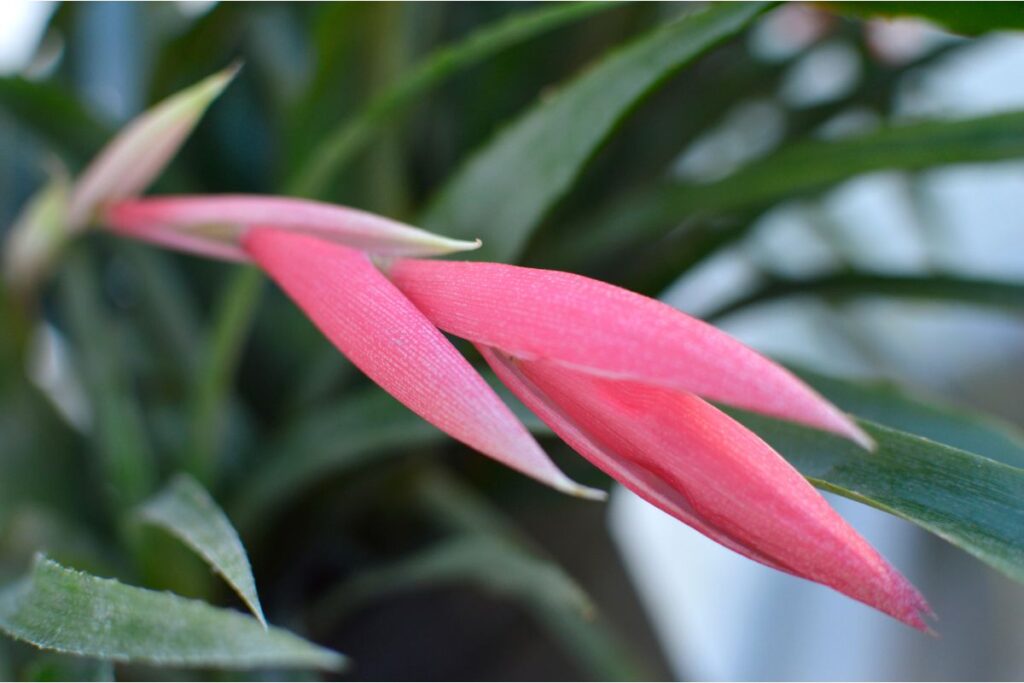
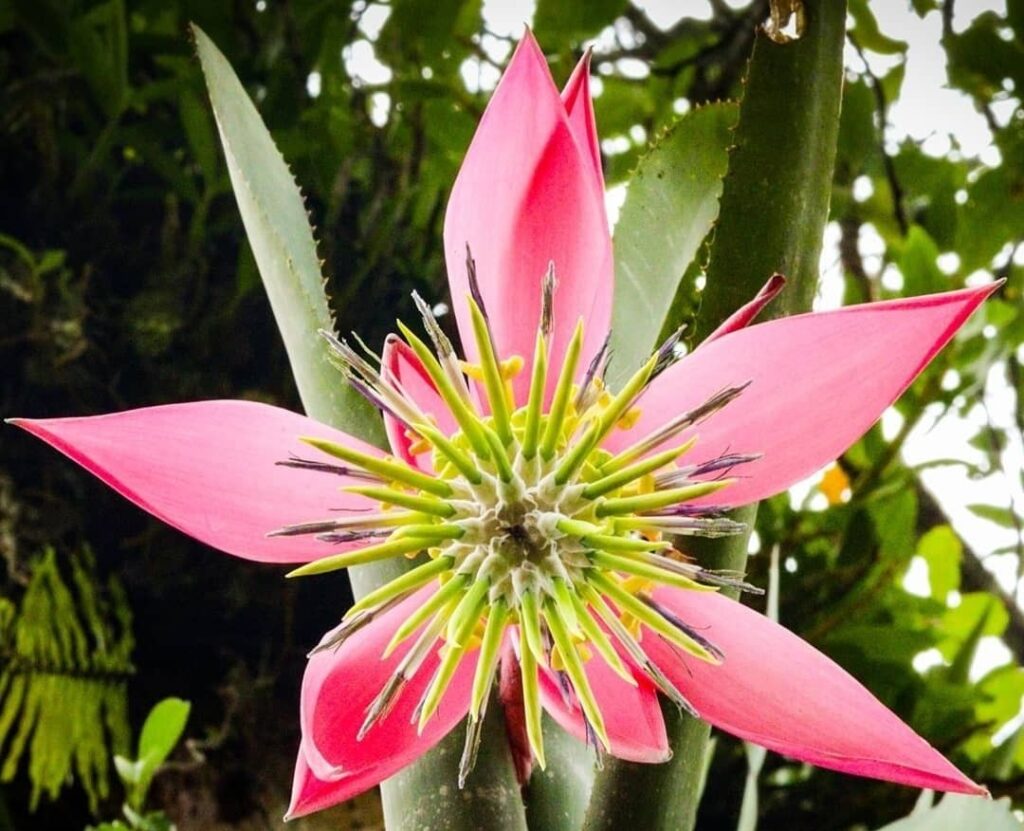
The Billbergia pyramidalis is an excellent landscape plant that is very cold-tolerant and clumps readily, growing in shade or full sun. It produces full, rounded pink and purple flowers during late summer, which can last for roughly a month. The Billbergia saundersii has deep green leaves with white spots that will blush reddish-pink in full sun areas. Its spectacular pendant inflorescence produces pink bracts and blue and white flowers. The Billbergia zebrina is another unique plant, named after the silvery horizontal banding on its foliage. It produces a large pendant flower with pink bracts and has tightly recurved bright green petals, earning it the common name “queen’s tears.”
In summary, Billbergia is a beautiful genus of bromeliads that can be grown both indoors and outdoors. With their unique adaptations and eye-catching varieties, they make an excellent addition to any bromeliad collection.
Billbergia Care Guide
Light Requirements
Now that you know about the Billbergia genus, let’s look at light requirements for optimal growth. Billbergias can tolerate a range of lighting conditions but they generally prefer bright indirect light or medium to low levels of ambient light in order to thrive.
Here is an overview of what each level of light exposure means:
- Bright Light: This type of intense sunlight will provide your billbergia with plenty of energy to flourish. They do best when placed near south-facing windows where they can receive plenty of sunshine throughout the day.
- Indirect Light: Placing your plant in an area where it receives direct sunlight for just part of the day is ideal as too much direct sun can scorch its leaves. If you don’t have access to such an area, try placing it next to a sheer curtain or behind some gauzy fabric so that the sun’s rays are filtered before reaching the plant.
- Low Light: Plants kept in dark corners may not fare as well since they won’t get enough natural sunlight, however, if you really want one then make sure it gets about 4 hours per day of artificial lighting from fluorescent bulbs specially designed for indoor plants.
Providing adequate lighting isn’t difficult; simply adjust according to the position and amount of light available and watch your billbergia grow!
Water Requirements
Watering is an important part of billbergia care. Depending on the species, it can be a weekly or daily task. Here’s what you need to know about watering your billbergia:
| Water Frequency | Water Amount |
|---|---|
| Once per week | 2-3 cups |
| Twice per week | 1 cup |
Humidity levels should also be taken into account when taking care of a billbergia. The ideal humidity level for these plants is 30-50%. If the environment around your plant isn’t humid enough, misting them with water will help increase its moisture levels. But make sure not to overdo it as that could potentially lead to root rot and other problems in your plant.
When selecting water for your Billbergia, make sure that it’s clean and free from chlorine or fluoride additives as this could damage your plant’s delicate foliage. Also, keep in mind that good drainage requirements are necessary for these plants so they don’t sit too long in wet soil which could cause soggy roots. Make sure to provide ample drainage by using well-draining soils such as cactus mix or adding gravel at the bottom of the pot before filling it up with soil.
Taking proper care of your billbergia will ensure its health and longevity. With just a few simple steps like providing adequate water amounts, selecting quality water sources and monitoring humidity levels, you’ll have beautiful blooms year round!
Soil Requirements
Now that we know the water requirements for billbergia, let’s move on to the soil. The ideal potting mix should include a combination of peat moss, bark chips and coarse sand. This will ensure that there is good soil drainage so excess moisture can escape easily from the roots.
When it comes to finding the perfect potting mix for your billbergia, remember that it has to be able to retain enough moisture without staying too wet. Additionally, you’ll want to make sure it can still provide adequate air circulation at all times. If possible, use a quality pre-mixed product specifically designed for bromeliads like billbergia rather than improvised mixes which often lack certain essential ingredients needed for optimal growth conditions.
Finally, when planting your billbergia in its new potting mix make sure not to bury or expose too much of the root system as this could cause damage or even death of the plant. A general rule of thumb is to leave about half an inch between the base of the stem and the topsoil surface—any more than this may lead to rot or fungal issues over time.
Fertilizer Requirements
Fertilizing plants is an important part of caring for billbergia. It’s essential to provide the plant with the necessary nutrients it needs to thrive. Fertilizer requirements can vary from species to species, so be sure to read up on your specific type before applying any fertilizer products.
When fertilizing your billbergias, you should consider both soil-applied and foliar feeding methods. For soil application, use a slow-release fertilizer that contains nitrogen, phosphorus and potassium in balanced amounts depending on what your particular species requires. Apply this during early spring after new growth has started but don’t overdo it as too much fertilizer may burn the roots or cause other damage.
For foliar feeding (spraying onto leaves), look for liquid formulations containing micronutrients like iron, magnesium and zinc which are often lacking in soils with low organic matter content. This will help boost flowering and promote healthy foliage throughout the season. Be sure not to spray when temperatures are high as this could scorch the leaves or even kill them off entirely!
So there you have it—proper fertilization is key when taking care of your billbergia plants! With just a little effort, you’ll be rewarded with beautiful blooms and lush green foliage all summer long.
Temperature And Humidity Requirements
Now that we’ve discussed the fertilizer requirements for billbergia plants, let’s talk about temperature and humidity. Temperature and humidity are two of the most important factors in creating optimal conditions for your plant to thrive.
The ideal temperature range for a Billbergia is between 65-80°F (18-27°C). If temperatures drop lower than this, you may see stunted growth or yellowing of the leaves. On the other hand, if temperatures rise beyond 80°F (27°C), it can cause leaf burn.
Humidity plays an equally important role in providing optimum conditions for your billbergia plant. The ideal relative humidity level should be around 50%, however many homeowners find that their homes aren’t quite humid enough so they need to employ some methods to increase it a bit. Here are a few ways that you can boost the humidity:
- Mist Spray – Misting your billbergias with water on a regular basis helps keep them hydrated and also adds moisture back into the air which increases overall relative humidity levels in your home.
- Humidifier – Another way to add more moisture into the air is by using a humidifier, either stand-alone or central depending on what type of system you have at home already. This will help ensure that there is always sufficient moisture available to prevent any potential issues from arising due to low relative humidity levels.
- Group Plantings – One last method you could use is grouping multiple plants together. This increases transpiration which then raises local relative humidity levels around those individual plants; making sure they receive all the necessary moisture they need while still being able to survive in relatively dry conditions otherwise present inside our homes.
With these tips and tricks, you’ll be well on your way to providing just the right balance of temperature and humidity required for healthy billbergia plants!
Pruning Requirements
Pruning a billbergia is an important part of its care. This not only keeps the plant healthy but also helps it to stay looking attractive throughout its life cycle. To ensure proper pruning techniques are used, there are some basic requirements that must be followed. Below is a table outlining these key points:
| Topic | Summary | Tool/Method |
|---|---|---|
| Pruning Techniques | Use sharp shears or scissors to make clean cuts close to the stem when removing dead branches or leaves from the plant. Do not use too much pressure as this could damage the plant’s structure. | Sharp Sheers / Scissors |
| Pruning Tools | Always use quality tools such as stainless steel, titanium coated blades for cutting away dead material on your plants. Avoid using old or rusty tools, which can cause damage and lead to disease in your plants. | Quality Tools (Stainless Steel, Titanium Coated Blades) |
| Pruning Requirements | Before pruning, always inspect the plant carefully for signs of disease or pests that may need treatment before proceeding with pruning. Ensure any wounds created by pruning have been sealed with wound sealant after you’re done trimming back excess growth. | Wound Sealant |
| Pruning Timing | Depending on the type of Billbergia you have, different times of year require more aggressive pruning than others e.g., late winter-early spring typically calls for heavier pruning than other seasons due to new growth emerging at this time period. Also, take into consideration what stage of bloom has been reached when deciding how much foliage should be removed from your billbergia during each session of professional maintenance work. | Professional Maintenance Work |
Common Pests And Diseases
Moving on from pruning requirements, it’s important to be aware of the common pests and diseases that can affect billbergia plants. These include mealybugs, scale insects, fungal diseases, root rot, and rust fungus. Mealybugs are tiny white bugs with a waxy coating that feeds off the sap in plant leaves and stems. To remove them, use a cotton swab dipped in rubbing alcohol to gently rub away any visible infestations. Scale insects form hard armored shells over their bodies which makes them difficult to eliminate manually. If you’re dealing with an infestation of scale insects, try spraying your billbergia with insecticidal soap or neem oil for the best results.
Fungal diseases such as root rot and rust fungus can also wreak havoc on billbergia plants if left unchecked. Root rot is caused by overwatering or poor drainage which leads to waterlogged roots becoming susceptible to fungi growths. Rust fungus meanwhile presents itself through small orange spots all over the foliage—this can often be treated by applying fungicide directly onto affected areas of the plant. When treating both root rot and rust fungus, it is important not to forget about prevention measures too; make sure you always provide adequate air circulation around your billbergia plants while keeping the soil moist but not saturated so they don’t become vulnerable to disease.
It’s wise to keep an eye out for signs of any pest or disease issues with your billbergia plants at all times so that you can act quickly should anything arise. Regularly inspecting your plant for signs of damage will help ensure its long-term health and vibrancy!
Toxicity
Billbergia plants are not considered toxic to humans, dogs or cats. They are safe to have around pets and are often used in terrariums and indoor plant displays. However, it’s always a good idea to keep any plant out of reach of small children and pets as some plants can still pose a choking hazard or cause minor stomach upset if ingested in large quantities.
When And How To Repot Billbergia
Now that we have discussed the toxicity of Billbergia, let’s move on to when and how to repot it. Repotting is an important part of any plant’s care as it helps keep them healthy and happy.
When it comes to repotting billbergia, you should do so during its active growing season which usually occurs from early spring until late summer. It is also important to use a good quality potting mix for your billbergia. A well-draining potting soil specifically designed for bromeliads will help promote healthy root growth and ensure that your plant gets enough nutrients. When selecting your pot size, make sure it’s only one or two sizes larger than the current pot because too much space can cause waterlogging in the roots leading to rot.
Transplanting your billbergia correctly is essential for its health and longevity. Take all necessary steps to avoid stressing out your plant by using proper tools and techniques; such as making several small holes at the bottom of the new pot before adding fresh soil and thoroughly soaking both old and new soil before transferring it into the new container. Once these steps have been completed, monitor closely for signs of shock or distress like wilted leaves or brown spots on foliage. If any of these occur, act quickly as they can be difficult to reverse if left untreated.
When And How To Propagate Billbergia
You can propagate Billbergia in two ways—either through seeds or through offsets. Seed propagation is quite slow and may take up to several years for the plant to mature. Hence, the more common and preferred method is through offsets. Offsets are also known as ‘pups’ which grow from the base of the mother plant. These pups are small shoots that can be removed and replanted once they are at least a third the size of the mature plant.
The best time to propagate Billbergia through offsets is in the late spring or early summer. During this time, the plant is undergoing active growth, which ensures that the offset has plenty of energy to establish itself as a separate plant.
To propagate through offsets, first, it is essential to remove the pup from the mother plant gently. Let the pup sit in the open air for a day or two after removing it from the mother plant. This will allow the wound to heal and will prevent the offset from rotting when planted.
The next step is to plant the pup in a new pot with potting soil with excellent drainage. Make sure to keep the soil moist but not too wet for the first few weeks. Keep the new plant in a location with indirect light and moderate temperature until it is well-established, and it is actively growing.
Conclusion
The billbergia is a genus of flowering bromeliad plants that can provide colorful and long-lasting blooms to brighten any indoor space. With proper care, these plants will thrive in the home and bring years of enjoyment.
Caring for your billbergia requires paying attention to light requirements, water needs, soil type, fertilizer use and pest control. In addition, you’ll need to know when it’s time to repot or propagate the plant if it begins outgrowing its pot or if you want more plants. Understanding all of these details helps ensure your billbergias stay healthy and vibrant for many years.
Overall, with a bit of knowledge on how to properly care for them, I’m sure you’ll be able to keep your bromeliads looking beautiful and enjoy their unique beauty for a long time!