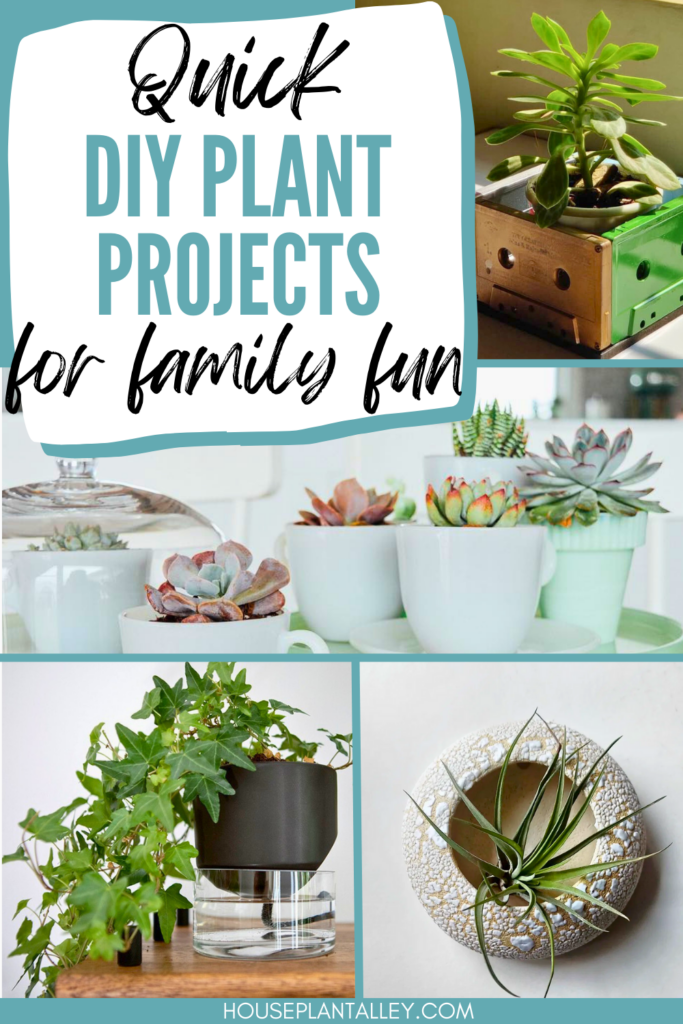
Houseplants have become a staple in home decor, not just for their aesthetic appeal but also for their ability to purify the air and uplift our spirits. For those who love adding a personal touch to their green spaces, DIY houseplant projects are the perfect solution. Whether you’re a seasoned plant enthusiast or a beginner, these projects are easy to complete in an afternoon and add a unique charm to your home. Let’s dive into some exciting and simple DIY houseplant projects!
Contents
- 1 Terrariums: A Miniature Garden in Glass
- 2 Hanging Planters: Elevate Your Greenery
- 3 Macramé Plant Hangers: Boho Chic Decor
- 4 Mason Jar Herb Garden: Fresh Herbs at Your Fingertips
- 5 Upcycled Plant Pots: Sustainable and Creative
- 6 Succulent Wall Art: Living Artwork
- 7 Fairy Garden: A Magical Miniature World
- 8 Kokedama: Japanese Moss Balls
- 9 Vertical Gardens: Maximize Your Wall Space
- 10 Self-Watering Planters: Low-Maintenance Greenery
- 11 Plant Shelves: Display Your Green Collection
- 12 Tea Cup Planters: Charming and Unique
- 13 Air Plant Holders: Minimalistic Elegance
- 14 Bottle Terrariums: Recycle and Reuse
- 15 Living Centerpieces: Functional and Beautiful
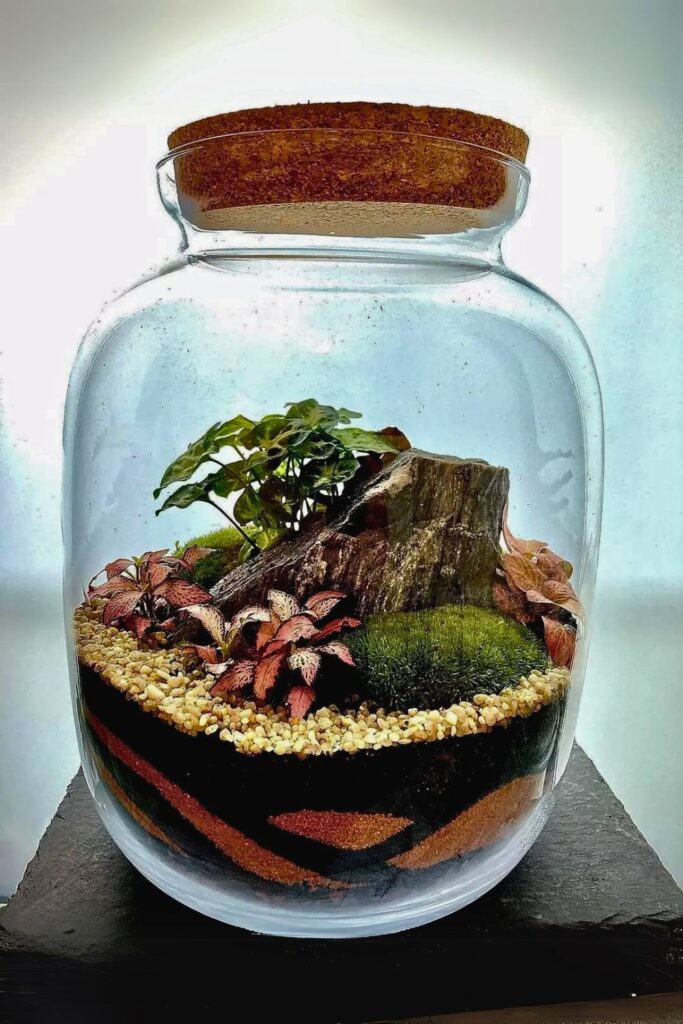
Terrariums: A Miniature Garden in Glass

Terrariums are a delightful way to create a tiny, self-sustaining garden indoors. Here’s how you can make your own:
Materials:
- A clear glass container with a wide opening
- Small pebbles or gravel
- Activated charcoal
- Potting soil
- Small plants (e.g., succulents, ferns, moss)
- Decorative elements (optional)
Steps:
- Prepare the Container: Clean your glass container thoroughly.
- Create the Drainage Layer: Add a layer of small pebbles or gravel at the bottom for drainage.
- Add Activated Charcoal: This helps keep the terrarium fresh and prevents mold.
- Layer the Soil: Add a layer of potting soil on top of the charcoal.
- Planting: Arrange your small plants in the soil, ensuring they have enough space to grow.
- Decorate: Add decorative elements like small rocks, figurines, or moss.
- Water: Lightly water the terrarium, making sure not to overwater.
Hanging Planters: Elevate Your Greenery
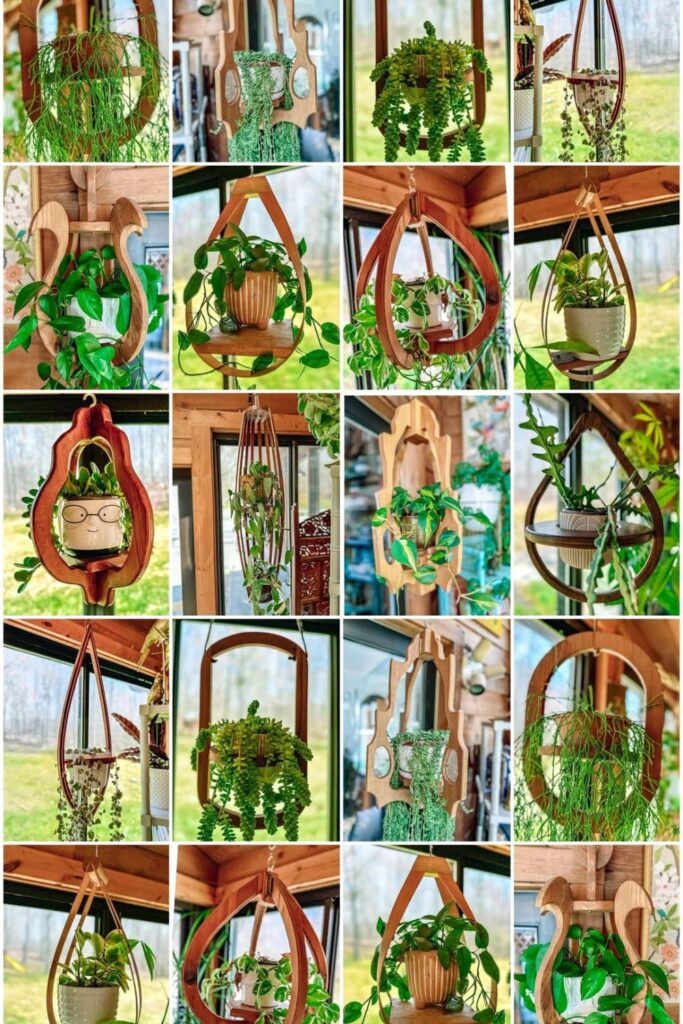
Hanging planters are a fantastic way to utilize vertical space and add a touch of greenery to any room.
Materials:
- A hanging planter (available in various designs)
- Potting soil
- Small plants (e.g., trailing plants, herbs)
- S-hooks or ceiling hooks
Steps:
- Choose the Planter: Select a hanging planter that suits your style and the size of your plants.
- Fill with Soil: Add potting soil to the planter.
- Planting: Place your plants in the soil, ensuring they are securely planted.
- Hang the Planter: Use S-hooks or ceiling hooks to hang the planter in your desired location.
- Water: Water the plants as needed, ensuring they receive adequate sunlight.
Macramé Plant Hangers: Boho Chic Decor
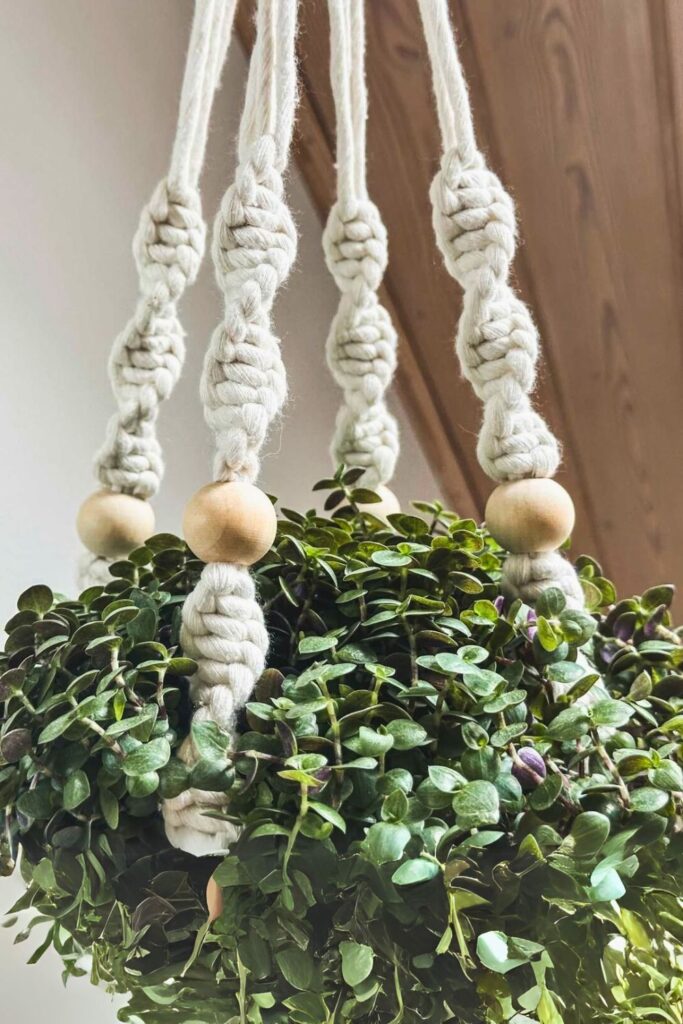
Macramé plant hangers are a trendy and stylish way to display your plants. They add a boho chic vibe to any space.
Materials:
- Macramé cord
- Metal or wooden ring
- Scissors
- Potted plant
Steps:
- Cut the Cord: Cut several lengths of macramé cord, depending on the size of your plant hanger.
- Attach to the Ring: Fold the cords in half and attach them to the metal or wooden ring using a lark’s head knot.
- Knotting: Create a series of knots (e.g., square knots, spiral knots) to form the pattern of your plant hanger.
- Create the Basket: Knot the cords together to form a basket for the plant pot.
- Finishing Touches: Trim any excess cord and add any decorative elements if desired.
- Place the Plant: Place your potted plant into the basket and hang it in your desired location.
Mason Jar Herb Garden: Fresh Herbs at Your Fingertips
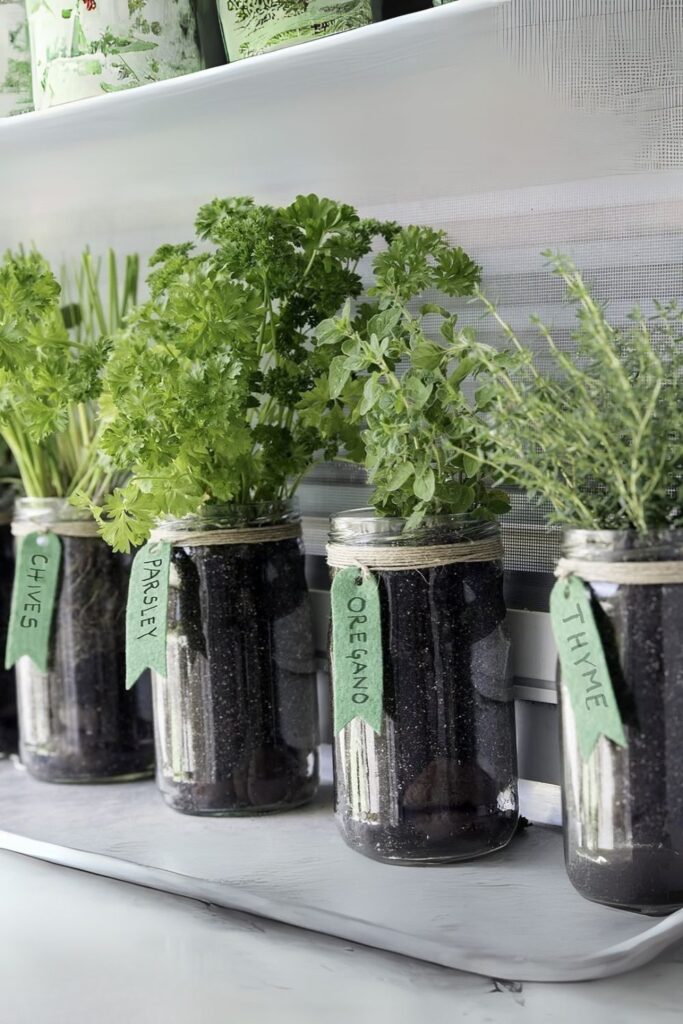
A mason jar herb garden is a simple and charming way to grow fresh herbs in your kitchen.
Materials:
- Mason jars
- Potting soil
- Herb seeds or seedlings (e.g., basil, mint, parsley)
- Small rocks or pebbles
- Labels (optional)
Steps:
- Prepare the Jars: Clean your mason jars and add a layer of small rocks or pebbles at the bottom for drainage.
- Fill with Soil: Add potting soil to the jars.
- Planting: Plant the herb seeds or seedlings in the soil.
- Label: Label each jar with the name of the herb (optional).
- Water: Water the herbs regularly and place the jars in a sunny spot.
Upcycled Plant Pots: Sustainable and Creative
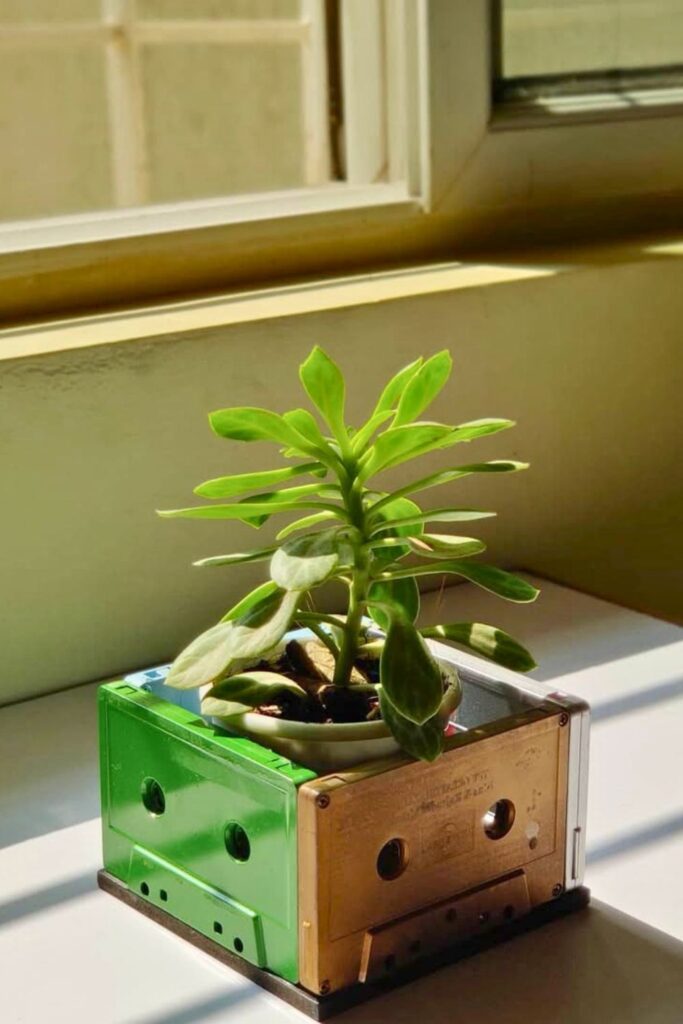
Upcycling old containers into plant pots is an eco-friendly and creative way to display your plants.
Materials:
- Old containers (e.g., tin cans, teapots, wooden boxes)
- Potting soil
- Plants
- Paint and brushes (optional)
Steps:
- Prepare the Containers: Clean the containers and, if desired, paint them to match your decor.
- Add Drainage: Ensure the containers have drainage holes; if not, create some.
- Fill with Soil: Add potting soil to the containers.
- Planting: Place your plants in the soil.
- Arrange: Arrange the upcycled pots in your desired location.
Succulent Wall Art: Living Artwork
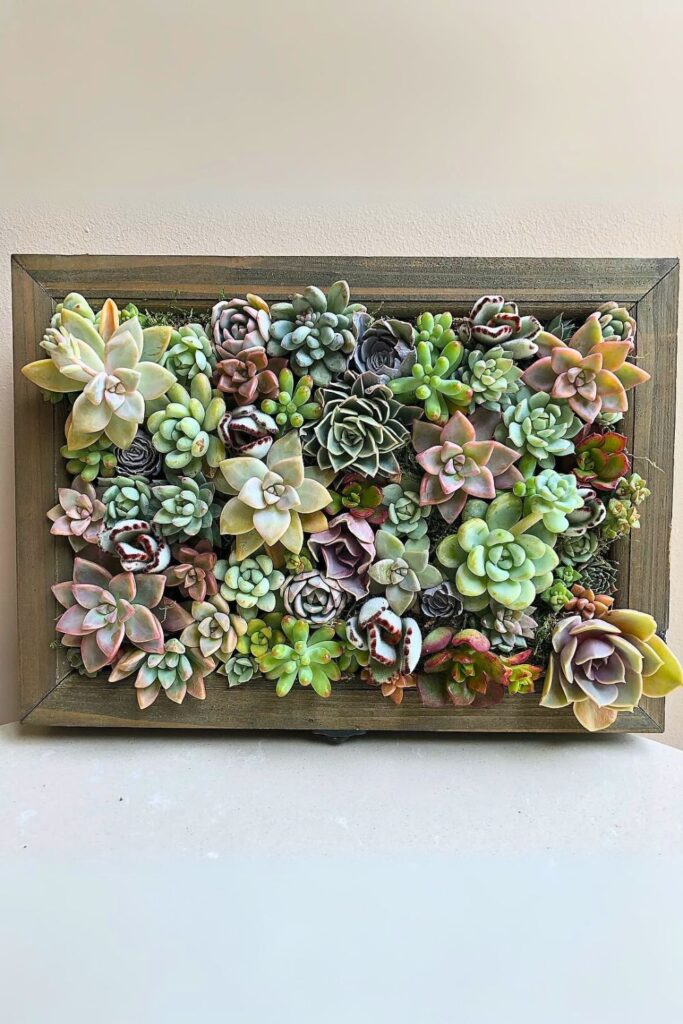
Create a stunning piece of living artwork with a succulent wall garden.
Materials:
- Shadow box frame
- Succulent cuttings
- Potting soil
- Moss
- Chicken wire
- Staple gun
Steps:
- Prepare the Frame: Remove the glass from the shadow box frame.
- Add Chicken Wire: Staple chicken wire to the back of the frame.
- Add Moss and Soil: Fill the frame with moss and potting soil.
- Planting: Insert succulent cuttings through the chicken wire into the soil.
- Hang: Hang the frame on a wall, ensuring it receives adequate sunlight.
Fairy Garden: A Magical Miniature World

Fairy gardens are whimsical and enchanting mini-gardens that can be created in any container.
Materials:
- Shallow container or pot
- Small plants and moss
- Miniature fairy garden accessories (e.g., houses, figurines, pathways)
- Potting soil
- Pebbles or rocks
Steps:
- Prepare the Container: Clean the container and add a layer of pebbles or rocks for drainage.
- Fill with Soil: Add potting soil to the container.
- Planting: Arrange small plants and moss in the soil.
- Add Accessories: Place the miniature accessories in the garden to create a magical scene.
- Water: Lightly water the fairy garden and place it in a suitable location.
Kokedama: Japanese Moss Balls
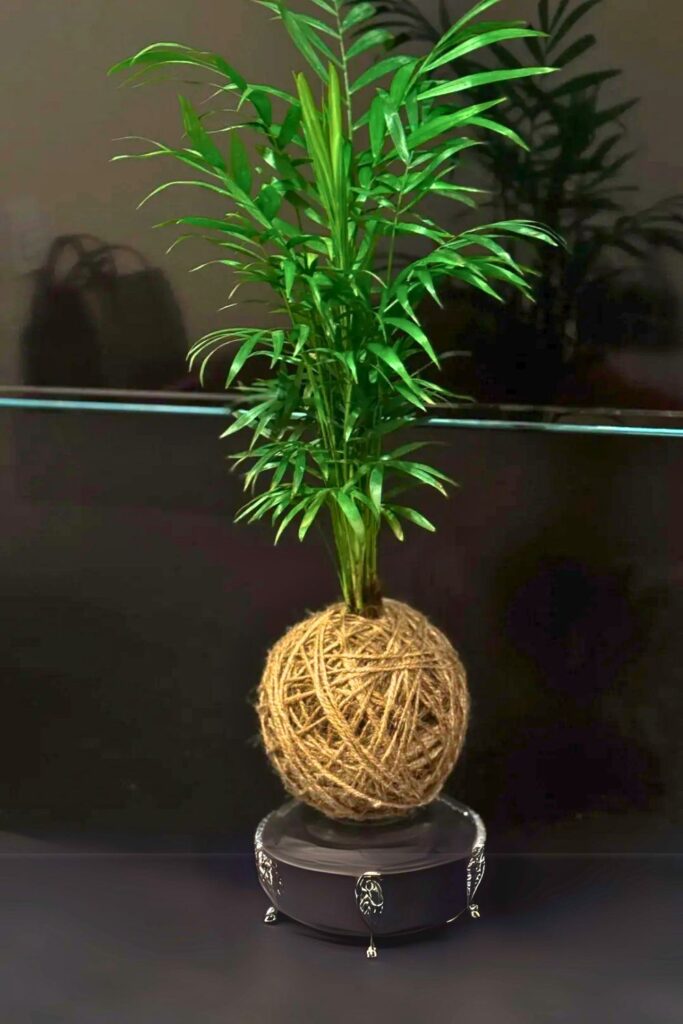
Kokedama is a traditional Japanese art form where plants are grown in moss-covered soil balls.
Materials:
- Small plant (e.g., fern, ivy)
- Potting soil
- Moss
- String or twine
- Water
Steps:
- Prepare the Plant: Remove the plant from its pot and gently shake off excess soil.
- Create the Soil Ball: Form a ball with the potting soil around the plant’s roots.
- Wrap with Moss: Cover the soil ball with moss.
- Secure with String: Wrap string or twine around the moss-covered ball to secure it.
- Water: Lightly water the kokedama and place it in a suitable location.
These DIY houseplant projects are not only easy to complete but also add a personal touch to your green space. Whether you’re creating a miniature garden, upcycling containers, or adding a touch of magic with a fairy garden, these projects are sure to bring joy and beauty to your home. Happy crafting! 🌿
Vertical Gardens: Maximize Your Wall Space
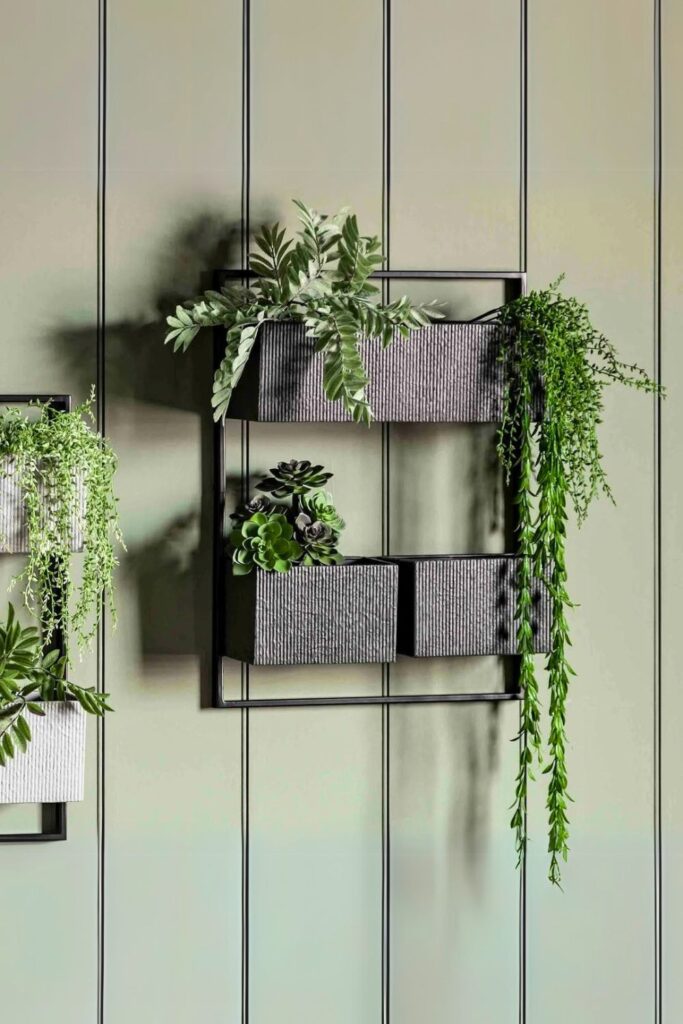
Vertical gardens are an excellent way to add greenery to small spaces by utilizing vertical surfaces.
Materials:
- Vertical garden panels or wall planters
- Potting soil
- Small plants (e.g., herbs, succulents, ferns)
- Drill and screws
Steps:
- Choose Your Wall: Select a wall that receives adequate light for your plants.
- Install the Panels: Attach the vertical garden panels or wall planters to the wall using a drill and screws.
- Fill with Soil: Add potting soil to the planters.
- Planting: Insert your small plants into the soil.
- Water: Water the plants regularly and ensure they get enough sunlight.
Self-Watering Planters: Low-Maintenance Greenery
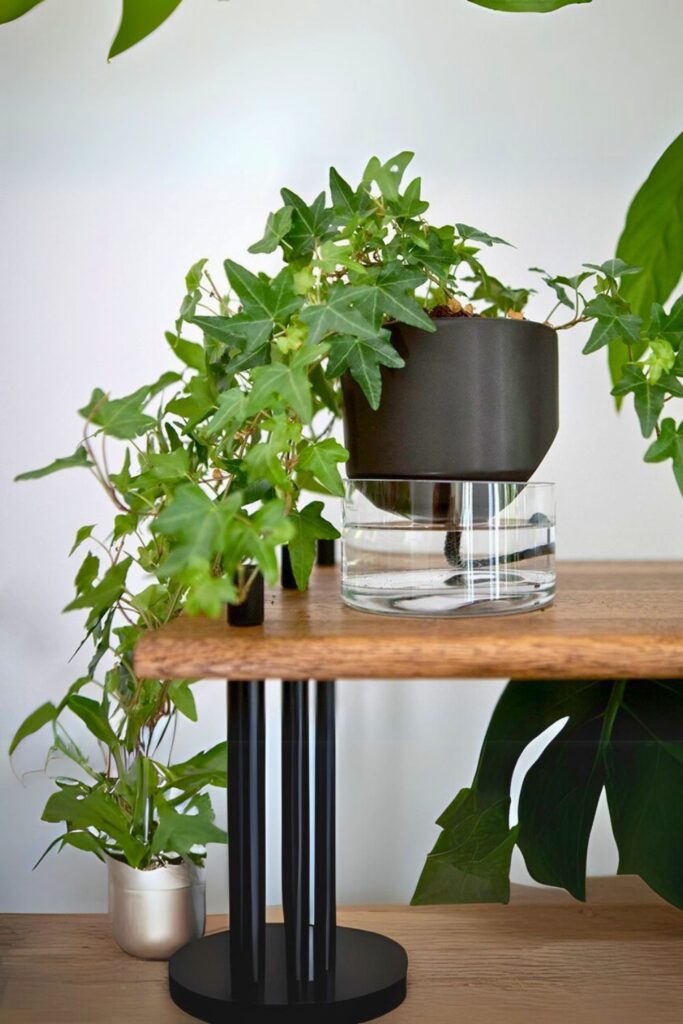
Self-watering planters are perfect for those who want to keep their plants hydrated without constant attention.
Materials:
- Self-watering planter or DIY self-watering system
- Potting soil
- Plants
Steps:
- Prepare the Planter: If using a DIY system, create a reservoir at the bottom of the planter.
- Fill with Soil: Add potting soil to the planter.
- Planting: Insert your plants into the soil.
- Watering System: Ensure the water reservoir is filled, and the wicking system is in place.
- Monitor: Check the water level regularly and refill as needed.
Plant Shelves: Display Your Green Collection
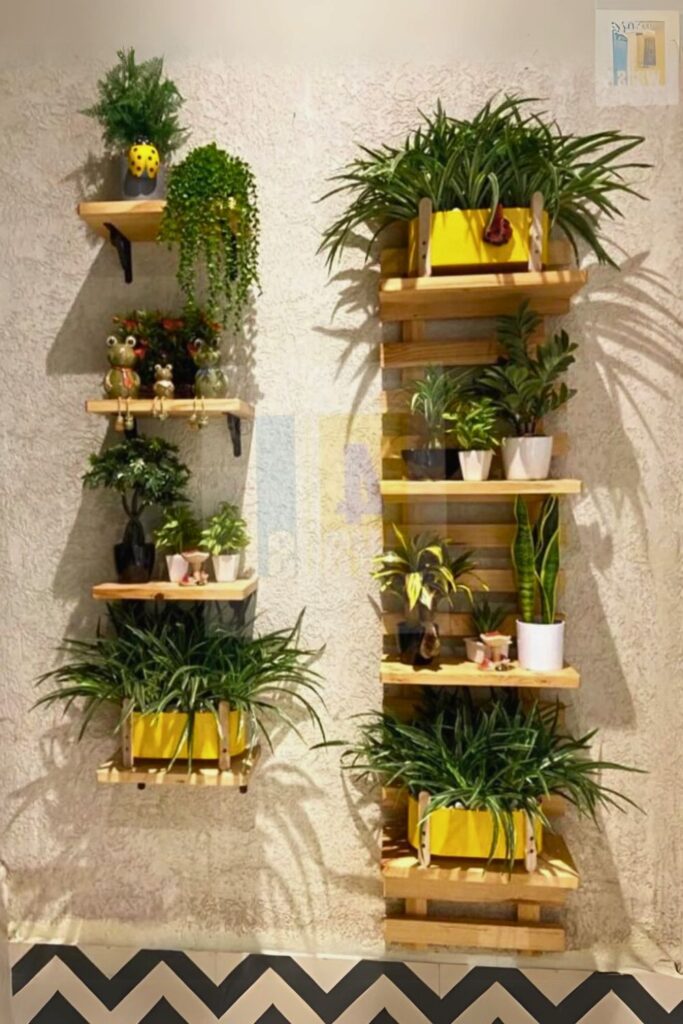
Plant shelves are a stylish way to display multiple plants and create a mini indoor garden.
Materials:
- Shelving units or floating shelves
- Potting soil
- Various plants
- Planters
Steps:
- Choose Shelves: Select shelving units or floating shelves that fit your space.
- Install: Attach the shelves to the wall securely.
- Arrange Planters: Place your plants in stylish planters and arrange them on the shelves.
- Water: Ensure each plant receives proper care and watering.
Tea Cup Planters: Charming and Unique
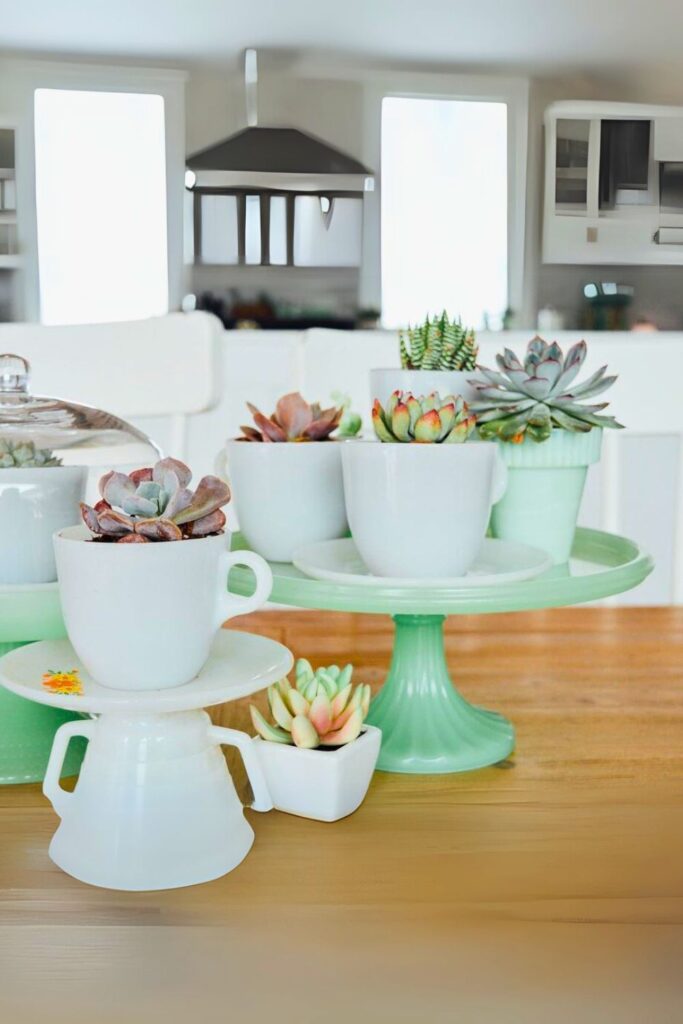
Tea cup planters add a touch of whimsy and charm to your plant collection.
Materials:
- Old tea cups or mugs
- Potting soil
- Small plants (e.g., succulents, cacti)
Steps:
- Prepare the Cups: Clean the tea cups and, if needed, add drainage holes.
- Fill with Soil: Add potting soil to the tea cups.
- Planting: Insert small plants into the soil.
- Display: Arrange the tea cup planters on a windowsill or shelf.
Air Plant Holders: Minimalistic Elegance
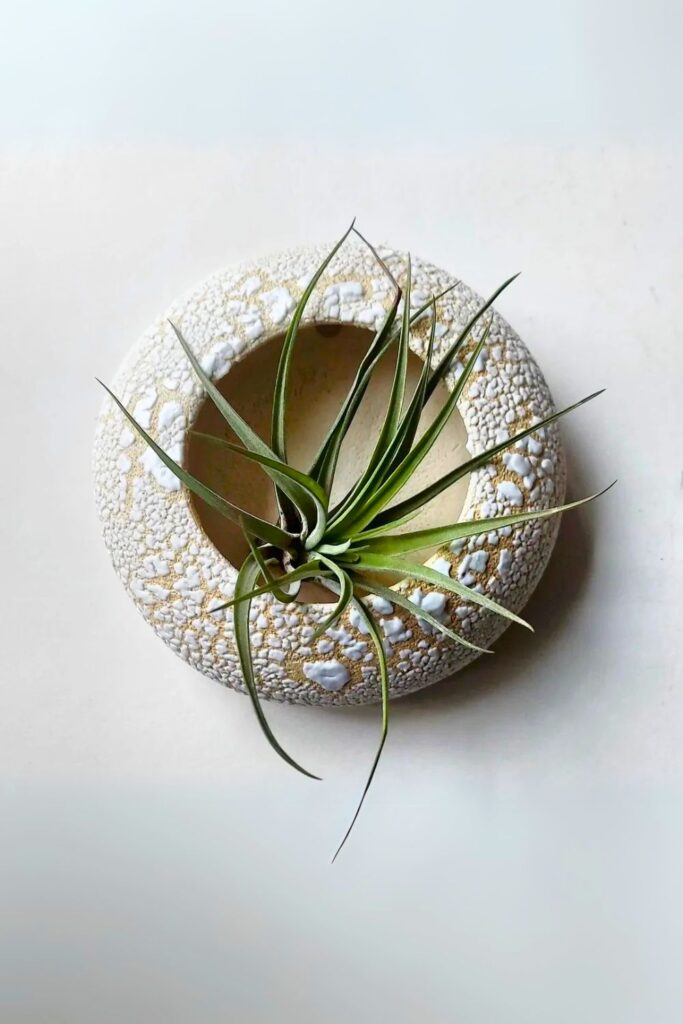
Air plants (Tillandsia) are perfect for minimalistic and low-maintenance displays.
Materials:
- Air plants
- Decorative holders (e.g., glass globes, driftwood, seashells)
- Decorative elements (optional)
Steps:
- Choose Holders: Select decorative holders that suit your style.
- Arrange Air Plants: Place the air plants in the holders.
- Decorate: Add decorative elements like sand, pebbles, or shells.
- Care: Mist the air plants with water and ensure they receive indirect sunlight.
Bottle Terrariums: Recycle and Reuse
Bottle terrariums are a great way to recycle old bottles and create a mini garden.
Materials:
- Glass bottles with wide openings
- Small pebbles or gravel
- Activated charcoal
- Potting soil
- Small plants (e.g., succulents, moss)
Steps:
- Clean the Bottles: Thoroughly clean the glass bottles.
- Create the Drainage Layer: Add a layer of small pebbles or gravel at the bottom.
- Add Activated Charcoal: This helps keep the terrarium fresh.
- Layer the Soil: Add potting soil on top of the charcoal.
- Planting: Insert small plants into the soil.
- Water: Lightly water the terrarium and seal the bottle.
Living Centerpieces: Functional and Beautiful
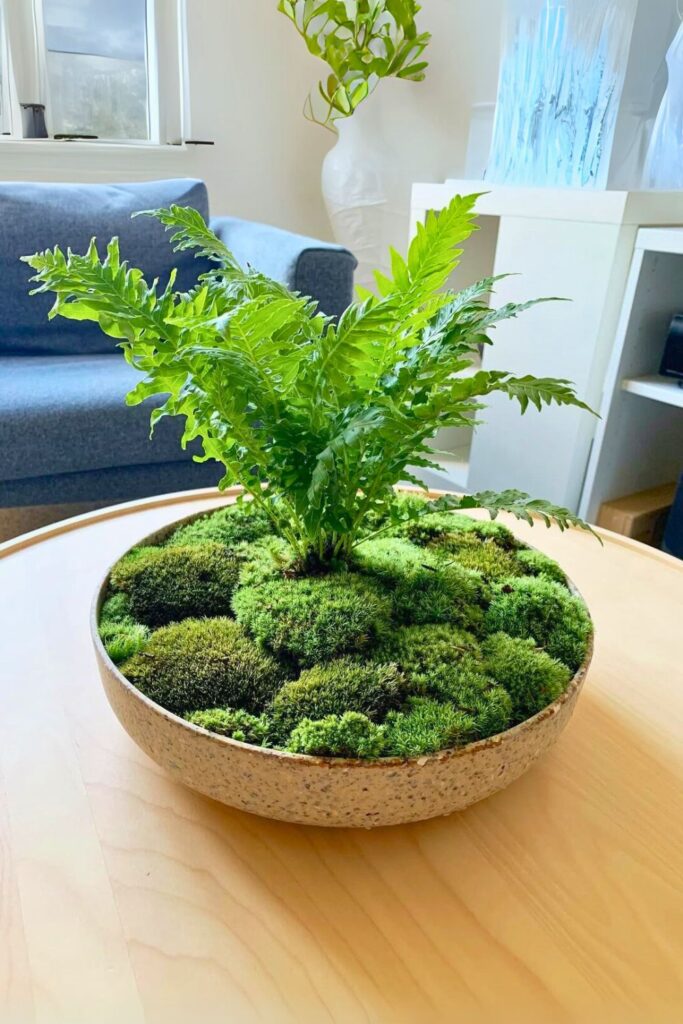
Living centerpieces are perfect for adding a touch of nature to your dining or coffee table.
Materials:
- Shallow container or tray
- Potting soil
- Small plants (e.g., succulents, ferns)
- Decorative elements (e.g., stones, candles)
Steps:
- Choose a Container: Select a shallow container or tray.
- Fill with Soil: Add potting soil to the container.
- Planting: Arrange small plants in the soil.
- Decorate: Add decorative elements like stones or candles.
- Water: Water the plants as needed and display the centerpiece on your table.