Hey, let’s talk about building DIY raised beds to boost your gardening game. These setups, often 2-3 feet high and 4 feet wide, can transform any space into a productive plot. Start by picking a spot with 6-8 hours of sunlight, then grab materials like untreated cedar or galvanized steel. Curious how a simple frame cuts your weeding time in half? Stick around for the details.
Contents
Simple Wooden Raised Bed
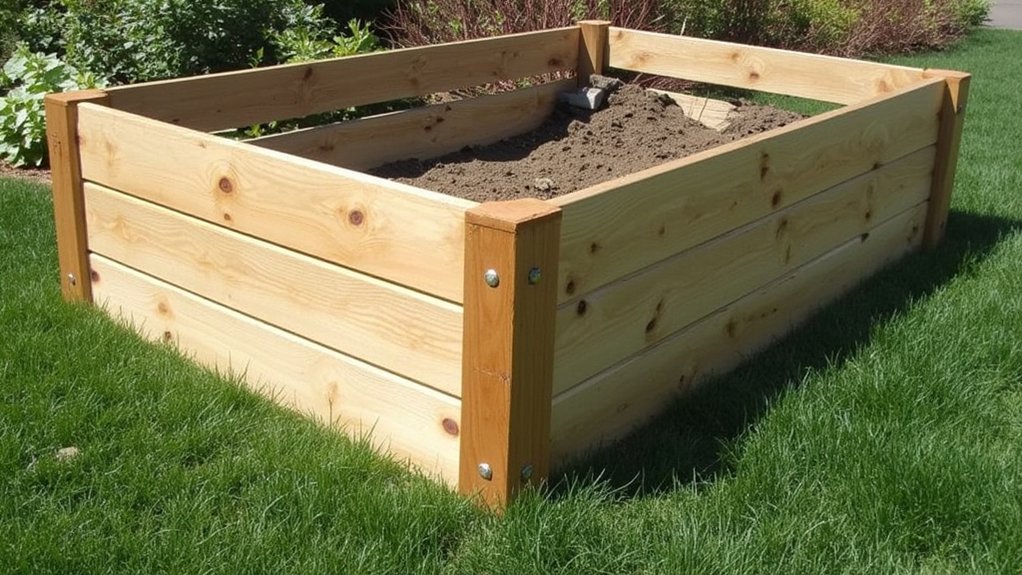
Hey there, let’s plunge into building a Simple Wooden Raised Bed for your garden. It’s a straightforward project, and you’ve got this! Grab some basic tools and materials, like a saw, drill, and untreated cedar boards.
Start by cutting four boards: two at 4 feet long for the sides, and two at 8 feet for the ends. Next, lay them out in a rectangle on flat ground, ensuring the corners align perfectly. Drill pilot holes, then screw the boards together with 3-inch galvanized screws for durability. This frame should be about 12 inches high, perfect for root growth.
Place it in a sunny spot, level the ground beneath, and you’re set to fill it with soil. Easy, right? Let’s get planting!
Innovative Metal Frame Bed
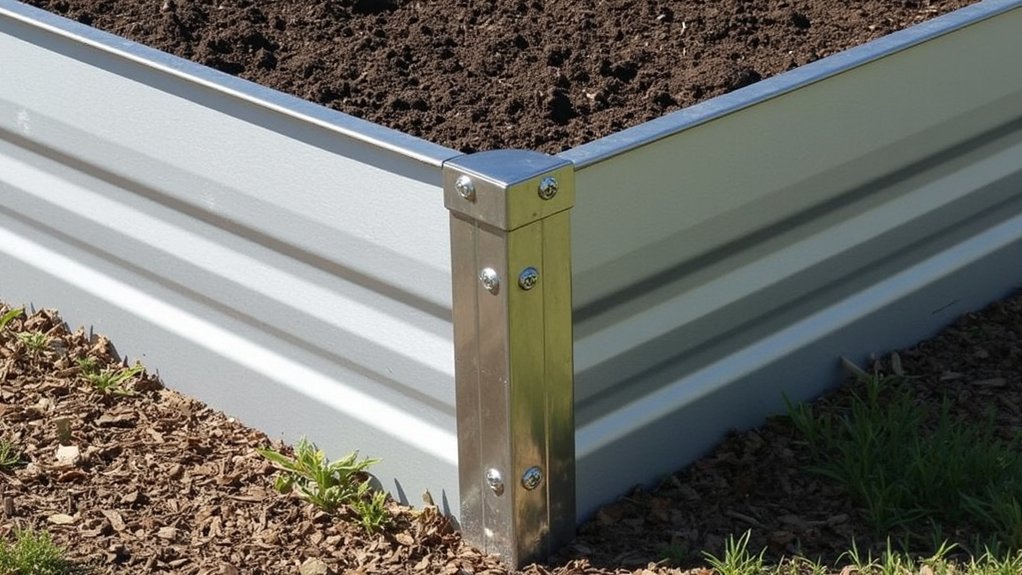
Several gardeners are switching to metal frame beds for their durability, and you can build one too! These beds resist rot and pests, lasting years with minimal upkeep. Let’s get started on crafting yours.
First, grab galvanized steel panels, about 4 feet by 2 feet, from a hardware store. You’ll need four for a rectangular bed, plus corner brackets and screws. Assemble the frame on level ground, securing each corner tightly with a drill.
Next, place the frame in your garden spot, ensuring it’s 12 inches deep for root growth. Line the bottom with landscape fabric to block weeds, then fill with soil. In just a weekend, you’ve got a sturdy, long-lasting bed ready for planting veggies or flowers!
Unique Stone Border Bed
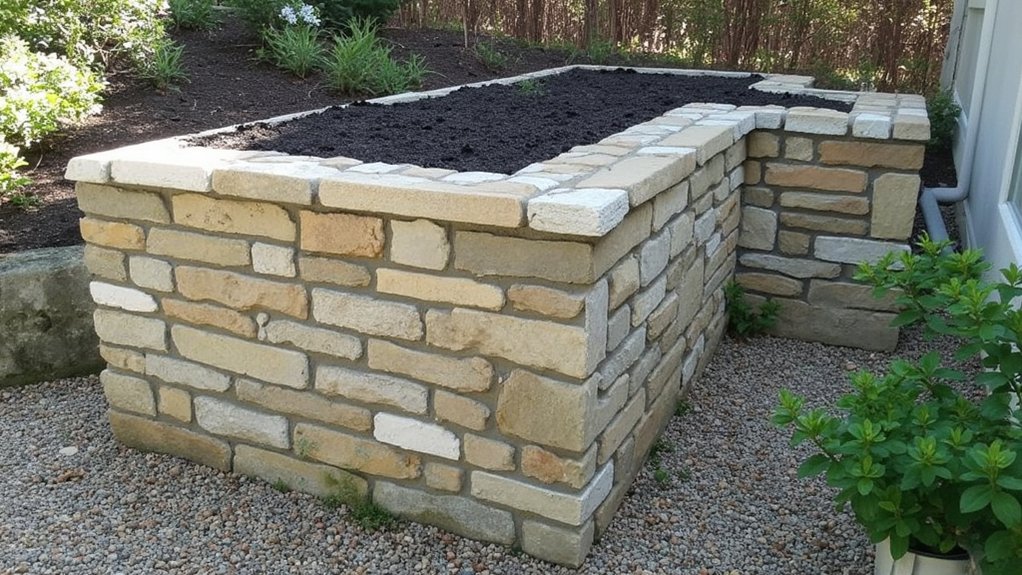
Gardeners, let’s plunge into building a unique stone border bed that’ll stand out in your yard. It’s a sturdy, natural design, perfect for defining garden spaces with rustic charm.
Start by picking a spot, ideally 4 feet by 6 feet, and mark the outline with string. Gather flat stones, about 6-12 inches wide, from a local quarry or hardware store. Stack them carefully, 12-18 inches high, ensuring they’re stable—use smaller stones to fill gaps if needed.
Next, level the ground inside with a shovel, then add a 2-inch layer of gravel for drainage. Top it with 10 inches of rich soil, mixed with compost. You’ll have a durable bed ready for planting in just a weekend!
Portable Fabric Raised Bed
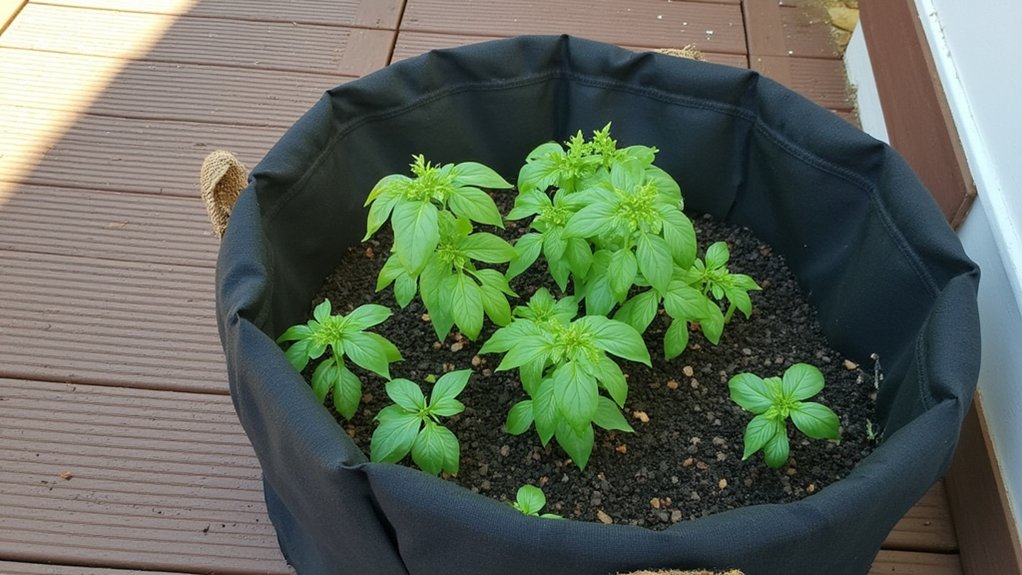
Let’s switch gears and talk about crafting a portable fabric raised bed, a handy option if you’re short on space or like flexibility. These beds, made from durable, breathable fabric, let roots breathe and prevent overwatering. You’ll love how easy they are to move!
Start by picking a fabric grow bag, ideally 15-20 gallons for decent depth, about 12-18 inches high. Place it on a flat, sunny spot—balcony or patio works great. Fill it with a mix of potting soil and compost, roughly 60/40 ratio, to about 2 inches from the top.
Next, plant your veggies or herbs directly, spacing them per seed packet instructions. Water gently, and in a week, you’ll see growth. Move it anytime—super simple!
Recycled Tire Raised Bed
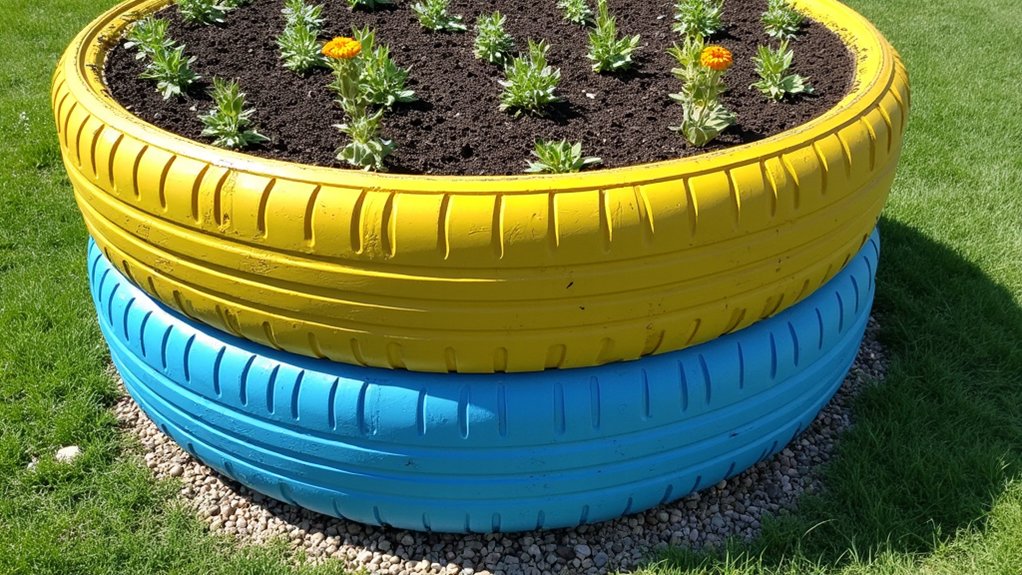
While exploring creative gardening solutions, you might consider building a raised bed from recycled tires for a sturdy, eco-friendly option. Old tires, often free from local shops, can be repurposed with minimal effort. They’re tough, weather-resistant, and perfect for small gardens.
Start by collecting 3-5 tires, depending on your desired height; each tire is about 12 inches tall. Stack them in a sunny spot, aligning the edges neatly for stability. Fill the bottom tire with gravel, about 3 inches deep, for drainage, then add a mix of soil and compost to the top.
Paint the tires with non-toxic, outdoor paint if you want a pop of color. Within a day, you’re ready to plant veggies or flowers. It’s that simple, and you’ve recycled!
Clever Pallet Raised Bed

Ever thought about turning old pallets into a raised bed for your garden? It’s a super smart, low-cost idea, and you’ve likely got pallets lying around or can grab some free from local stores.
Start by picking two sturdy pallets, ideally 48×40 inches, to form the sides. Stack and secure them with heavy-duty screws, creating a bed about 24 inches high for easy access. Line the inside with landscape fabric, stapling it tightly, to keep soil from spilling out through the slats.
Next, place your bed on level ground, fill it with a mix of compost and topsoil, and you’re set. Within a day, usually 4-5 hours of work, you’ll have a functional, recycled raised bed ready for planting!
Stackable Brick Raised Bed
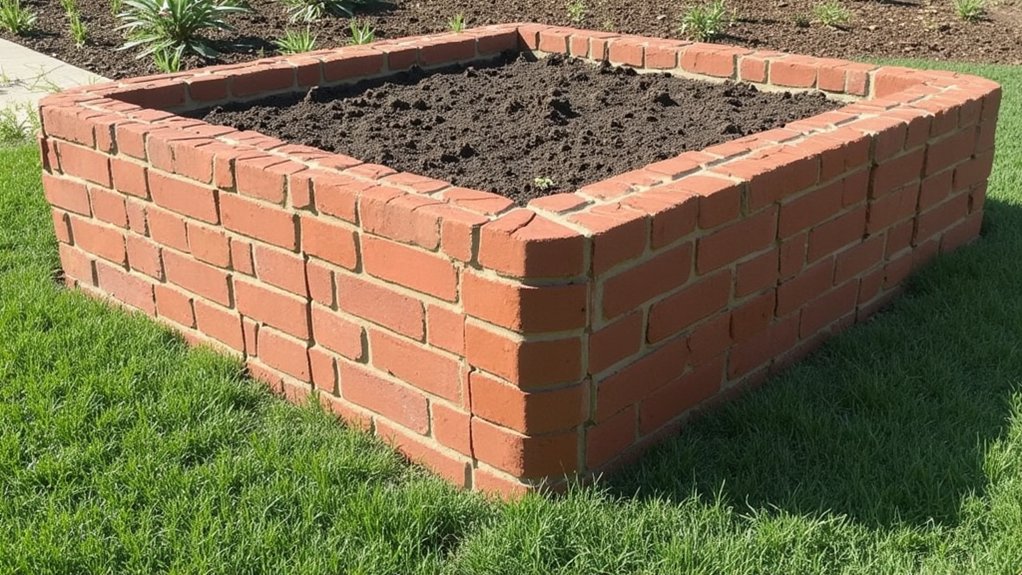
If you’re hunting for a durable, customizable option, consider building a stackable brick raised bed for your garden. It’s a sturdy choice, and you can tweak the size to fit your space perfectly.
Start by picking a level spot, ideally 4 feet by 4 feet for easy reach. Gather standard red bricks, about 120 for a two-layer bed, 12 inches high, and some mortar mix. Lay the first row in a square, using a level to keep things even, then apply mortar before stacking the next layer.
Let it cure for 48 hours before filling with soil. You’ve now got a long-lasting bed that’s ready for planting, and it looks pretty neat, too! Just maintain it by checking for cracks yearly.
Versatile Trellis Raised Bed
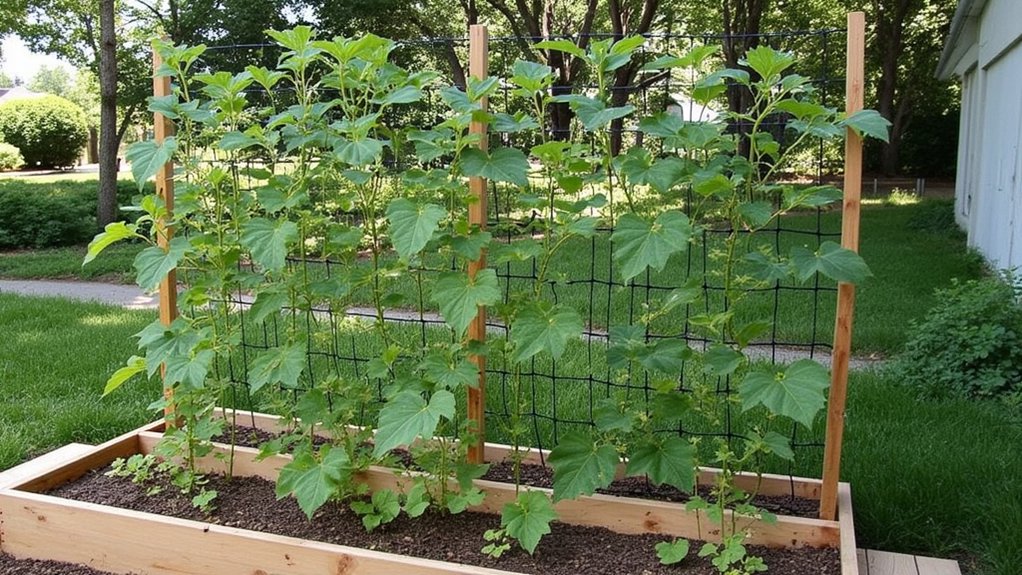
As you immerse yourself in creative gardening solutions, let’s explore the versatile trellis raised bed, a fantastic dual-purpose setup. It’s a raised bed with a built-in trellis, perfect for climbing plants like beans or cucumbers.
Start by building a sturdy 4×2-foot wooden frame, using 2×6-inch boards for durability. Attach a 5-foot-high trellis frame on one long side, securing it with heavy-duty screws. Use a mesh netting or lattice panel for the trellis, ensuring vines can grip easily.
Position this bed in a sunny spot, ideally getting 6-8 hours of light daily. Fill it with rich, well-draining soil, about 12 inches deep. Plant your seeds or seedlings at the base, and watch them climb as they grow over weeks!
Compact Cinder Block Bed
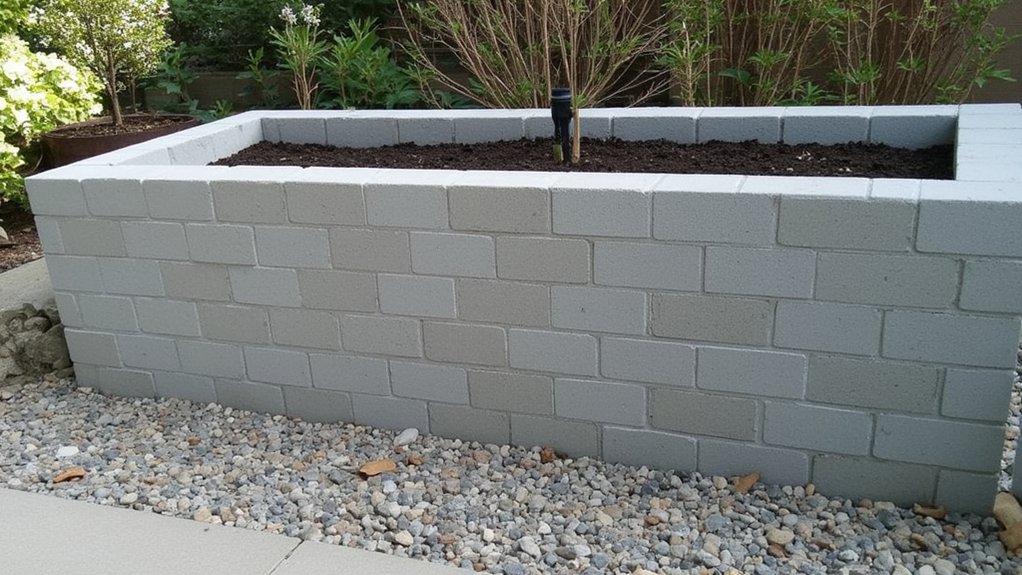
Let’s switch gears and talk about building a compact cinder block bed, a solid choice for small spaces. You can create this sturdy setup in a weekend, perfect for tight yards or patios.
Start by picking a flat spot, ideally 4 feet by 2 feet, for easy reach. Grab 16 standard cinder blocks, each 8x8x16 inches, and lay out the first layer in a rectangle, two blocks long, one wide. Stack a second layer, staggering the joints for stability, and check it’s level.
Now, fill the base with gravel, about 2 inches deep, for drainage. Top it with quality soil, roughly 12 inches, and you’re set to plant. It’s simple, durable, and maximizes your tiny growing area!
Elevated Barrel Bed
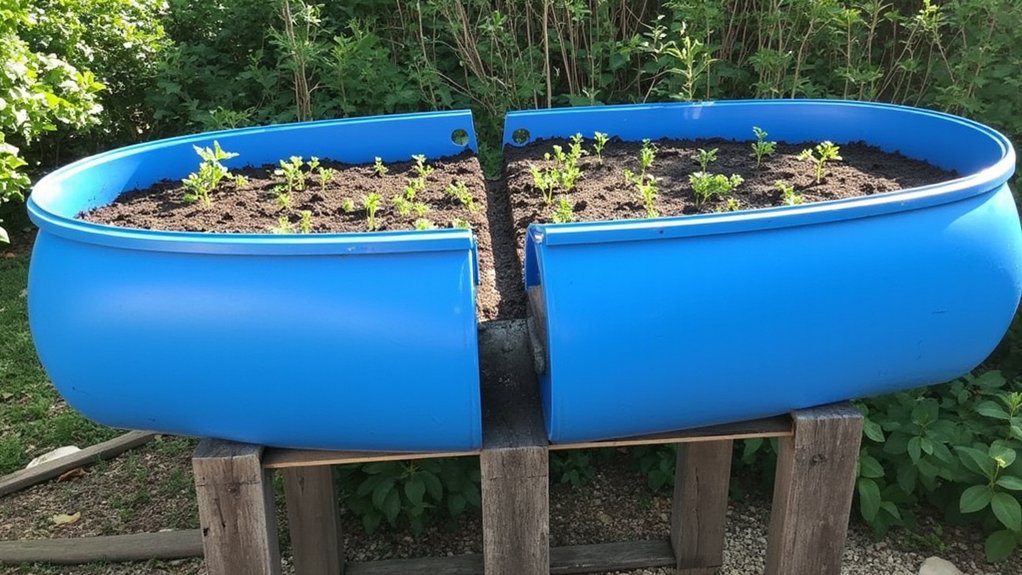
Gardeners, immerse yourselves in crafting an elevated barrel bed, a clever solution for limited space or tricky terrain. You’ll love how this setup saves your back while maximizing growing area.
Start by grabbing a 55-gallon food-grade plastic barrel, often found at local hardware stores for about $20. Cut it in half lengthwise with a jigsaw, creating two troughs, each roughly 2 feet wide. Drill drainage holes, spacing them 6 inches apart along the bottom, to prevent water buildup.
Next, build a sturdy frame from 2×4 lumber, about 3 feet high, to hold the halved barrel securely. Bolt the barrel to the frame, fill it with soil, and you’re set to plant within a weekend. It’s gardening, elevated—literally!