There are now many different types of Alocasia that I lovingly cherish and care for, and I’m sure there will be many more to come! Now that I’ve grown many babies of Alocasia Frydek, Regal Shield, Yucatan Princess and Azlanii from bulbs, among others, I’d like to share my experience of propagating Alocasias with you. In principle, Alocasia can be propagated via the pups that the mother plant has formed and bulbs. Today I will share with you how to grow Alocasia from bulbs.

Contents
How To Obtain An Alocasia Bulb
If you have an Alocasia at home, you will usually come across small bulbs—also called tubers, corms and rhizomes—at the latest during a repotting process. These are basically babies of the mother plant, which primarily grow underground and from which new small plants can be grown with relatively little effort. The more mature the plant, the more bulbs you often find in the substrate—at least in my experience. But even with still small Alocasias, I have so far had the pleasure of “harvesting” mini small bulbs.
These are either already loose in the substrate or still attached to the mother plant via a root. If the bulb has not yet separated from the mother plant by itself, it can be broken off or separated very easily. However, if the bulb is not yet really rounded, but rather oval, this is a sign that it is still too young. In any case, leave it on the mother plant.
Tip
Bulbs can be bought online via Etsy. It is, in my opinion, a nice alternative to buying an already established plant.
What’s Up and What’s Down In a Bulb?
This is a question everyone asks at the beginning. The part of the bulb that was connected to the mother plant (here you can also see a part of the root) is at the bottom. In other words, the new seedling will sprout on the opposite side.
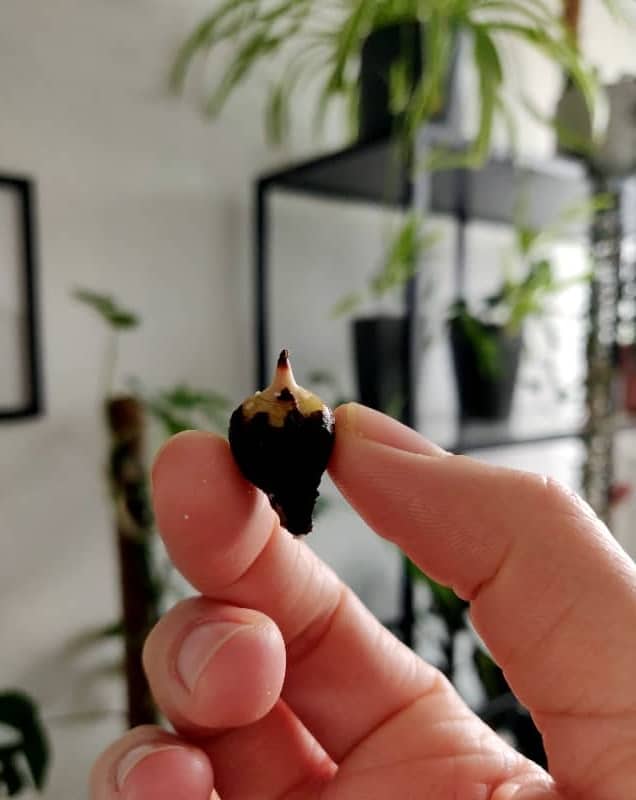
It is therefore potted in such a way that the small, light-colored tip from which the bulb will sprout points upwards.
How To Grow Alocasia From Bulb
First of all, there are many different options. Some swear by the water method, others by moss. Here’s a brief overview of common substrates and methods:
- Classic substrate (e.g. potting soil)
- Water
- Perlite
- Expanded clay/LECA
- Sphagnum Moss
Soil, perlite and sphagnum moss are always to be kept slightly moist, and the bulb surrounded by the substrate.
If you want to use expanded clay, you can, for example, use a small glass, fill it with a few expanded clay balls, place the bulb in it and add a little expanded clay again. Then fill up with a little water so that the clay granules are moist and release water to the nodule.
Water is also often used to sprout and root the bulbs. To do this, fill a glass with some water and let the bulb float. Unfortunately, I haven’t been able to achieve any success with this method so far, but after a while, it started to smell terrible—the bulbs started to rot. My favorite methods are definitely propagation in sphagnum moss or perlite! Here, the bulbs have always sprouted quickly and developed extremely well.
Tip on the Moss
When buying, make sure that the moss comes from sustainable cultivation!
Do You Remove The Bulb Skin?
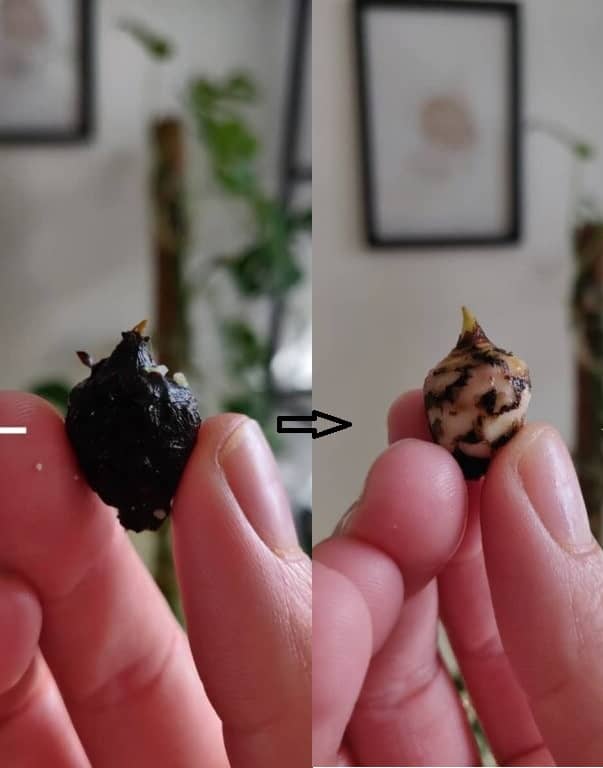
Often the bulb is surrounded by harder, dark skin. In my experience, the bulb roots much faster once it has been freed from the skin. This can be cleaned off quite easily with your fingernails (just be a little careful), and it doesn’t have to be completely removed. I always make sure the worst is gone.
Should I Store The Bulb Dry?
Since I have been asked several times whether the bulbs should be dried beforehand, here are a few words: Once a rhizome has been separated from the mother plant or removed from the mother plant’s substrate, it should migrate to the substrate/growing medium of your choice. This will ensure that it doesn’t dry out.
Where Do I Place the Freshly “Potted” Bulb?
Whichever method you choose, place your soon-to-be babies in a bright and warm place, around 70-75°F (21-22°C) is ideal. Growing them now requires a little patience: it can actually take a few weeks to months.
I wish you a lot of fun trying it out with your soon-to-be Alocasia babies!