You’ve probably walked past those gorgeous, disease-resistant roses at the garden center, wondering if they’re really as foolproof as advertised. Knockout roses aren’t just marketing hype—they’re genuinely low-maintenance powerhouses that’ll bloom continuously from spring until the first hard frost. However, there’s a catch most gardeners don’t realize until it’s too late.
Contents
- 1 Discovering the Perfect Knockout Rose Varieties for Your Garden
- 2 Essential Planting Techniques and Soil Preparation Methods
- 3 Optimizing Light Exposure and Watering Schedules
- 4 Seasonal Care and Maintenance Strategies
- 5 Pruning Techniques for Maximum Bloom Production
- 6 Identifying and Managing Common Pests
- 7 Preventing and Treating Rose Diseases
- 8 Year-Round Health Monitoring and Plant Longevity Tips
Discovering the Perfect Knockout Rose Varieties for Your Garden
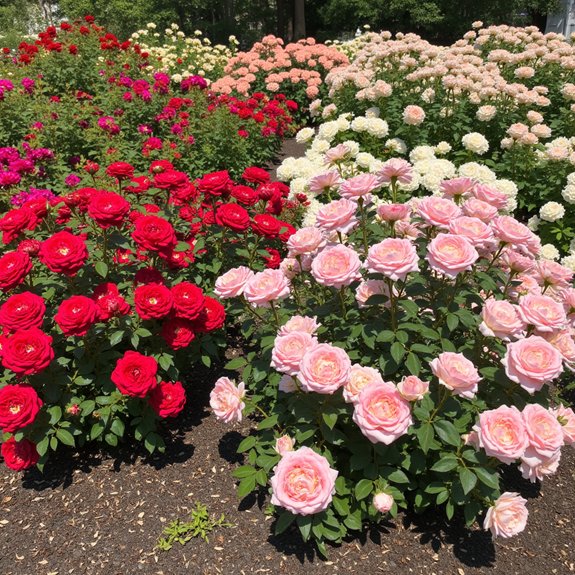
Five distinct Knockout rose varieties offer gardeners reliable options for creating stunning landscapes with minimal fuss. The original ‘Knock Out’ produces cherry-pink single blooms, earning Hall of Fame status in 2018. For dramatic color combinations, choose ‘Rainbow Knock Out’ with coral pink petals and bright yellow centers. ‘Double Knock Out’ delivers crimson red double flowers with cinnamon fragrance, while ‘Pink Knock Out’ provides vibrant fuchsia-pink blooms from spring through frost. Their growth habits vary from compact to standard sizes, allowing you to match specific garden spaces. Each variety maintains the signature disease resistance that makes Knockout roses garden favorites.
Essential Planting Techniques and Soil Preparation Methods
Three critical factors determine your Knockout roses’ long-term success: timing, location, and soil preparation. Plant during early spring or fall when temperatures stay between 40-60℉. Choose spots with 6-8 hours of direct sunlight, spacing plants 3-4 feet from competitors.
Dig irregular holes 6-8 inches deeper and wider than containers, ensuring proper soil drainage. Soak bare-root roses for 24 hours before planting. Focus on planting depth by burying the bud union just under soil level for cold protection.
Backfill with a 50-50 mix of organic compost and existing soil. Apply 3-4 inches of mulch for temperature stability and moisture retention.
Optimizing Light Exposure and Watering Schedules

After you’ve established proper planting conditions, your Knockout roses need consistent light exposure and strategic watering to reach their full capacity. Light requirements are straightforward: provide at least six hours of direct sunlight daily, though they’ll tolerate four hours minimum. Morning sun works best, preventing afternoon scorching on delicate blooms.
Your watering frequency should involve deep sessions once or twice weekly, delivering 2-3 gallons per mature plant. Water at the base, never the foliage, to prevent disease. New plantings need water 3-4 times weekly initially. Let soil dry between sessions for ideal root development.
Seasonal Care and Maintenance Strategies
Building on your established watering routine, seasonal care for Knockout roses follows a predictable pattern that adapts to your plants’ changing needs throughout the year. Spring requires fertilizing when bud eyes swell, followed by pruning dead canes. Summer means deep watering twice weekly and deadheading spent blooms.
Fall brings seasonal adjustments like light pruning to prevent winter disease, plus reducing fertilizer completely. Winter care involves monitoring for damage and planning next year’s improvements.
Climate considerations matter—colder zones need extra mulching, while warmer areas may require summer shade protection. Each season demands specific attention for ideal rose health.
Pruning Techniques for Maximum Bloom Production
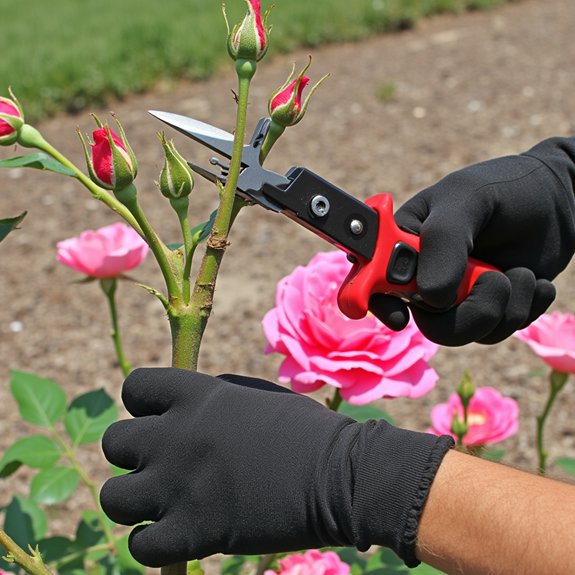
When you understand proper pruning timing and technique, your Knockout roses will reward you with spectacular bloom displays throughout the growing season. Pruning timing matters most—tackle this task in early spring when bud eyes begin swelling. Remove dead, diseased, or damaged canes first using sharp bypass pruners.
For effective shaping techniques, create a vase formation by cutting above outward-facing buds. This promotes airflow and reduces disease risk. Snip canes at 45-degree angles, leaving healthy wood. Remove weak, spindly growth that won’t support blooms. Clean up all debris afterward to prevent overwintering diseases from attacking your roses.
Identifying and Managing Common Pests
While Knockout roses boast impressive disease resistance, they’re still vulnerable to several common pests that can damage your plants if left unchecked. Pest identification starts with regular monitoring, checking leaves weekly for early signs. Aphids cluster on new growth, creating sticky honeydew deposits. Spider mites cause brown, dull foliage and fine webbing. Japanese beetles chew holes in flowers and leaves during summer months.
Organic treatments work effectively against these invaders. Spray aphids and spider mites off with strong water bursts. Hand-pick Japanese beetles into soapy water for disposal. Beneficial insects like ladybugs naturally control aphid populations.
Preventing and Treating Rose Diseases
Although Knockout roses resist many diseases better than traditional varieties, they aren’t completely immune to fungal infections and viral problems. Disease prevention starts with proper spacing for airflow and watering at soil level, not on leaves.
Black spot appears as dark spots with yellow halos on foliage. Remove infected leaves immediately and dispose in trash, never compost. Powdery mildew creates white, dusty coating on leaves during humid conditions. Treatment options include fungicidal sprays or baking soda solutions.
Rose rosette disease shows excessive red growth and thorns. Unfortunately, there’s no cure—remove entire plants to prevent spreading to nearby roses.
Year-Round Health Monitoring and Plant Longevity Tips
Since proper monitoring extends far beyond troubleshooting problems, you’ll want to establish a seasonal routine that keeps your Knockout roses thriving for decades. Spring demands careful inspection for winter damage and pest emergence. Summer requires weekly checks for spider mites and black spot, especially during humid spells.
Fall brings vital decisions about fertilizer timing—stop feeding six weeks before your first expected frost to prevent tender new growth. Winter protection becomes essential in zones 4-6, using mulch mounds around the base. Monthly dormant season inspections help catch problems before spring arrives.