You’ve probably watched those tiny succulent leaves sitting on soil for weeks, wondering if anything will actually happen. The truth is, you’re likely making one of three critical mistakes that prevent successful propagation. Most gardeners rush the process, skip the essential callusing period, or create the wrong environment entirely. Once you understand the specific timing, moisture levels, and light requirements that trigger root development, you’ll discover why some people seem to effortlessly multiply their succulent collections while others struggle with shriveled, rotting failures.
Contents
Why Succulents Are Perfect for Propagation
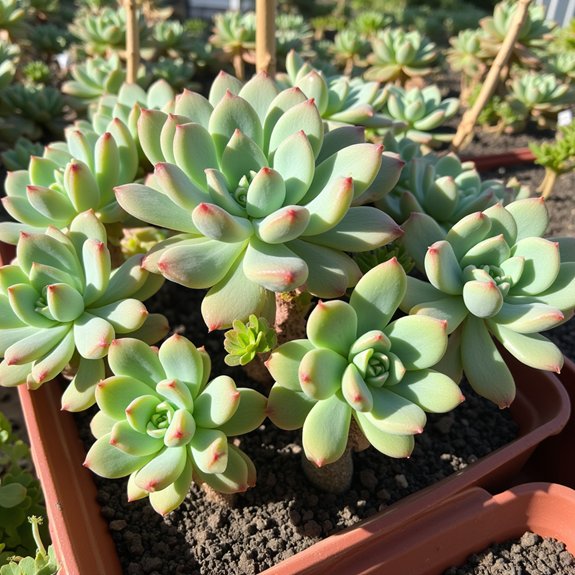
Unlike most houseplants that demand constant attention, succulents practically beg you to ignore them. Their thick, water-storing leaves make them incredibly forgiving when you forget to water for weeks. This resilience translates into exceptional propagation benefits, since baby plants inherit the same drought-tolerant traits that make their parents nearly indestructible.
You’ll find success with countless succulent varieties, from jade plants to echeveria. Each leaf contains everything needed to create a complete replica of the parent plant. Simply remove a healthy leaf, let it dry for a few days, then watch roots and shoots emerge within weeks.
Essential Steps for Leaf Propagation Success
When you select the right leaf, you’re already halfway to propagation success. Focus on healthy, plump leaves from the outer portions of your plant. Gently twist and pull each leaf from its base, ensuring you get the entire attachment point intact.
Your callousing technique determines everything that follows. Place removed leaves on newspaper or a dry tray, letting them sit for 2-3 days until cut ends form protective scabs. Skip this step, and you’ll watch your leaves rot instead of root.
Proper leaf selection combined with patient callousing creates the foundation for thriving new plants.
Mastering the Cutting Propagation Method
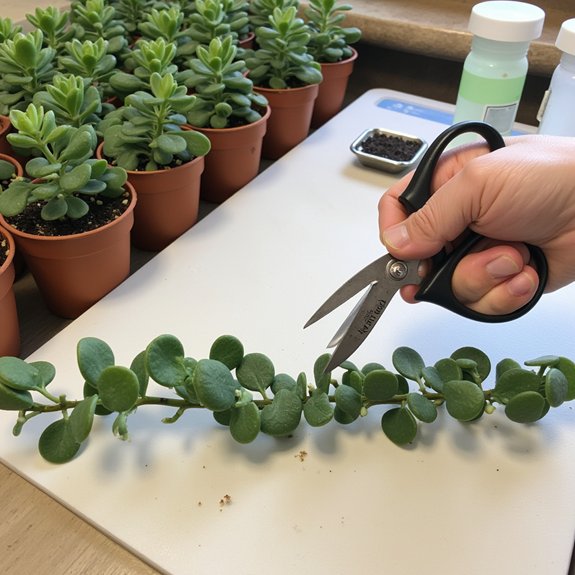
While leaf propagation works beautifully for many succulents, cutting propagation offers faster results and works better for stretched or leggy plants. You’ll master cutting techniques by selecting healthy stems from vine-type varieties like string of pearls or etiolated specimens.
When selecting cuttings, choose stems with several leaf nodes and cut below a healthy leaf set. Clean your shears with bleach solution first to prevent disease spread. Remove lower leaves, exposing bare stem for soil contact.
Let cuts callous for three days on newspaper. Plant in well-draining mix, keeping leaves above soil line, then water lightly.
Creating the Ideal Growing Environment
After your cuttings have successfully rooted, you’ll need to establish proper growing conditions that mirror their desert origins. Light requirements are essential—place your new plants in bright, indirect sunlight for 4-6 hours daily. Direct afternoon sun can scorch tender new growth, so morning light works best.
Soil drainage remains your biggest priority. Your container must have multiple drainage holes, and water should flow through completely within seconds. Check soil moisture by inserting your finger one inch deep; water only when completely dry. Overwatering kills more succulents than drought ever will.
Nurturing Your New Succulent Plants
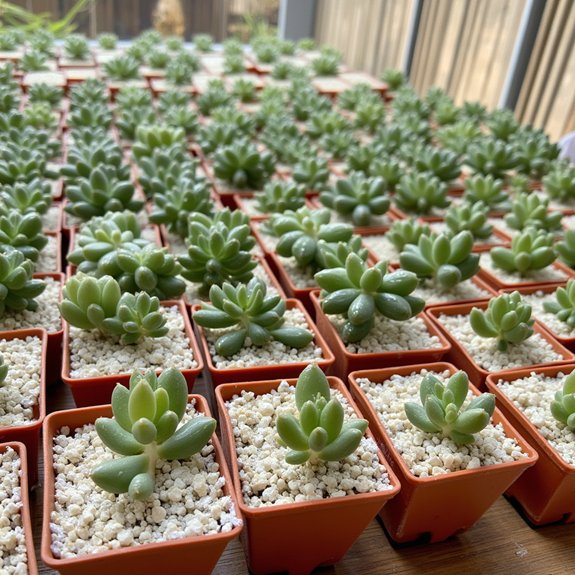
Once your propagated succulents show established root systems, you’ll shift focus from basic survival to active growth promotion. Develop a consistent watering schedule by checking soil moisture weekly, watering only when completely dry. During growing season, water every 7-10 days, reducing frequency in winter months.
Understanding nutrient requirements becomes essential now. Feed your young plants with diluted succulent fertilizer monthly during spring and summer. Use quarter-strength liquid fertilizer to avoid overwhelming delicate roots.
Gradually introduce brighter light over two weeks, moving containers closer to sunny windows. Watch for stretching, which indicates insufficient light, and adjust placement accordingly.
Troubleshooting Common Propagation Challenges
Even when you follow every step correctly, propagation problems can still pop up and frustrate new gardeners. Leaf rot shows up as mushy, black spots and happens when leaves stay too wet. If you see this, remove affected leaves immediately and adjust your watering schedule.
Cutting failure often occurs when stems weren’t properly calloused or soil stays too moist. Check for white roots after two weeks—healthy cuttings develop visible growth. If nothing happens after four weeks, start over with fresh materials and drier conditions.