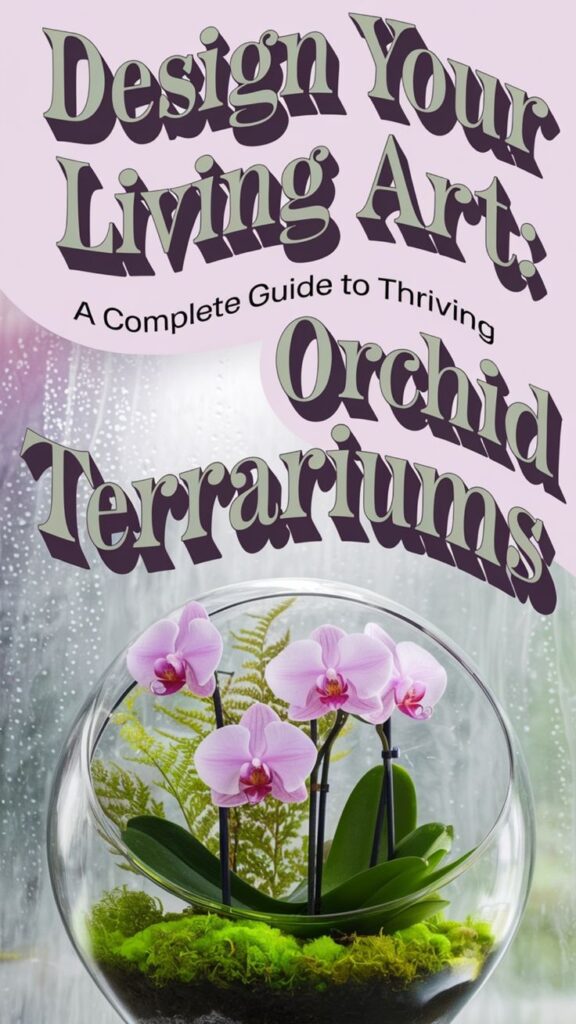
When you peek into Sarah’s living room window, you’ll spot a stunning 12-inch glass globe housing three miniature Pleurothallis orchids, each thriving in their own perfectly humid microclimate. Creating your own orchid terrarium isn’t just a weekend project – it’s your gateway to maintaining a self-sustaining ecosystem that’ll flourish for years. Before you grab that empty fish tank from the garage, though, there are essential elements you’ll need to understand about these delicate botanical worlds.
Contents
- 1 Understanding Orchid Terrarium Basics
- 2 Selecting the Right Terrarium Container
- 3 Best Miniature Orchid Species for Terrariums
- 4 Essential Materials and Tools
- 5 Creating the Perfect Growing Medium
- 6 Step-by-Step Assembly Guide
- 7 Lighting and Temperature Requirements
- 8 Watering and Humidity Management
- 9 Common Problems and Solutions
- 10 Long-Term Care and Maintenance Tips
Understanding Orchid Terrarium Basics
While orchids are known for being finicky plants, creating a terrarium provides the perfect microenvironment for these exotic beauties to thrive. A terrarium’s enclosed space helps maintain consistent humidity levels between 60-80%, which is essential for orchid health.
You’ll need a clear glass container that’s at least 12 inches tall with a wide opening, allowing for proper air circulation. The container shouldn’t be completely sealed, as orchids need some ventilation to prevent fungal growth.
Choose miniature orchid varieties like Pleurothallis or Masdevallia, which adapt well to terrarium life. They’ll need bright, indirect light and temperatures between 65-80°F to flourish in their enclosed garden.
Selecting the Right Terrarium Container
Success in orchid terrarium gardening starts with choosing the perfect container. You’ll need a glass vessel that’s at least 12 inches tall and 10 inches wide, with a wide opening for easy plant access and maintenance.
Look for containers with built-in drainage holes or the ability to create a 2-inch drainage layer. Clear glass is essential, as it allows you to monitor root health and moisture levels while providing necessary light transmission.
If you’re working with miniature orchids, you can opt for smaller containers around 8 inches tall, but never sacrifice ventilation. Your container should have a removable lid or adjustable openings to control humidity.
Best Miniature Orchid Species for Terrariums
When selecting orchids for your terrarium, you’ll want to focus on miniature varieties that won’t quickly outgrow their space. Popular choices include Pleurothallis species, which rarely exceed 4 inches in height, and the compact Masdevallia varieties that thrive in enclosed environments. The most successful terrarium orchids are typically those that naturally grow to less than 6 inches tall at maturity, making species like Lepanthopsis astrophora and Dendrobium cuthbertsonii excellent candidates.
Recommended Terrarium Orchid Varieties
Selecting the right orchid varieties stands as the cornerstone of creating a thriving terrarium ecosystem. Three outstanding choices include Pleurothallis grobyi, with its delicate 1/4-inch flowers, Masdevallia wendlandiana, featuring bright orange blooms, and Lepanthopsis astrophora, known for its star-shaped purple blossoms.
You’ll want to take into account Dendrobium lichenastrum, which grows to just 2 inches tall, and Bulbophyllum tingabarinum, producing copper-colored flowers throughout the year. These compact varieties thrive in 70-80% humidity levels common in closed terrariums.
For lower light conditions, try Haraella retrocalla or Schoenorchis fragrans, both adaptable to LED grow lights.
Selecting Based on Size
Finding the right-sized orchids makes all the difference in a terrarium’s long-term success. You’ll want to choose miniature species that won’t outgrow your container, typically those under 6 inches in height at maturity.
Consider compact favorites like Lepanthopsis astrophora, which reaches only 2-3 inches, or Pleurothallis grobyi, maxing out at 4 inches. The tiny Masdevallia minuta, growing to just 1.5 inches, works perfectly in smaller setups.
For medium-sized terrariums, you can opt for slightly larger specimens like Restrepia brachypus or Dendrobium loddigesii, which top out at 5-6 inches while still maintaining proper proportion to your display.
Essential Materials and Tools
You’ll need a clear glass container with a lid, preferably 1-2 gallons in size, along with specialized orchid potting mix and sphagnum moss for your terrarium foundation. Essential tools include long-handled tweezers, scissors, a spray bottle, and a small trowel for precise substrate placement and plant handling. Your basic supply list should also include activated charcoal, decorative stones, and a humidity gauge to help create the perfect microclimate for your miniature orchids.
Basic Container and Substrates
Three essential components form the foundation of any successful orchid terrarium: a clear glass or plastic container, proper substrate layers, and adequate drainage materials.
You’ll want to select a container that’s at least 12 inches tall with a wide opening for easy access. Glass offers better clarity and insulation, while plastic proves more lightweight and durable. For drainage, start with a 1-inch layer of small pebbles or expanded clay pellets.
Layer your substrates strategically: add 2 inches of orchid bark mix, followed by a thin layer of sphagnum moss. Top it off with a blend of fine charcoal and perlite to maintain proper moisture levels.
Tools For Assembly Steps
A well-equipped orchid enthusiast needs several key tools for terrarium assembly. You’ll want long-handled tweezers for precise plant placement, pruning scissors for trimming roots and leaves, and a small spray bottle for misting. A measuring cup helps portion substrate materials accurately.
Don’t forget your protective gear – gardening gloves to keep your hands clean and safety glasses when working with activated charcoal. You’ll also need a small hand trowel, chopsticks for making planting holes, and a soft brush for cleaning glass surfaces.
Keep a soil probe handy to test moisture levels, and grab some fishing line or thin wire for securing orchids to mounts.
Creating the Perfect Growing Medium
The ideal growing medium for orchid terrariums combines several key components to create an environment that mimics these plants’ natural habitat. Start with a base of fine-grade orchid bark (½-inch pieces), then mix in equal parts sphagnum moss and horticultural charcoal.
Add a handful of perlite for every 2 cups of your mixture to improve drainage and aeration. You’ll also want to incorporate small pieces of tree fern fiber, which helps retain moisture while preventing soil compaction.
Mix these components thoroughly in a clean container, then soak the blend in distilled water for 30 minutes before adding it to your terrarium.
Step-by-Step Assembly Guide
Before you begin assembling your orchid terrarium, you’ll need to gather essential materials like drainage rocks, activated charcoal, orchid bark mix, and sterilized tools. Start by creating distinct layers in your container, beginning with a 1-inch base of drainage material, followed by a ½-inch charcoal layer, and topped with 2-3 inches of your prepared growing medium. Once your foundation is set, you’ll carefully position your orchids, ensuring their roots spread naturally through the medium while keeping the crown slightly elevated to prevent rot.
Gather Required Materials First
Successful orchid terrarium creation starts with gathering every essential material before assembly begins. You’ll need a clear glass container at least 12 inches tall, activated charcoal, orchid-specific potting mix, and sphagnum moss.
Next, collect your drainage materials: small pebbles or LECA balls (½-inch diameter), and decorative items like driftwood or moss-covered branches. Don’t forget essential tools including long-handled tweezers, scissors, and a spray bottle for misting.
Finally, select miniature orchid varieties suitable for terrarium life, such as Pleurothallis or Masdevallia species. You’ll want at least two plants to create visual interest and proper spacing.
Layer Your Growing Medium
With your materials ready and organized, proper layering becomes your foundation for orchid terrarium success. Start by placing a 1-inch layer of small pebbles or gravel at the bottom for essential drainage.
Next, add a ½-inch layer of activated charcoal, which helps filter water and prevents bacterial growth. Cover this with a thin layer of sphagnum moss to separate your drainage layers from the growing medium.
Finally, add your orchid potting mix, filling about one-third of your container’s height. Create small mounds and valleys in the mix to add visual interest and provide varying moisture levels for your orchids’ roots.
Position Orchids Carefully
Once you’ve prepared the growing medium layers, placing your orchids requires careful attention to spacing and positioning. Remove each orchid from its pot, gently untangle the roots, and trim any dead or rotting sections with sterilized scissors.
Position your largest orchid first, placing it 2-3 inches from the terrarium’s back wall. Allow 3-4 inches between plants for proper air circulation. Angle each orchid slightly forward, ensuring the crown sits above the growing medium to prevent rot.
For multiple orchids, create visual depth by positioning taller varieties toward the back and shorter ones in front, maintaining at least 2 inches from the glass walls.
Lighting and Temperature Requirements
Proper lighting and temperature control serve as the cornerstones of a thriving orchid terrarium. You’ll want to place your terrarium in a spot that receives bright, indirect sunlight for 12-14 hours daily. East-facing windows typically work best, but you can also use artificial grow lights positioned 12-18 inches above the terrarium.
Maintain temperatures between 65-80°F during the day and allow a 10-15°F drop at night. You can monitor these conditions using a small digital thermometer. If you’re using grow lights, they’ll generate extra heat, so you’ll need to adjust your room’s temperature accordingly and guarantee proper ventilation through the terrarium’s openings.
Watering and Humidity Management
Successful orchid care in terrariums depends heavily on maintaining the right balance of water and humidity. You’ll need to keep humidity levels between 60-80%, which you can monitor using a small hygrometer placed inside the terrarium.
Water your orchids thoroughly when the moss or growing medium feels slightly dry to the touch, typically every 7-10 days. Don’t let water pool at the bottom, as this can lead to root rot. Instead, mist the air space and walls every 2-3 days with distilled water.
If humidity drops below 60%, add a small humidity tray filled with pebbles and water beneath your plants, but don’t let the pots touch the water.
Common Problems and Solutions
Even with careful attention to watering and humidity, orchid terrariums can encounter several common issues that need quick attention. Root rot often appears as blackened, mushy roots and typically results from poor drainage or overwatering. If you spot this, remove affected roots with sterilized scissors and repot in fresh medium.
Mold growth, appearing as white or gray fuzzy patches, requires immediate action. Increase air circulation by opening the terrarium for 30 minutes daily, and remove affected plant material. For stubborn cases, spray a diluted fungicide solution (1:4 ratio) onto problem areas.
Watch for pest infestations, particularly mealybugs and spider mites, which thrive in humid environments.
Long-Term Care and Maintenance Tips
While your orchid terrarium thrives in its enclosed environment, you’ll need to establish a consistent maintenance routine to guarantee its long-term success. Schedule monthly cleaning sessions to wipe down glass surfaces and remove any dead plant material.
Monitor humidity levels weekly, aiming for 60-80%, and adjust ventilation accordingly. You’ll want to inspect the growing medium every 3-4 months, replacing it if it shows signs of decomposition or salt buildup.
Prune orchid stems after blooming, and fertilize quarterly with a balanced orchid fertilizer at quarter-strength. Remember to check the drainage layer twice yearly, ensuring it’s free from bacterial growth or stagnant water.