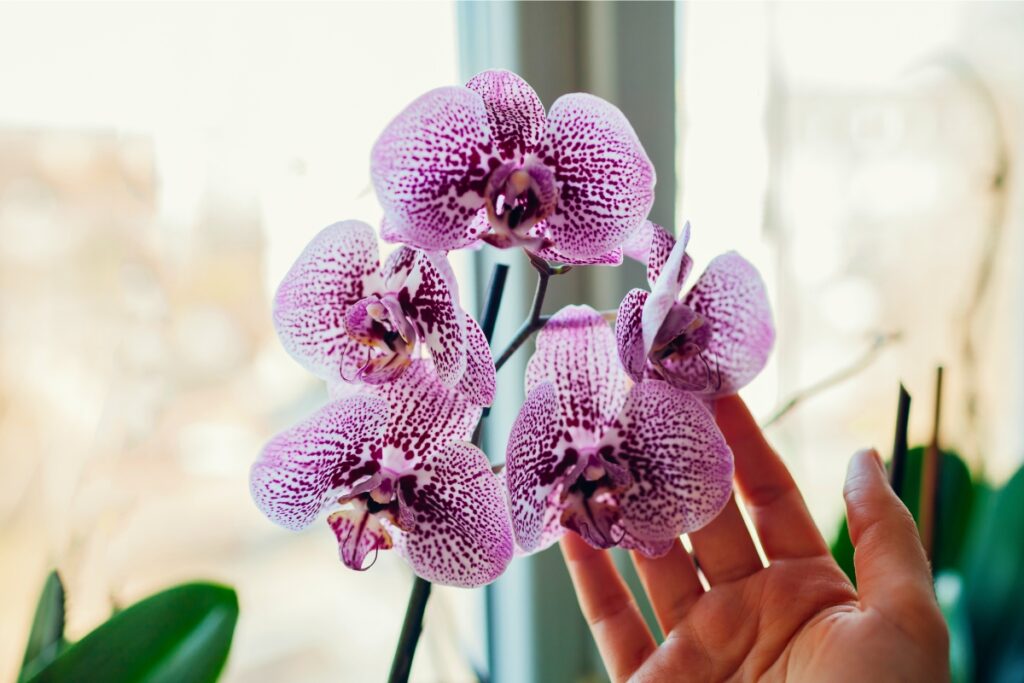
You’ll find that successful orchid care isn’t one-size-fits-all, especially when you’re dealing with different climate zones. Whether you’re growing Phalaenopsis in Minnesota’s cold winters or nurturing Vandas in Florida’s humid summers, your approach needs to adapt with the seasons. The key lies in understanding how your local weather patterns affect these sensitive plants – and that’s where many growers stumble. Let’s explore how you can fine-tune your care routine to match your specific climate conditions.
Contents
- 1 Understanding Your Local Climate Patterns
- 2 Spring Care: Awakening Your Orchids
- 3 Summer Heat Management Strategies
- 4 Fall Preparation and Growth Cycles
- 5 Winter Protection Methods
- 6 Watering Adjustments Through the Seasons
- 7 Climate-Specific Fertilization Schedules
- 8 Essential Tools for Climate Control
- 9 Troubleshooting Common Seasonal Problems
Understanding Your Local Climate Patterns
Why do so many orchid enthusiasts struggle to grow these stunning plants? It’s often because they haven’t taken time to understand their local climate patterns, which directly impact an orchid’s growth cycle.
You’ll need to track your area’s temperature fluctuations, humidity levels, and seasonal changes throughout the year. Start by recording daily temperatures, both indoor and outdoor, for at least two weeks. Pay attention to how humidity varies between seasons, and note when your region experiences significant weather shifts.
Your local weather station’s historical data can help fill in gaps, providing detailed information about frost dates, rainfall patterns, and temperature extremes that’ll affect your orchid care routine.
Spring Care: Awakening Your Orchids
As spring arrives, you’ll need to evaluate your orchids for signs they’re ready to emerge from winter dormancy, including new root tips and leaf buds. Begin gradually adjusting their exposure to light and temperature by moving them closer to east-facing windows and maintaining daytime temperatures between 70-80°F. Once you’ve confirmed active growth, it’s time to repot your orchids in fresh medium, trimming away any dead roots and choosing a container that’s 1-2 inches larger than the current root mass.
Repotting After Winter Rest
Spring marks the ideal time to repot your orchids after their winter dormancy period. When you notice new root growth emerging, usually in early to mid-March, it’s time to take action. Your orchids will need fresh media and possibly larger containers.
Begin by removing your orchid from its old pot, trimming away dead roots with sterilized scissors. Choose a new pot that’s 1-2 inches wider than the root ball. Fill the container with fresh orchid bark mix, ensuring it’s pre-soaked for 24 hours.
Position your orchid so the crown sits slightly below the pot’s rim, then gently work the media around the roots until stable.
Light and Temperature Adjustments
Once your orchids emerge from winter dormancy, they’ll need gradual adjustments to both light and temperature conditions. Start by moving them to an east-facing window, where they’ll receive gentle morning sunlight for 4-6 hours daily.
Increase daytime temperatures to 70-75°F (21-24°C), while maintaining nighttime temperatures around 60-65°F (15-18°C). You’ll want to check leaf color regularly; bright green indicates proper light, while dark green suggests insufficient exposure.
If you’re using grow lights, position them 12-18 inches above the plants, and increase duration by 30 minutes each week until you reach 12-14 hours of daily light exposure.
New Growth Assessment
The successful assessment of new growth begins with careful inspection of your orchid’s crown, roots, and pseudobulbs. Look for fresh green tips emerging from the plant’s base, and gently probe new roots, which should feel firm and appear light green or silvery.
Check pseudobulbs weekly during spring growth spurts. They shouldn’t feel soft or wrinkled. If you’re growing sympodial orchids like Cattleyas, you’ll notice new shoots appearing between mature pseudobulbs. These shoots should emerge every 4-6 months when healthy.
For monopodial orchids like Phalaenopsis, examine the crown for new leaves, which typically grow at a rate of 1-2 inches per month.
Summer Heat Management Strategies
Managing your orchids during intense summer heat requires strategic planning and consistent monitoring. You’ll need to adjust your watering schedule, sometimes increasing frequency to twice daily when temperatures exceed 85°F (29°C).
Position your orchids 6-8 inches below shade cloth that blocks 50-70% of sunlight, and guarantee proper air circulation using small fans. If you’re growing indoors, keep plants away from windows between 10 AM and 4 PM to prevent leaf burn.
Mist your orchids in the morning using room-temperature water, and maintain humidity between 50-70% using humidity trays filled with pebbles. Don’t forget to reduce fertilizer strength by half during extreme heat periods.
Fall Preparation and Growth Cycles
As fall arrives, you’ll need to adjust your orchid care routine by gradually reducing water and fertilizer amounts to match your plant’s natural growth slowdown. You’ll notice the autumn light becoming less intense, which means it’s time to move your orchids closer to windows or adjust grow lights to maintain 12-14 hours of daily exposure. When nighttime temperatures start dropping below 65°F (18°C), you should begin shifting your orchids to their cooler fall conditions by moving them away from drafty windows and reducing daytime temperatures by 5-10 degrees.
Reducing Water and Fertilizer
When your orchids begin displaying signs of dormancy in late summer, it’s time to gradually reduce their water and fertilizer intake. Cut back watering frequency by 25% every two weeks until you’re watering half as often as during the growing season.
Switch to a lower-nitrogen fertilizer with an NPK ratio of 10-30-20, applying it at quarter-strength every third watering. You’ll want to monitor your orchids’ pseudobulbs, which should remain firm but slightly wrinkled, indicating proper water reduction.
For orchids in bark mix, maintain light moisture by misting the media’s surface twice weekly. Don’t resume normal feeding until you notice new growth tips emerging.
Light Changes During Fall
The shorter days of fall signal your orchids to prepare for their natural rest cycle. You’ll need to adjust their light exposure gradually, reducing it by 10-15% every two weeks until winter.
If you’re growing indoors, move your orchids 6-8 inches further from their light source, or reduce artificial lighting by one hour daily. For south-facing windows, consider adding a sheer curtain to filter intense afternoon rays.
Monitor your plants’ leaf color carefully – they should maintain a bright, healthy green. If you notice darkening leaves, they’re getting too little light; yellowish ones indicate too much exposure.
Temperature Drop Adjustments
During fall’s temperature shifts, your orchids require careful adjustments to their growing environment. Start by reducing nighttime temperatures 5-10°F lower than daytime readings, aiming for a 15-20°F daily fluctuation that mimics natural conditions.
Move your plants 6 inches back from windows to protect them from cold drafts, and maintain humidity between 50-60% using a humidity tray. You’ll need to decrease watering frequency by 25%, letting the growing medium dry slightly between waterings.
Monitor your orchids’ temperature exposure using a min-max thermometer, and if temps drop below 55°F, consider relocating plants to a warmer spot or using supplemental heating.
Winter Protection Methods
Because winter’s harsh conditions can devastate unprotected orchids, you’ll need to implement several key safeguards. Start by moving your plants 6-8 inches away from cold windows, and install thermal curtains to maintain a consistent temperature between 60-75°F.
For outdoor orchids, you’ll want to build a temporary greenhouse using 6-mil clear plastic sheeting, or wrap individual plants in frost cloth when temperatures drop below 50°F. Don’t forget to add a 3-inch layer of mulch around the roots.
During winter nights, use LED grow lights for 12-14 hours daily, and maintain humidity at 50-60% using a reliable humidifier placed nearby.
Watering Adjustments Through the Seasons
While orchids require consistent moisture throughout the year, you’ll need to make strategic adjustments to your watering routine as seasons change. During spring and summer’s active growth, water thoroughly every 5-7 days, allowing the top inch of media to dry between waterings.
In fall, reduce watering frequency by 30%, spacing sessions 8-10 days apart. Winter demands the most restraint – water only every 10-14 days, and mist leaves on sunny mornings to combat dry indoor heating.
Monitor your orchid’s roots through clear pots; healthy roots appear silvery-green when dry and bright green when wet. Adjust these intervals based on your specific climate and humidity levels.
Climate-Specific Fertilization Schedules
Just as water needs vary with the seasons, fertilization requirements shift dramatically based on your local climate. In warm regions, you’ll need to fertilize every 2-3 weeks during the growing season, using a balanced 20-20-20 orchid formula at quarter strength.
For cooler climates, reduce fertilizing to once monthly from March to September, and stop completely during winter dormancy. If you’re in a humid subtropical zone, dilute your fertilizer to one-eighth strength but apply weekly to prevent salt buildup.
Always check your specific orchid variety’s needs, as Phalaenopsis and Cattleyas have different nutritional demands throughout their growth cycles.
Essential Tools for Climate Control
Proper climate control tools make the difference between thriving orchids and struggling plants. You’ll need a reliable thermometer-hygrometer combo to monitor both temperature and humidity levels, along with a digital min-max gauge to track fluctuations throughout the day.
For humidity management, invest in a quality humidifier with adjustable settings, plus humidity trays filled with pebbles. In warmer climates, you’ll want oscillating fans for air circulation and shade cloth rated at 50-70% light reduction.
Temperature control requires efficient space heaters with thermostats for winter, while summer demands proper ventilation systems, including exhaust fans and automated vent openers.
Troubleshooting Common Seasonal Problems
Even with the right tools in place, seasonal changes can throw your orchids off balance. During winter, you’ll notice yellowing leaves and root die-back if temperatures drop below 60°F, while summer can bring sunscald and dehydration when temps exceed 85°F.
Watch for specific seasonal indicators: brown leaf tips in winter (low humidity), wrinkled pseudobulbs in summer (dehydration), and spotted leaves in spring (fungal growth). You’ll need to adjust watering frequency, moving from once-weekly in winter to twice-weekly in summer. If you’re seeing black roots, cut back watering immediately and check for proper drainage.