You’ve probably noticed how expensive succulents can be at garden centers, but there’s a better way to grow your collection. With just a few basic tools and the right technique, you can transform a single plant into dozens of healthy new specimens. While traditional propagation methods work, using smart shortcuts like honey-based rooting hormone and precise timing can triple your success rate. Let’s explore the proven hacks that experienced growers use to multiply their collections efficiently.
Contents
- 1 Essential Tools and Materials for Successful Propagation
- 2 The Natural Honey Method for Better Root Development
- 3 Perfect Timing: When to Take Your Succulent Cuttings
- 4 Water Propagation vs. Soil Propagation: Which Works Best
- 5 Common Propagation Mistakes to Avoid
- 6 Choosing the Right Leaves and Stems for Propagation
- 7 Creating the Ideal Environment for New Growth
- 8 Caring for Your Propagated Succulents
- 9 Advanced Techniques for Difficult-to-Propagate Species
- 10 Fast-Track Methods for Rapid Plant Multiplication
Essential Tools and Materials for Successful Propagation
Success in succulent propagation starts with having the right tools at your disposal. You’ll need sharp, clean pruning shears or a sterile razor blade for taking cuttings, along with small pots (2-4 inches wide) filled with well-draining cactus soil.
Keep a spray bottle handy for misting leaf cuttings, and gather clean paper towels to dry your cuttings before planting. You’ll also want rooting hormone powder, though it’s optional, and a clear plastic dome or bag to create humidity.
Don’t forget small plant markers to track your propagation dates and varieties. A heating mat can speed up root development in cooler months.
The Natural Honey Method for Better Root Development
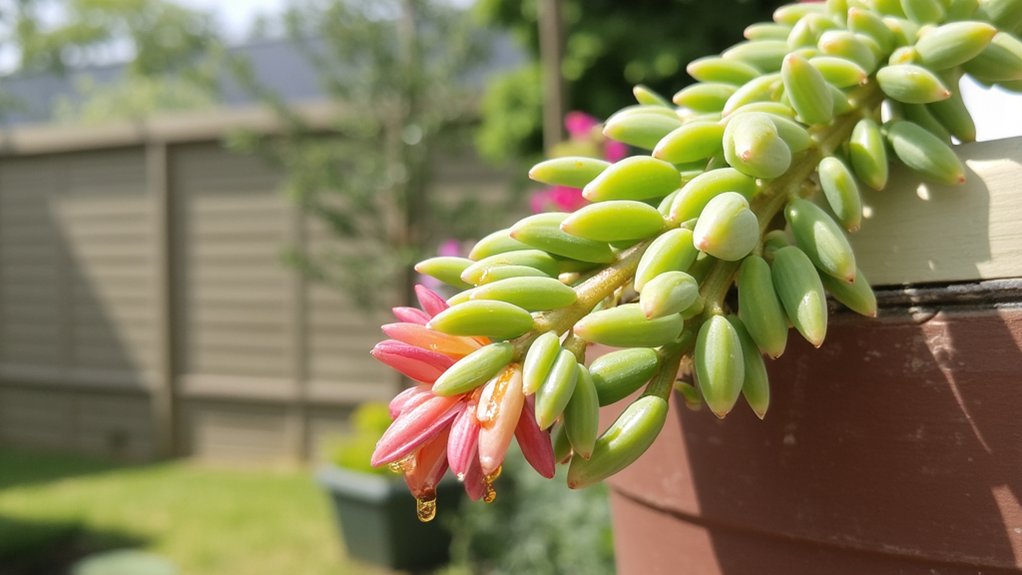
While many gardeners rely on commercial rooting hormones, raw honey serves as a natural alternative that’s probably sitting in your kitchen cabinet right now. This sweet solution contains natural enzymes and antimicrobial properties that help prevent rot while stimulating root growth.
To use honey for propagation, dip your succulent cutting’s stem into a 1:5 mixture of raw honey and water. Make sure you’ve let the cutting callus for 48 hours first. Once dipped, place the cutting in well-draining soil, and don’t water for three days to prevent the honey from washing away.
You’ll notice faster root development compared to using plain water, often within 2-3 weeks.
Perfect Timing: When to Take Your Succulent Cuttings
Since seasonal timing plays a crucial role in propagation success, you’ll want to take your succulent cuttings during the plant’s active growing period. For most succulents, this means spring through early summer, when temperatures range between 65-75°F.
Watch for signs that your plant is ready: firm, healthy leaves and stems, vibrant coloring, and new growth appearing. Don’t take cuttings during dormancy periods, typically mid-winter, as they’ll struggle to develop roots.
For best results, take your cuttings in the morning hours when plants are well-hydrated. Wait 24-48 hours after watering to verify stems aren’t waterlogged before making your cuts.
Water Propagation vs. Soil Propagation: Which Works Best
Once you’ve selected the perfect time for taking your cuttings, you’ll need to decide between water or soil propagation methods. While both techniques can be successful, each offers distinct advantages.
Water propagation lets you monitor root development clearly, typically showing results within 2-3 weeks. Simply suspend your cutting above water, ensuring the stem doesn’t touch the liquid, and watch those roots emerge.
Soil propagation more closely mimics natural growing conditions and reduces the transplant shock that water-propagated succulents might experience. Place your cutting in well-draining cactus mix, keeping the soil slightly moist until roots develop after 3-4 weeks.
Common Propagation Mistakes to Avoid
Even experienced gardeners can fall prey to common propagation pitfalls that doom their succulent cuttings from the start. Don’t rush to water your cuttings immediately after planting – wait at least 5-7 days to let the cut end callus over first.
Another major mistake is placing newly propagated cuttings in direct sunlight. Your cuttings need bright, indirect light for the first 2-3 weeks. After that, gradually introduce them to more intense light conditions.
You’ll also want to avoid using containers without drainage holes. Excess moisture leads to rot, so always choose pots with adequate drainage and use well-draining cactus soil.
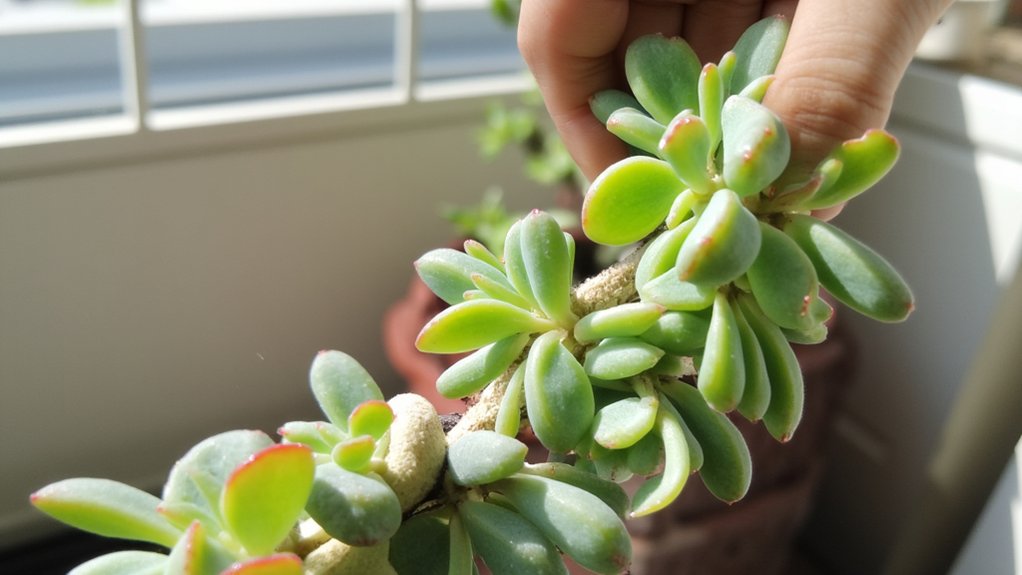
Choosing the Right Leaves and Stems for Propagation
When selecting leaves and stems for succulent propagation, you’ll need to identify specimens that are healthy, plump, and free from damage or disease. Look for mature leaves that easily twist off with a gentle motion, avoiding those that are mushy, discolored, or scarred.
For stem cuttings, choose sections that are at least 4 inches long with multiple leaf nodes. Make clean cuts just below a node using sterilized pruning shears. The ideal stems should be firm, with vibrant coloring and no signs of pest damage.
Remember to let your cuttings callus for 3-5 days before planting them, as this prevents rot and increases your success rate.
Creating the Ideal Environment for New Growth
The right growing environment can make or break your succulent propagation success. You’ll need bright, indirect sunlight, with morning sun being ideal – place your cuttings 6-12 inches from an east-facing window for best results.
Keep the temperature between 65-80°F (18-27°C), and maintain 40-50% humidity. Don’t place your props near air vents or drafty areas, as fluctuating conditions will slow growth.
For soil propagation, use a well-draining mix with 50% perlite or pumice. If you’re using the water method, maintain water levels just below the leaf or stem’s base, changing it every 4-5 days to prevent bacteria growth.
Caring for Your Propagated Succulents
Once you’ve successfully propagated your succulents, maintaining their health requires a careful balance of water, light, and nutrients. Water your new plants sparingly, allowing the soil to dry completely between waterings, typically every 7-10 days.
Place your propagated succulents in bright, indirect sunlight for 4-6 hours daily. During their first month, protect them from intense afternoon sun to prevent leaf burn. After six weeks, gradually introduce them to more direct light.
Feed your young plants with a diluted succulent fertilizer (1/4 strength) once monthly during the growing season. Monitor the leaves closely – if they’re wrinkled, increase watering; if they’re yellowing, reduce it.
Advanced Techniques for Difficult-to-Propagate Species
Because some succulent species prove stubborn to propagate through typical methods, you’ll need specialized techniques to achieve success. For challenging varieties like Echeveria ‘Black Prince’ or Haworthia, try the scooping method: carefully remove the center growth point using a sterile spoon, leaving a 1/2-inch depression.
For slow-growing species like Ariocarpus, grafting offers better results. First, slice both the rootstock and scion at 45-degree angles with a sharp blade. Align the vascular tissues precisely, then secure them with grafting clips or rubber bands for 2-3 weeks until they fuse together.
Always maintain temperatures between 70-75°F during these advanced propagation attempts.
Fast-Track Methods for Rapid Plant Multiplication
When you’re keen to expand your succulent collection quickly, strategic mass propagation techniques can help you generate dozens of new plants in record time. Start by selecting 8-10 healthy mother plants and harvest 3-4 leaves from each, ensuring clean breaks at the stem.
Create a propagation tray using a shallow container filled with fast-draining cactus mix. Space the leaves 1 inch apart, and mist lightly every 3 days. Keep the tray in bright, indirect light at 70-75°F.
For maximum success, dip leaf ends in rooting hormone and maintain 40% humidity. You’ll see tiny roots within 2 weeks and baby plants within 4-6 weeks.