You might think old containers are just junk, but they’re perfect for upcycling into planters. Let’s start with something simple, like turning tin cans into mini gardens. First, clean them thoroughly, remove labels, and punch drainage holes in the bottom using a hammer and nail. Curious how to transform other items, like cracked mugs or plastic bottles, into green havens? Stick around for some clever tricks!
Contents
Old Tin Cans
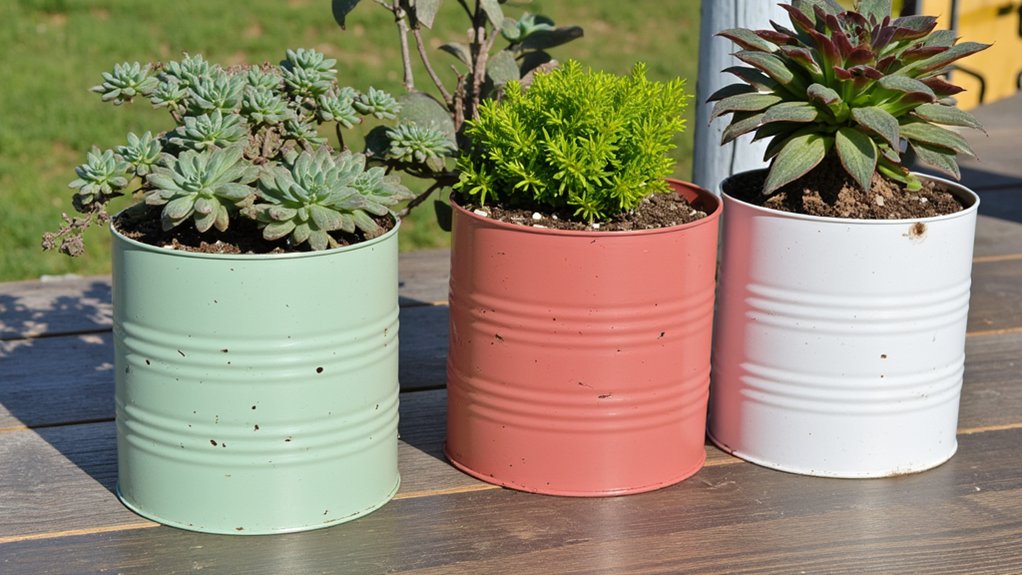
Hey, let’s kick things off with a simple idea—turning old tin cans into quirky, functional planters! You’ve got those empty soup or veggie cans lying around, so why not repurpose them? Grab a few, and let’s get started with this easy project.
First, clean the cans thoroughly with soap and water, removing labels and sticky residue. Use a hammer and a large nail to punch 3-4 drainage holes in the bottom, spacing them evenly. This takes just 5 minutes, trust me. Next, sand the sharp edges with 120-grit sandpaper for safety—don’t skip this step.
Now, paint or decorate the outside if you’d like, using acrylic paint for durability. Finally, add small pebbles, then soil, and plant your favorite herbs or succulents. See, super simple!
Vintage Mason Jars

Folks, let’s switch gears and transform those vintage Mason jars into charming planters for your space. You’ve likely got a few lying around, so why not repurpose them with style?
Start by cleaning the jars thoroughly with soap and water, ensuring no residue remains. Then, add a 1-inch layer of small pebbles at the bottom for drainage, since jars don’t have holes. Top that with 2-3 inches of potting soil, perfect for small herbs or succulents.
Next, plant your chosen greenery, pressing the soil gently around the roots. Water lightly, just enough to moisten the soil, about 1-2 tablespoons. Place the jar on a sunny windowsill, and check moisture every 3-4 days. There you go, a simple, rustic planter!
Broken Ceramic Mugs
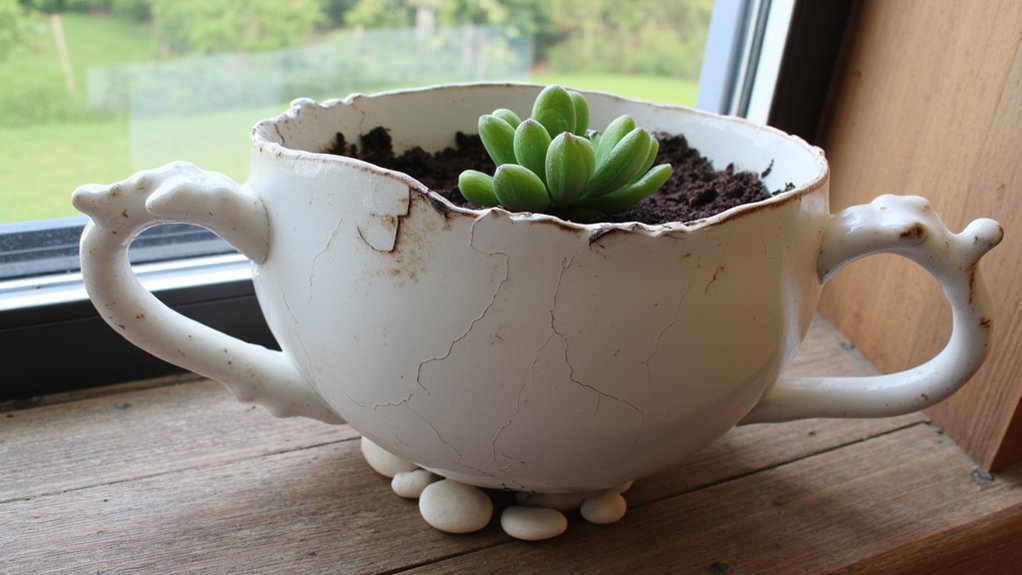
While, let’s tackle those broken ceramic mugs next and turn them into quirky little planters. Don’t toss those chipped or cracked mugs, alright? You’ve got a chance to make something unique with just a bit of effort.
First, gather your supplies: sandpaper, small pebbles, potting soil, and a tiny plant like a succulent. Use sandpaper to smooth any sharp edges on the mug’s break, taking about 5 minutes. Then, add a 1-inch layer of pebbles at the bottom for drainage, since mugs don’t have holes.
Next, fill it with potting soil, leaving ½ inch at the top. Plant your succulent, pressing the soil gently around it. Water lightly, just a tablespoon, and place it on a sunny windowsill. There you go, a cute mini planter!
Repurposed Plastic Bottles
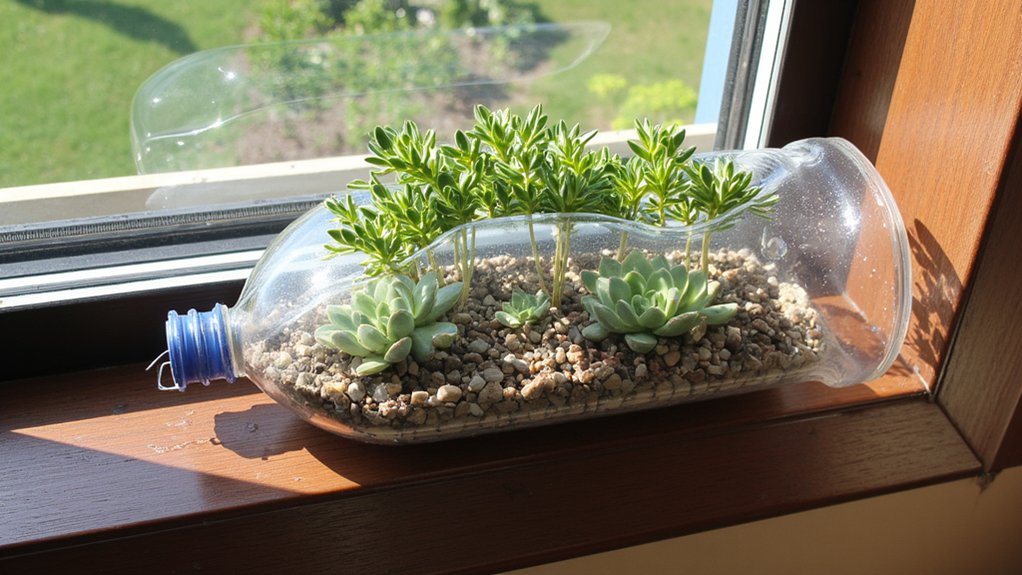
Let’s plunge into transforming those empty plastic bottles into functional planters, a super easy project for anyone. Grab a clean, 2-liter plastic bottle, and let’s get started with minimal tools. You’ll just need scissors, a marker, and some potting soil.
First, mark a line about 5 inches from the bottom, then carefully cut along it. This creates a base for your planter, nice and sturdy. Poke four small drainage holes in the bottom using the scissors’ tip. Add a 1-inch layer of small pebbles for extra drainage before filling with soil.
Now, plant your seeds or small plants, like herbs or succulents. Water lightly, and place it on a sunny windowsill. Watch it grow in just days, and you’ve upcycled with style!
Worn Wooden Crates
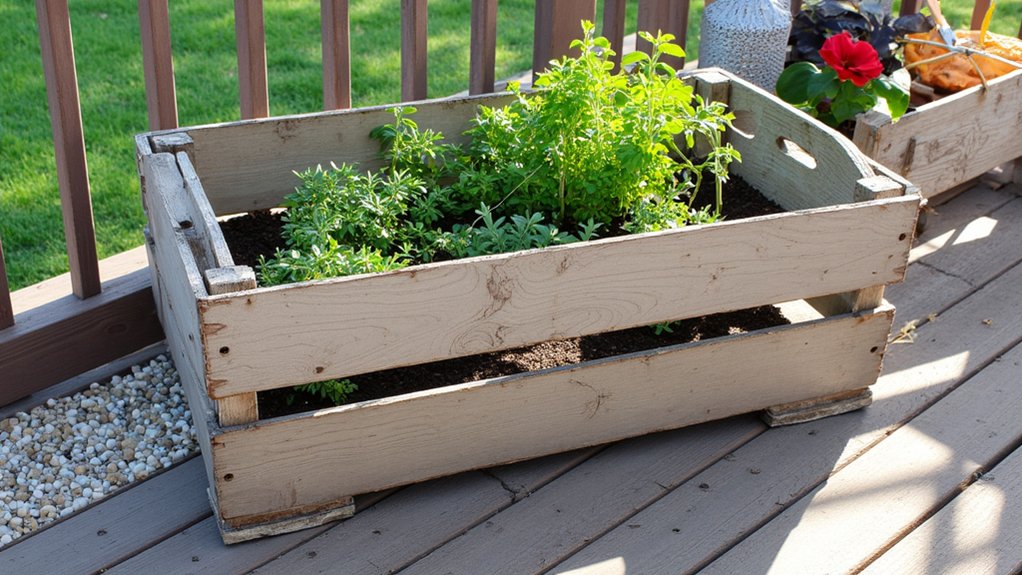
Hey, now that you’ve tackled plastic bottles, it’s time to try something a bit sturdier with worn wooden crates. These rustic boxes, often found at flea markets or in your garage, can transform into charming planters. Let’s get started with a simple project.
First, inspect your crate for splinters or loose nails, and sand rough spots with 80-grit sandpaper. Line the inside with a plastic sheet, about 1 mil thick, to prevent water leakage. Poke a few drainage holes, roughly 1/4 inch wide, through the plastic at the bottom.
Next, add a 2-inch layer of small pebbles for drainage, then fill with potting soil. Plant herbs or succulents, watering lightly. Place it on your porch, and watch it thrive!
Discarded Metal Buckets
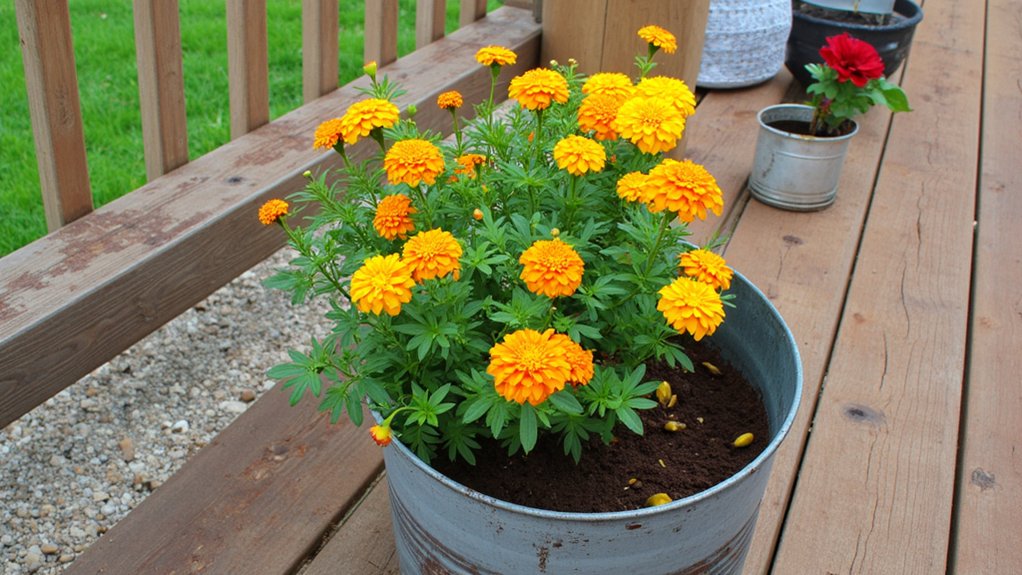
Folks, it’s time to turn those discarded metal buckets into unique, sturdy planters for your space. You’ve likely got a rusty bucket or two lying around, so let’s repurpose them with minimal effort.
First, grab a bucket—say, a 5-gallon one—and check for holes. If there aren’t any, drill three to five ¼-inch drainage holes in the bottom, using a power drill, to prevent water buildup. Line the base with small pebbles, about 2 inches deep, for extra drainage.
Next, fill it with potting soil, leaving 1 inch at the top. Plant your favorite herbs or flowers—think basil or marigolds—and water lightly. Place it on your porch or patio, and you’re done. It’s a quick project, taking just 30 minutes tops!
Used Glass Jars
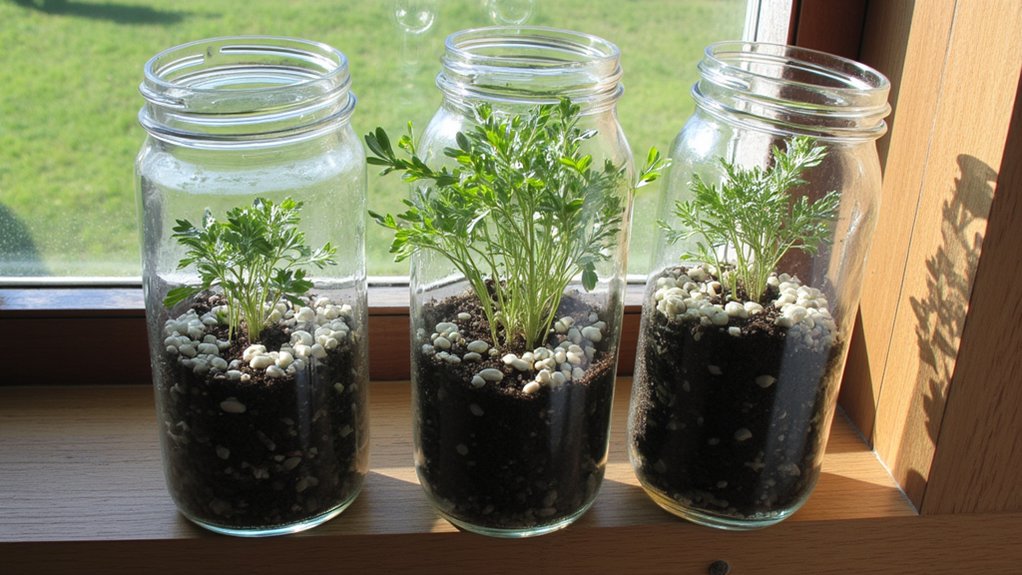
Glass jars, those forgotten relics from your kitchen, can transform into charming mini planters with a little creativity. You’ve got tons of these lying around—old jam jars, pickle containers, you name it. Let’s turn them into something useful.
Start by cleaning the jars thoroughly with warm, soapy water to remove residue. Dry them completely, as dampness can harm plants. Next, add a 1-inch layer of small pebbles at the bottom for drainage, since glass doesn’t have holes.
Then, fill with 3-4 inches of potting soil, leaving space at the top. Plant small herbs like basil or tiny succulents, pressing the soil gently around the roots. Place them on a sunny windowsill, watering lightly every 3-4 days. See, it’s that simple!
Empty Paint Cans

Old paint cans, those rusty relics in your garage, can become awesome planters with a bit of effort. Don’t toss ‘em out just yet! Grab a can, check for leftover paint, and clean it thoroughly with soapy water.
First, punch drainage holes in the bottom using a hammer and a large nail—aim for 3-5 holes, about ¼ inch wide. This prevents water buildup, keeping roots healthy. Next, sand off any rust with 80-grit sandpaper, taking maybe 10 minutes per can, then rinse it again. Line the bottom with small pebbles, about 1-2 inches deep, for extra drainage.
Finally, paint the outside with leftover acrylic paint for a fresh look. Fill with soil, plant your fave herbs, and you’re set!
Cracked Teapot Planters
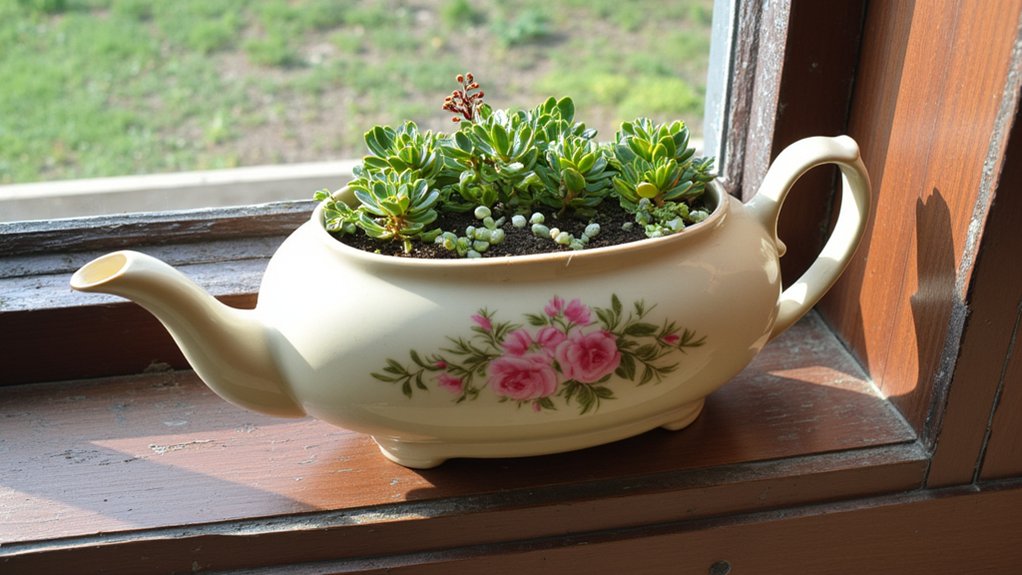
Hey there, let’s transform those cracked teapots sitting in your cupboard into unique planters. Don’t toss them out just yet; they’ve got potential. With a little effort, you’ll create quirky, eye-catching homes for small plants.
First, inspect the cracks to verify they’re not too wide—about 1/8 inch max works best. Clean the teapot thoroughly with soap and water, then dry it completely. This prevents mold from sneaking in later.
Next, line the bottom with small pebbles, about 1-2 inches deep, for drainage. Add potting soil on top, leaving 1 inch of space at the rim. Plant a small succulent or herb, something that won’t outgrow the space in a month. Water lightly, and place it on a sunny windowsill for best results.
Retired Colander Planters
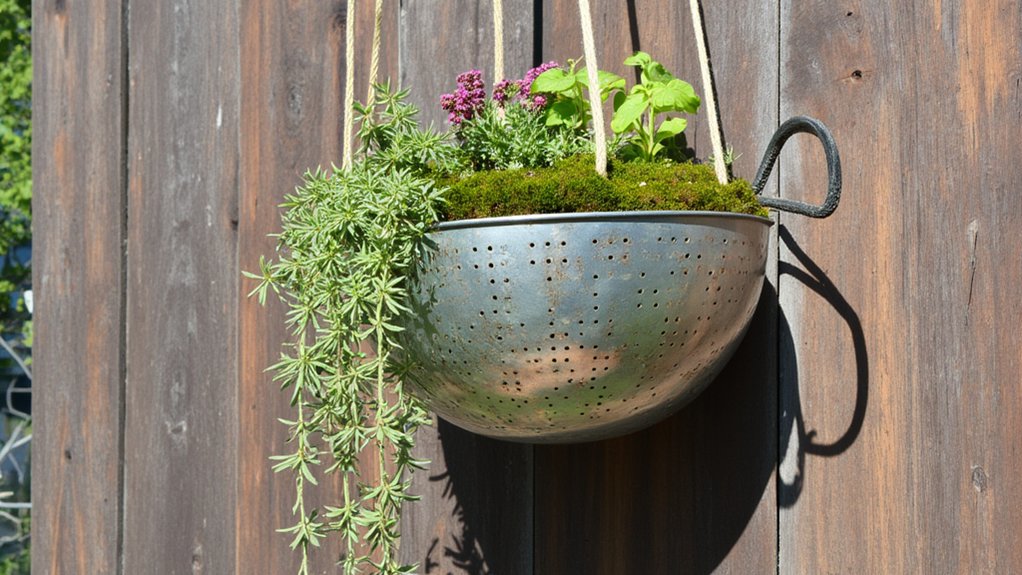
Take a look at that rusty colander you’ve got stashed away; it’s perfect for a quirky planter project. Don’t toss it out just yet. Its built-in drainage holes are ideal for plants, saving you extra work.
Start by cleaning the colander thoroughly with soap and water, removing any grime. Next, line it with a coconut fiber liner or moss, about 1/2 inch thick, to hold soil. This prevents messes while still allowing drainage through those handy holes.
Fill it with potting soil, leaving 1 inch at the top, then plant small herbs or succulents. Place it on a saucer to catch drips, and set it in a sunny spot. Water every 3-4 days, checking soil moisture. There you go, a funky, functional planter!