Hey, if you’re tight on yard space, vertical gardening’s your secret weapon. It’s all about using walls, fences, and even air to grow plants without sprawling out. Think wall-mounted boxes or hanging shelves—perfect for herbs or flowers in just 2-3 square feet. Want specifics on building a tiered ladder stand in a weekend? Stick with me for practical hacks to transform your tiny plot.
Contents
Wall-Mounted Planter Boxes
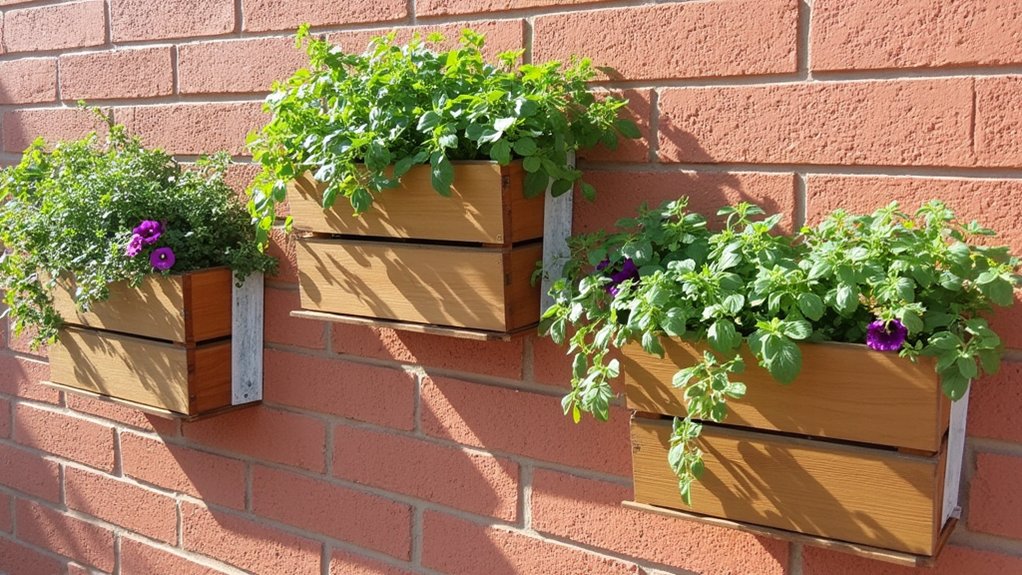
Although it might seem tricky at first, setting up wall-mounted planter boxes is a fantastic way to maximize your vertical gardening space. Don’t worry, though; you’ve got this! Start by picking a sturdy wall that gets decent sunlight, ideally 4-6 hours daily.
Next, grab some pre-made planter boxes, about 12 inches wide and 6 inches deep, from a local hardware store. You’ll need a drill, screws, and wall anchors for secure mounting. Measure and mark spots 18 inches apart on the wall, ensuring they’re level, then drill pilot holes.
Finally, attach the boxes with screws, tightening them firmly. Fill with lightweight soil, and plant herbs or small flowers. Check weekly for stability, and you’re set!
Hanging Rope Plant Shelves
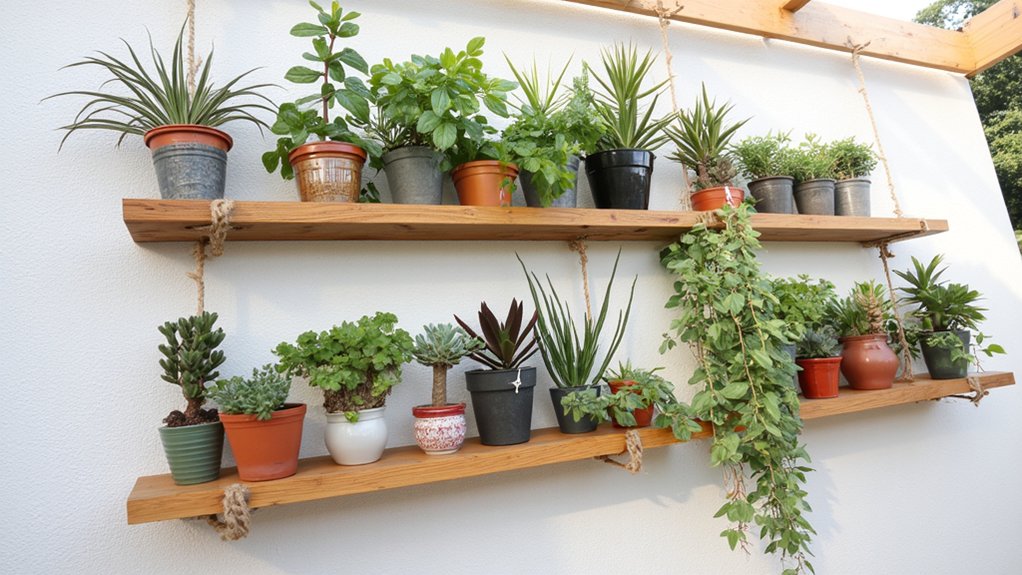
Hey, let’s plunge into making hanging rope plant shelves, a cool way to elevate your vertical garden! You’ll need sturdy rope, wooden boards, and a drill. Start by cutting four 6-foot lengths of rope, ensuring they’re equal.
Next, grab a 12-inch by 6-inch wooden board for each shelf. Drill four holes, one at each corner, about half an inch from the edges. Thread the ropes through the holes, tying knots beneath to hold the board securely. Space multiple boards 18 inches apart if you’re stacking shelves.
Hang this setup from a strong ceiling hook or beam in your yard. It takes about an hour to assemble, and boom, you’ve got a floating garden! Add small pots, and you’re set.
Tiered Ladder Plant Stands
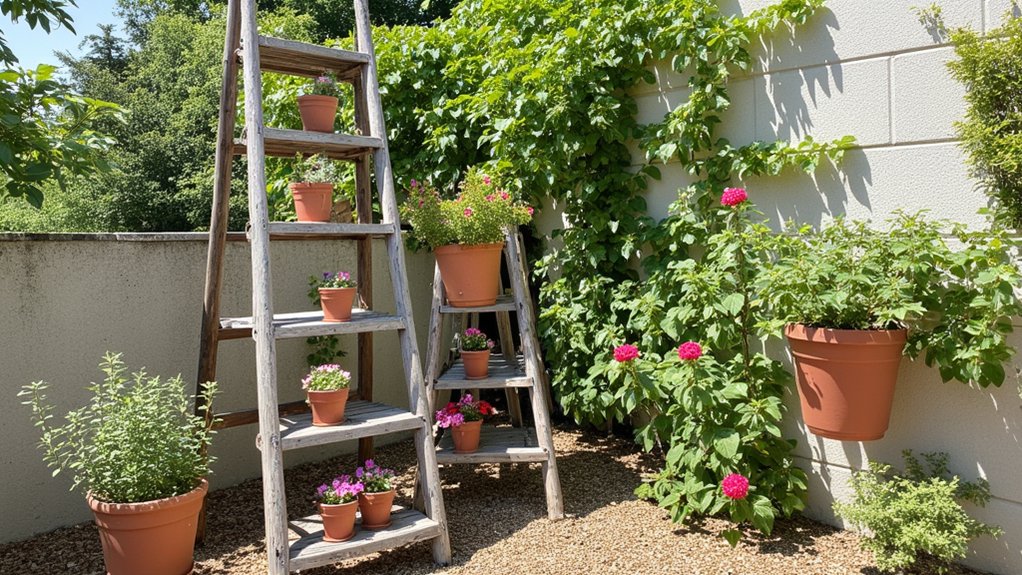
Three clever ways exist to boost your vertical garden, and tiered ladder plant stands are one of them. You’ve gotta try this space-saving trick! These stands, often 4 to 6 feet tall, let you stack plants on multiple levels, maximizing every inch.
Start by picking a sturdy ladder stand, ideally with 3 to 5 tiers, from a local garden store. Place it in a sunny spot, ensuring the base is stable on flat ground. Then, arrange your pots—use 6-inch to 10-inch ones for herbs or flowers—starting with heavier plants at the bottom for balance.
Check weekly for wobbling, and tighten screws if needed. With just 10 minutes of setup, you’re transforming your yard into a lush, vertical oasis!
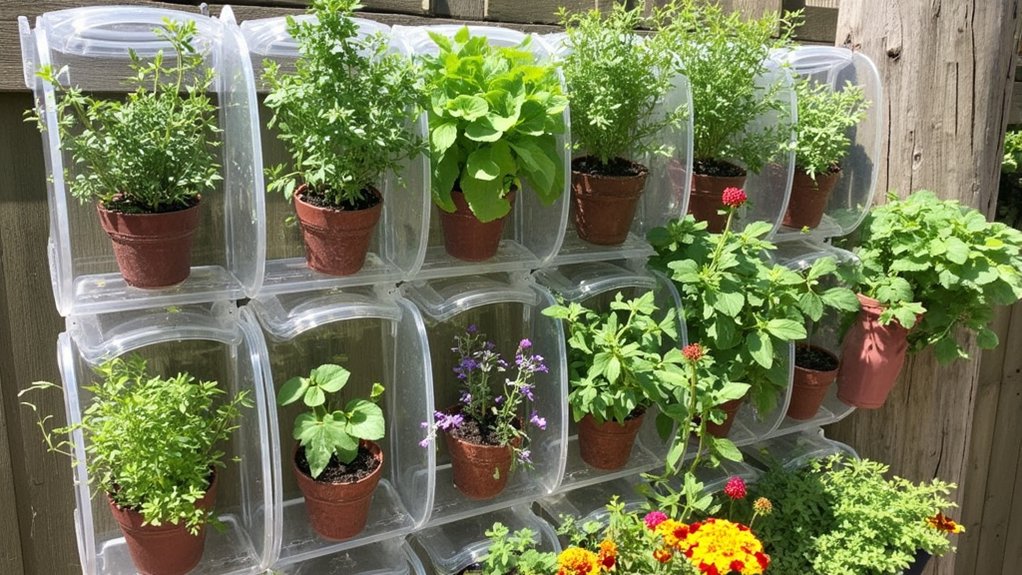
Stackable Vertical Plant Towers
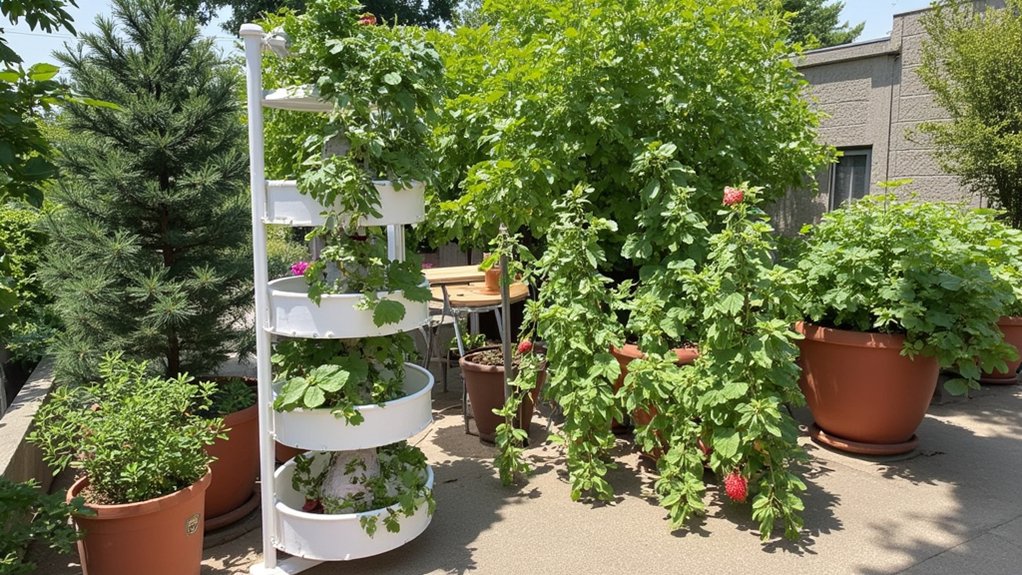
Ready for another vertical gardening gem? Let’s explore stackable vertical plant towers, a brilliant way to maximize space. These towers let you grow tons of plants, even if you’ve got a tiny yard.
Start by picking a sturdy, stackable tower system—many are about 4 feet tall with 3-5 tiers. Place it in a sunny spot, ideally getting 6 hours of light daily, and secure the base on flat ground. Fill each tier with quality potting soil, leaving an inch from the top for watering ease.
Next, plant herbs, flowers, or small veggies like lettuce in each pocket. Water from the top, letting it trickle down, and check soil moisture every 2-3 days. You’ll save space and grow a lush, towering garden!
Repurposed Gutter Gardens
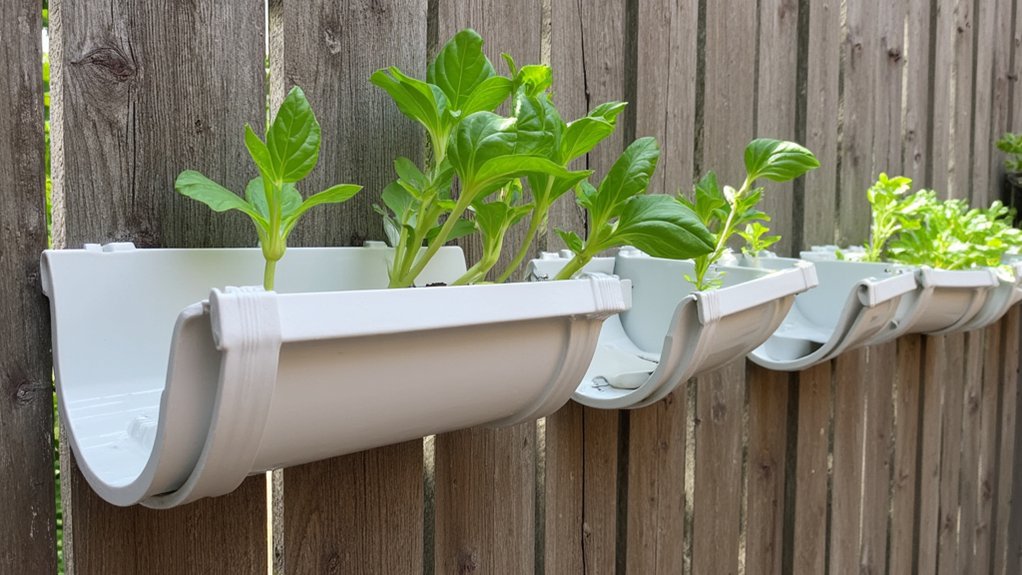
Check out this clever idea for vertical gardening with repurposed gutter gardens. You can transform old rain gutters, often just lying around, into awesome planting spaces. Grab some 3-foot sections, clean them thoroughly, and get ready to mount them.
Start by drilling small drainage holes, about every 6 inches, along the bottom of each gutter. Next, secure end caps with waterproof sealant to prevent leaks, and fill with lightweight potting soil. Mount them on a sturdy fence or wall using brackets, spacing each gutter 12 inches apart for growth room.
Plant shallow-rooted crops like lettuce, spinach, or strawberries, and water them every 2-3 days. In just a week, you’ll see sprouts popping up. Keep it simple, and watch your space-saving garden thrive!
Pallet Vertical Herb Garden
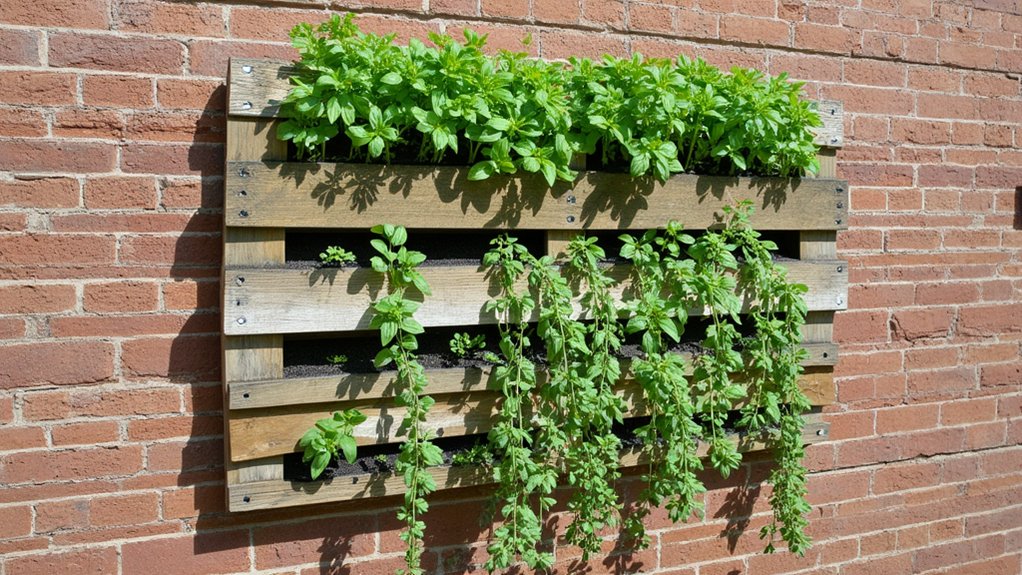
While you’re exploring vertical gardening ideas, let’s plunge into creating a pallet vertical herb garden. It’s a super simple, space-saving project. Grab an old wooden pallet, ideally 48 by 40 inches, from a local warehouse or store.
First, sand it down to remove splinters, then paint or seal it for weather resistance. Line the back and sides with landscape fabric, stapling it tightly to hold soil. This prevents messy leaks when you water. Fill the gaps with potting mix, leaving a half-inch at the top.
Now, plant herbs like basil, thyme, or mint in the openings, spacing them 6 inches apart. Water them every 2-3 days, ensuring drainage. In a week, you’ll see growth, transforming your yard!
Shoe Organizer Plant Pockets
Let’s switch gears and explore another clever vertical gardening idea with a shoe organizer for plant pockets. You’ve probably got an old over-the-door shoe organizer lying around, right? Turn it into a space-saving garden by hanging it on a sturdy fence or wall.
First, make sure it’s a fabric organizer with clear pockets, about 24 inches wide. Fill each pocket with potting soil, leaving an inch at the top for watering. Plant small herbs like basil or tiny flowers like marigolds, ensuring roots have room, roughly 3-4 inches deep.
Water them every 2-3 days, checking for drainage to avoid soggy soil. Hang it in partial sun, and you’re set! Watch your mini-garden thrive in just weeks.
Trellis Vine Structures
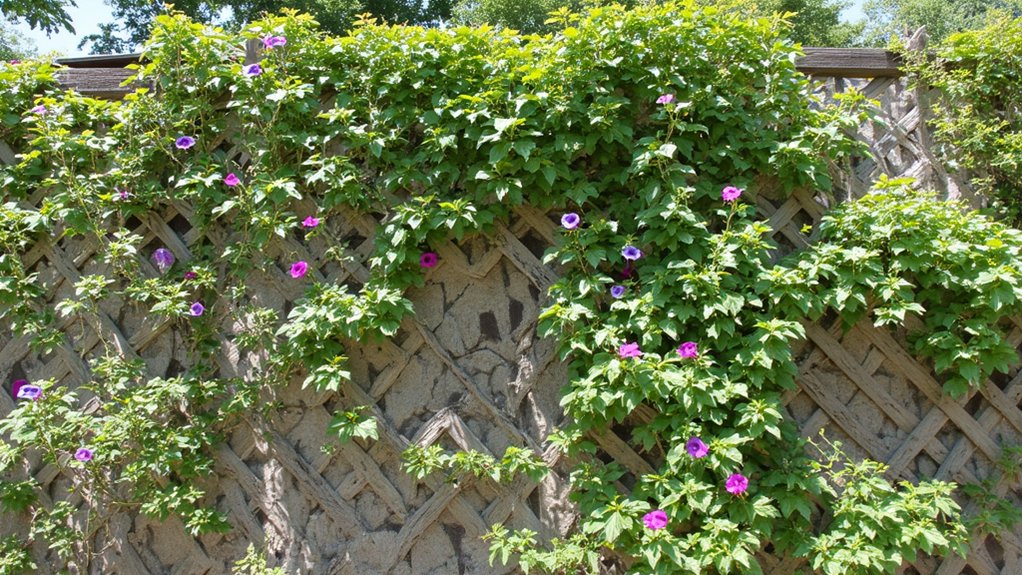
As we immerse ourselves in trellis vine structures, picture transforming a plain wall into a lush, green masterpiece. You can do this easily with a sturdy trellis. Mount a 6-foot by 3-foot wooden or metal frame against your wall, securing it with heavy-duty screws for stability.
Next, choose fast-growing vines like clematis or morning glory, which climb naturally. Plant them at the base, about 12 inches apart, in well-drained soil. Guide the tendrils onto the trellis as they grow, tying them loosely with garden twine if needed. Within 6-8 weeks, you’ll see coverage starting to form.
Water weekly, ensuring the soil stays moist, not soggy. Soon, your wall won’t just be a barrier—it’ll be a living artwork!
PVC Pipe Vertical Planters
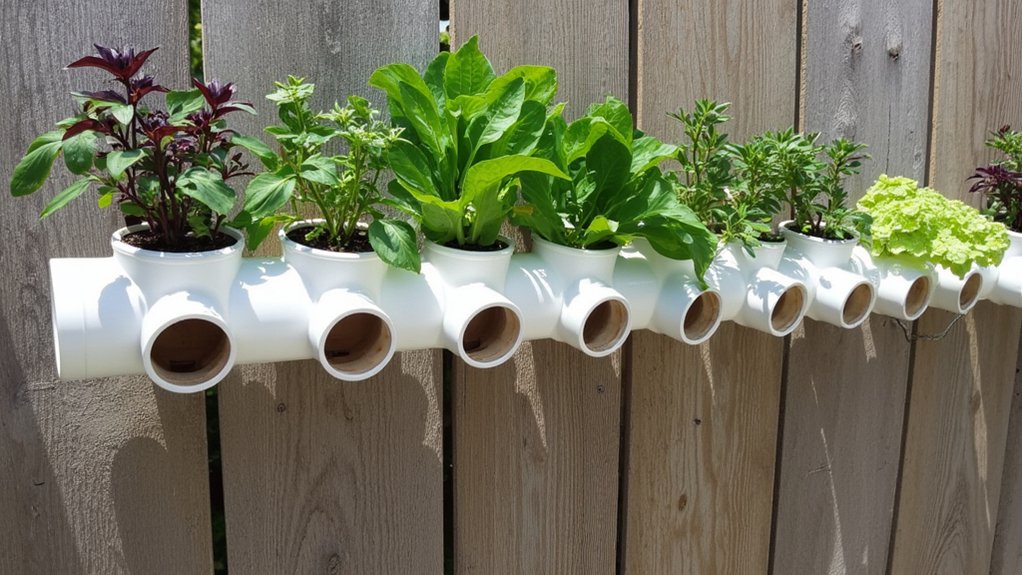
Check out this clever idea—using PVC pipes to create vertical planters for your garden space! They’re affordable, easy to set up, and perfect for tight yards.
Start by grabbing a 4-inch diameter PVC pipe, about 4 feet long, from your local hardware store. Drill 2-inch holes every 6 inches along one side, ensuring they’re evenly spaced for plants. Cap the bottom with a PVC end cap to hold soil, then stand it upright against a fence or wall.
Fill it with potting soil, and plant herbs, flowers, or small veggies like lettuce in each hole. Water from the top, letting it trickle down. In just a week, you’ll see growth, maximizing your space with minimal effort!
Cinder Block Plant Walls
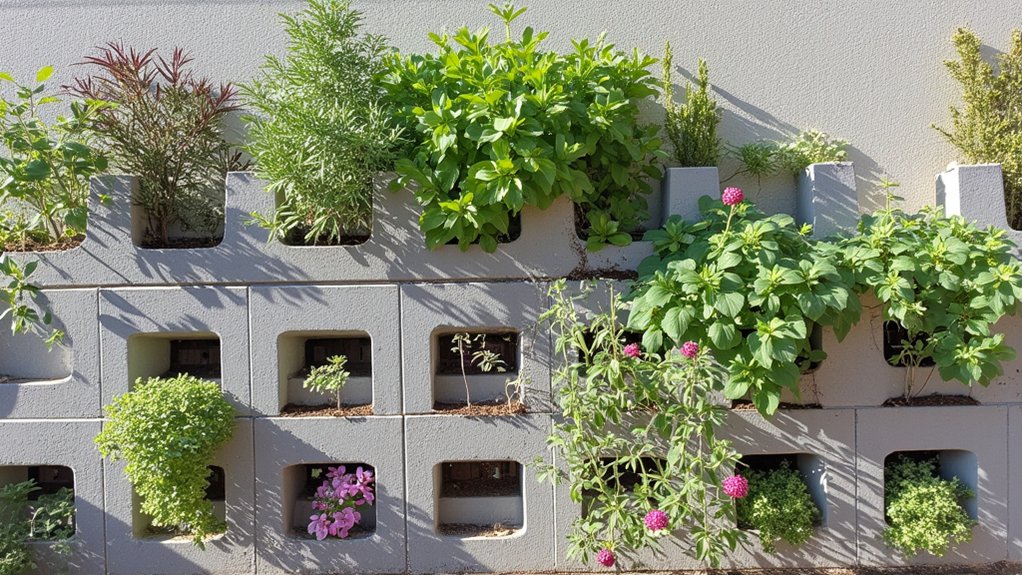
Ever thought about turning cinder blocks into a unique vertical garden wall? You can, and it’s easier than you’d think! Stack those blocks in a staggered pattern, creating a sturdy, tiered structure. Make sure each block’s holes face up, as they’ll hold your plants.
Start by placing a base layer of cinder blocks on level ground, about 3 feet wide. Add a second row, offsetting each block by half its length, roughly 8 inches, for stability. Fill the holes with potting soil, then plant small herbs or succulents—think basil or sedum—that thrive in tight spaces. Water them every 2-3 days, ensuring drainage through the block bottoms. In just a week, you’ll see growth, transforming your yard!