Your roses don’t have to become casualties of winter’s harsh grip. Most gardeners make significant mistakes during fall preparation, leading to weak, disease-prone plants come spring. You’ll need to master specific timing, techniques, and protective strategies that vary dramatically based on your climate zone and rose varieties. The difference between thriving blooms and disappointing results often comes down to understanding one essential factor that separates successful rose growers from those who struggle year after year.
Contents
- 1 Understanding Your Climate Zone and Rose Varieties
- 2 Essential Pre-Winter Watering and Feeding Practices
- 3 Proper Autumn Pruning Techniques
- 4 Cleaning Up Diseased Debris and Garden Maintenance
- 5 Mulching Strategies for Temperature Protection
- 6 Burlap Wrapping Methods for Extra Insulation
- 7 Special Care for Climbing and Container Roses
- 8 Monitoring and Removing Winter Protection
Understanding Your Climate Zone and Rose Varieties

Before you grab your pruning shears and start preparing for winter, you’ll need to understand two essential factors that determine your roses’ survival strategy. First, identify your hardiness zone. Zones 1-6 require serious protection from harsh cold and wind, while zones 7-13 need only minimal care like mulching.
Second, consider your rose varieties’ climate adaptability. Modern and old garden roses typically handle winter better than their fussier cousins. Floribundas, Hybrid Teas, and Grandifloras demand more attention and protection. Understanding these factors guarantees you’re not over-protecting hardy varieties or under-protecting vulnerable ones.
Essential Pre-Winter Watering and Feeding Practices
Once you’ve identified your roses’ winter needs, you’ll want to focus on proper hydration and nutrition timing. Water your roses consistently until the first frost, providing about two gallons weekly. Deep watering twice per week at the base prevents leaf moisture, which invites disease. Your watering frequency should remain steady through fall.
For nutrient balance, stop fertilizing in August completely. Late-season feeding encourages tender new growth that’ll freeze and damage easily. Also cease deadheading in late summer, allowing roses to form hips naturally. This signals dormancy preparation, helping your plants redirect energy toward root strengthening rather than bloom production.
Proper Autumn Pruning Techniques

While your roses enter dormancy, you’ll need to prune strategically to protect them without triggering vulnerable new growth. Wait for several frost days before cutting, using sharp shears to remove diseased, dead, or dying branches. These pruning techniques focus on preserving healthy canes while maintaining proper rose shapes for ideal airflow.
Cut back to one-third of mature height in harsh climates, creating a vase-like silhouette. Remove all diseased leaves and debris completely—defoliation may be necessary if disease was present. Avoid heavy pruning that encourages tender shoots vulnerable to frost damage.
Cleaning Up Diseased Debris and Garden Maintenance
After completing your autumn pruning, thorough cleanup becomes your next critical defense against disease. Remove all fallen leaves, diseased canes, and debris from around your roses. This garden sanitation step prevents fungal spores from overwintering in your soil.
Rake up every leaf and twig, then dispose of diseased materials in the trash or burn them—never compost infected debris. Healthy plant matter can go in your compost pile. Pull weeds growing near your roses, as they harbor pests and diseases.
Effective disease management requires cutting back nearby companion plants to improve airflow around your roses.
Mulching Strategies for Temperature Protection
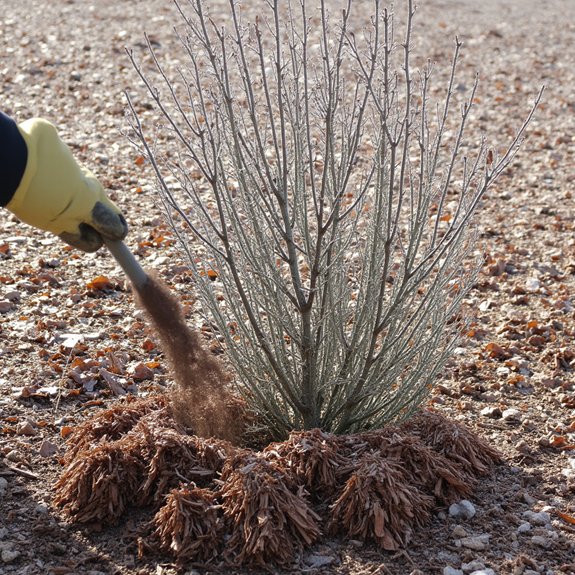
Two key benefits make mulching your most valuable winterization tool: stabilizing soil temperature and retaining essential moisture throughout winter’s freeze-thaw cycles. Effective mulch types include compost, shredded leaves, grass clippings, pine needles, and wood chips. Start your mulch application techniques by mounding compost or soil around each rose’s base, creating a 4-6 inch protective barrier. Then apply your chosen mulch material in a 2-3 inch layer, extending outward to the drip line. Remember to leave breathing room directly around the stem—this prevents rot while ensuring proper insulation for healthy spring growth.
Burlap Wrapping Methods for Extra Insulation
For roses in zones 1-6 or particularly vulnerable varieties, burlap wrapping provides the extra protection layer that mulching alone can’t deliver. These burlap benefits include wind protection and temperature stabilization around your entire plant.
Start by securing burlap around the rose’s perimeter, leaving the top open for ventilation. You can also create a burlap sack, fill it with leaves, then close with clothespins while maintaining airflow holes. For advanced insulation techniques, wrap chicken wire or tomato cages in burlap first, then surround your roses. This creates air pockets that boost insulation while preventing the fabric from directly touching branches.
Special Care for Climbing and Container Roses
While standard roses present their own winterization challenges, climbing and container roses demand specialized techniques that address their unique vulnerabilities. For climbers, use the Minnesota tip method by carefully bending long canes to the ground, securing them with stakes or weights. This climbing technique protects vulnerable growth from harsh winds and temperature swings.
Container roses need extra attention since pots freeze faster than ground soil. Wrap containers in burlap or black plastic for container insulation, then move them to unheated garages or sheds. Water deeply every two weeks to prevent dry-out during winter months.
Monitoring and Removing Winter Protection
Once April arrives and forsythia blooms signal winter’s end, you’ll need to carefully remove your roses’ protective coverings. Don’t rush this process, as late frosts can still damage exposed canes. Remove burlap wrapping and mulch gradually over several days, allowing plants to adjust slowly.
Conduct a thorough spring assessment of each rose, checking for broken canes, signs of rot, or winter damage. Cut damaged wood back to healthy tissue using sharp pruners. Make seasonal adjustments by gradually reducing mulch thickness around the base, leaving some protection until nighttime temperatures consistently stay above freezing.