Transform Your Balcony into a Green Haven
You can turn your outdoor balcony into a lush retreat with simple DIY upgrades. Start by maximizing space; a vertical garden wall, for instance, uses 2×4-foot wall-mounted planters to hold up to 15 small pots. These setups save floor space while showcasing vibrant greenery like ferns or ivy. Curious about more practical ideas to elevate your plant game? Stick around for actionable tips!
Crafting a Vertical Garden Wall
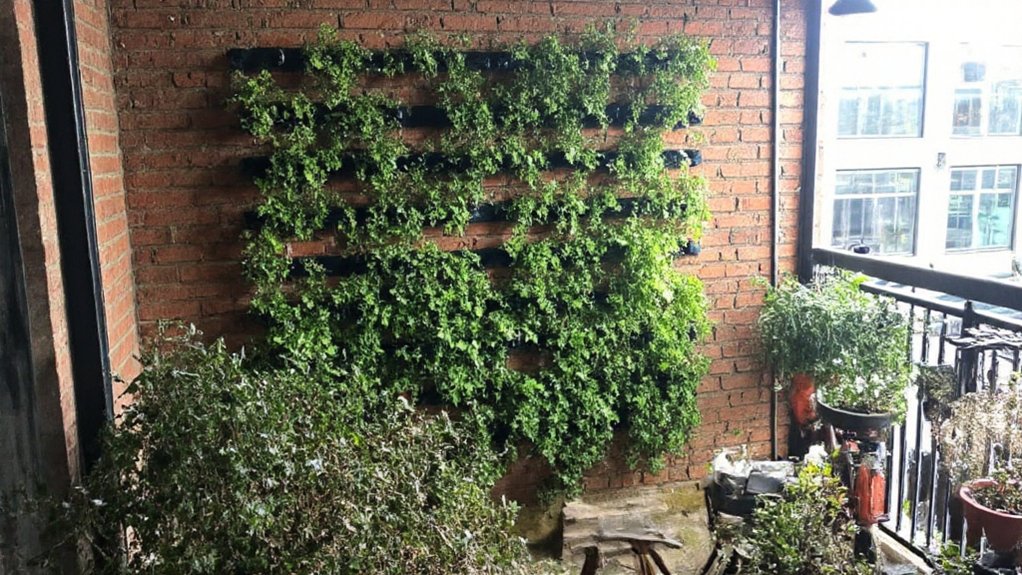
Crafting a vertical garden wall is an excellent way to maximize space on a small outdoor balcony while adding a lush, green aesthetic. This DIY project involves creating a structure that allows plants to grow upwards, using wall-mounted planters, trellises, or custom frames. Start by selecting a sturdy wall or railing on your balcony that can support the weight of the garden, then choose a design that fits your space—whether it’s a pre-made vertical planter system or a DIY setup using pallets or wire grids.
To build your vertical garden, secure the frame or planters to the wall with appropriate hardware, ensuring they are level and stable. Fill the containers with lightweight potting soil and select plants that thrive in vertical conditions, such as succulents, ferns, or trailing vines. Watering systems like drip irrigation can be integrated for easy maintenance, and positioning the garden in an area with adequate sunlight will help your plants flourish. This upgrade not only enhances the beauty of your balcony but also creates a living piece of art.
Building Custom Wooden Planters
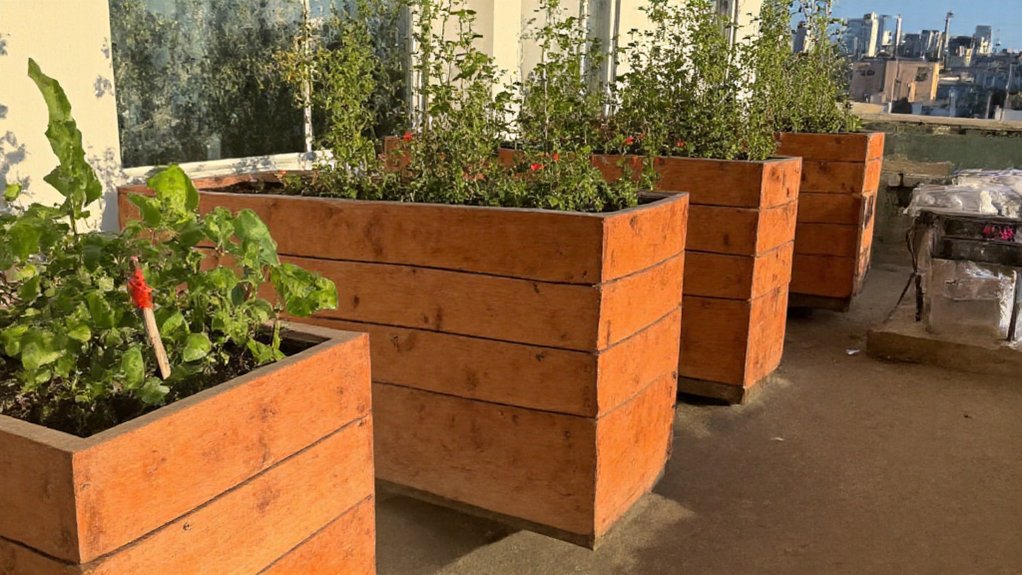
Building custom wooden planters is a fantastic way to elevate the look of your outdoor balcony while creating a personalized space for your plants. These planters can be tailored to fit any size or style, allowing you to maximize your balcony space and add a touch of rustic charm. Using basic materials like cedar or pine, which are weather-resistant and durable, you can construct sturdy boxes that withstand outdoor conditions while providing a nurturing environment for your greenery.
To start, measure your balcony area to determine the dimensions of your planter, ensuring it fits well without overcrowding. Gather tools like a saw, drill, and sandpaper, along with wood planks, screws, and a liner to prevent water damage. Cut the wood to size, assemble the frame by securing the sides with screws, and sand down rough edges for a polished finish. Add a plastic or fabric liner inside to protect the wood from moisture, then fill with soil and your favorite plants. This DIY project not only enhances your balcony’s aesthetic but also gives you the satisfaction of crafting something functional with your own hands.
Designing a Hanging Plant Display
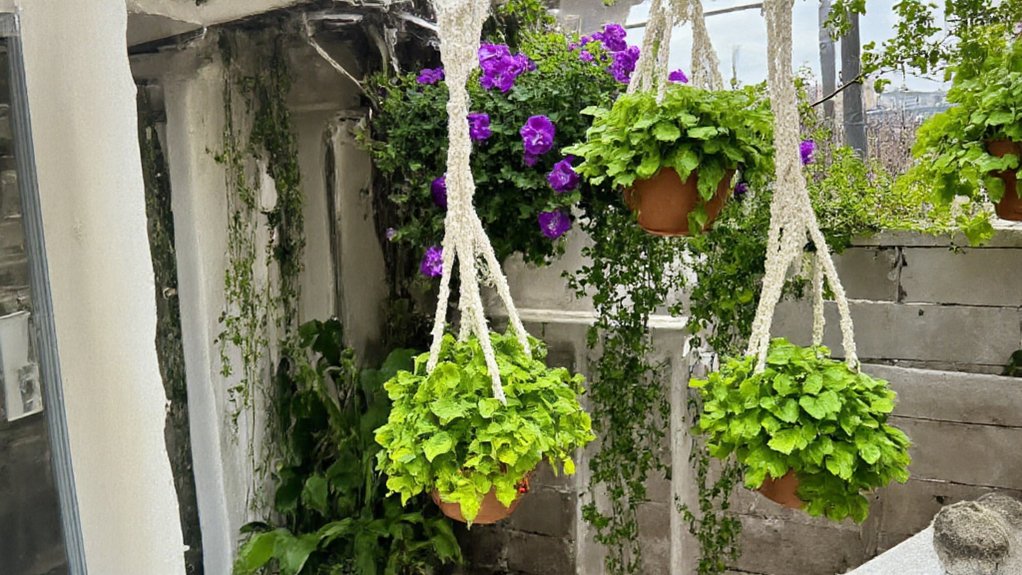
Designing a hanging plant display is a fantastic way to maximize space on your outdoor balcony while adding a lush, vertical element to your decor. Start by selecting sturdy hanging planters or baskets that can withstand outdoor conditions, guaranteeing they have proper drainage to prevent water buildup. Choose a variety of plants, such as trailing vines like pothos or ivy, or vibrant flowers like petunias, to create visual interest and texture. Consider the weight of the planters when filled with soil and plants, and use secure hooks or brackets mounted to the ceiling or railing to guarantee safety.
Position your hanging display in an area that receives the right amount of sunlight for your chosen plants, and think about the overall aesthetic by arranging them at different heights for a cascading effect. Incorporate macramé hangers or decorative chains to enhance the style, and regularly check the stability of the setup to keep your balcony both beautiful and safe.
Creating a Tiered Plant Stand
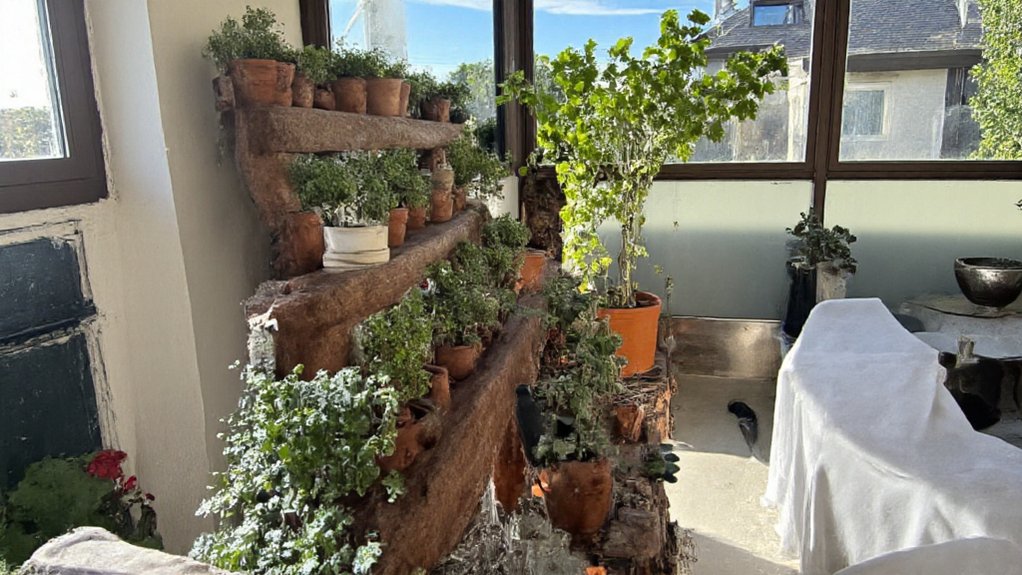
Creating a tiered plant stand is an excellent way to maximize space on your outdoor balcony while adding visual interest to your plant display. This DIY project allows you to arrange your plants at different heights, making it easier to showcase a variety of species and ensuring each plant gets adequate sunlight. A tiered stand also helps organize your balcony, preventing clutter and creating a neat, aesthetically pleasing setup.
To build a tiered plant stand, you can use materials like wood, metal, or even repurpose old furniture such as ladders or shelves. Start by designing a structure with multiple levels, ensuring stability to support the weight of your pots. Secure the tiers with screws or brackets, and consider adding a weather-resistant finish to protect the stand from outdoor elements. Once completed, arrange your plants strategically, placing taller or trailing plants on higher tiers and smaller ones below for a balanced look.
Repurposing Old Furniture for Plant Shelves
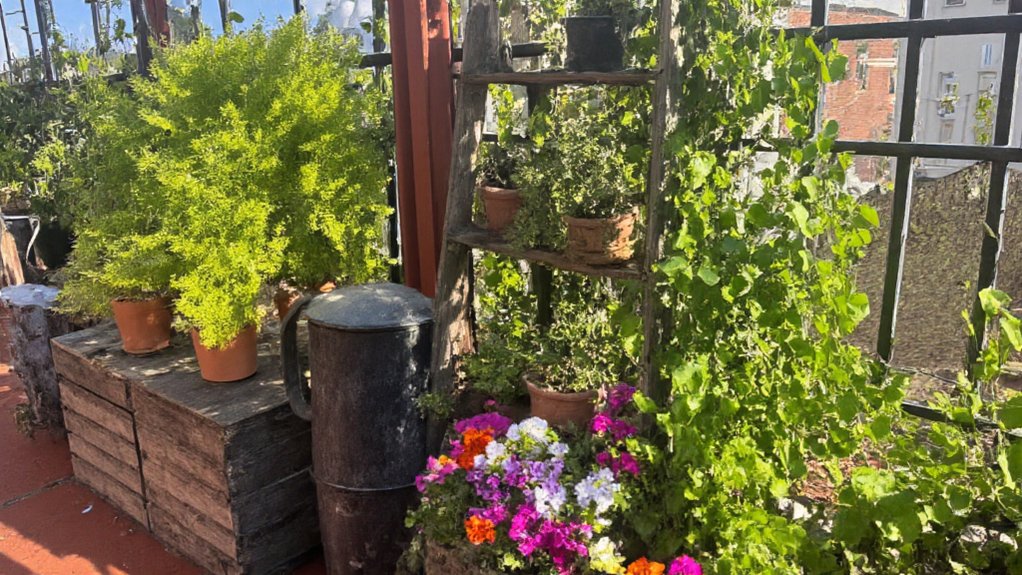
Repurposing old furniture for plant shelves is a creative and sustainable way to enhance your outdoor balcony garden. Items like old ladders, wooden crates, or unused bookshelves can be transformed into unique plant stands with minimal effort. By sanding down rough edges, applying a weather-resistant sealant, or painting the furniture to match your balcony’s aesthetic, you can create sturdy and stylish shelves to display your plants at varying heights, adding depth and visual interest to your space.
This approach not only saves money but also reduces waste by giving new life to items you might otherwise discard. For example, stacking crates vertically or horizontally can create a tiered effect for potted plants, while an old dresser with drawers removed can serve as a multi-level plant holder. Make sure the furniture is stable and secure, especially if exposed to wind, to keep your plants safe and your balcony looking organized and vibrant.
Installing a Simple Trellis for Climbers
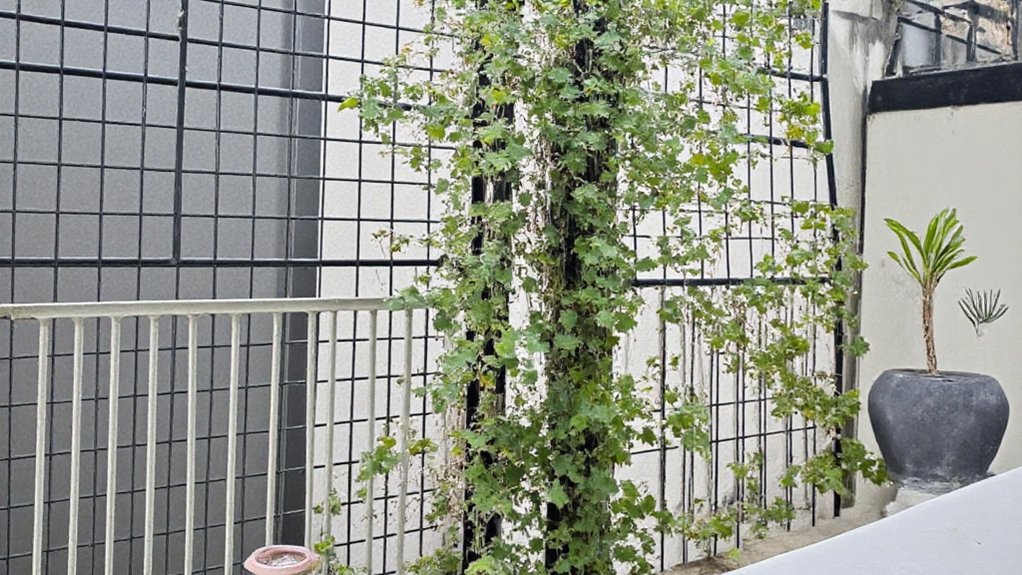
Installing a simple trellis for climbers is an excellent way to maximize vertical space on your outdoor balcony while adding a lush, green aesthetic. A trellis provides support for climbing plants like ivy, clematis, or morning glories, allowing them to grow upward and create a natural privacy screen or decorative feature. This upgrade is both functional and visually appealing, transforming a plain balcony into a vibrant garden space.
To install a trellis, start by selecting a sturdy, weather-resistant material such as wood, metal, or plastic that suits your balcony’s style. Secure the trellis to a wall or railing using brackets or heavy-duty zip ties, ensuring it is stable enough to support the weight of mature plants. Position it in a spot with adequate sunlight for your chosen climbers, and plant them at the base, guiding their tendrils or vines onto the trellis as they grow. With minimal effort, this simple addition can elevate your balcony’s charm and greenery.
Making a DIY Herb Garden Box
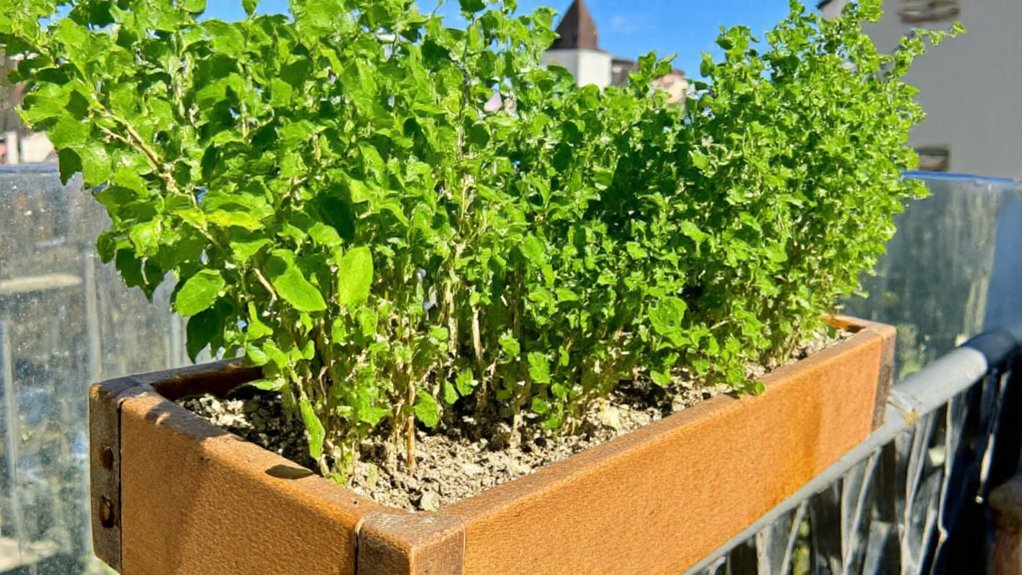
Creating a DIY herb garden box is a fantastic way to bring fresh flavors to your balcony while adding a touch of greenery. This project is simple, affordable, and perfect for small spaces, allowing you to grow herbs like basil, mint, thyme, or rosemary right at your fingertips. All you need is a wooden box or crate, some basic tools, and a few materials to get started.
Start by selecting a sturdy container, such as a wooden planter box or even a repurposed crate, ensuring it has proper drainage holes to prevent waterlogging. Line the box with a breathable landscape fabric to keep the soil in place, then fill it with a high-quality potting mix suitable for herbs. Plant your chosen herbs, spacing them appropriately to allow for growth, and place the box in a sunny spot on your balcony since most herbs thrive in at least 6 hours of sunlight daily. Water regularly, keeping the soil moist but not soggy, and soon you’ll have a thriving mini garden to enhance your cooking and balcony aesthetic.
Adding Decorative Pebble Pathways
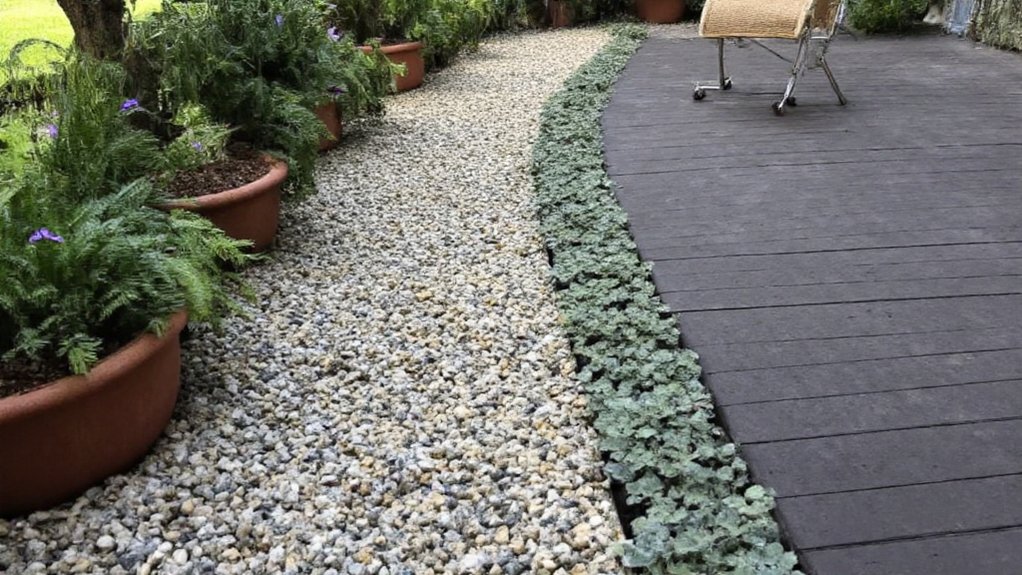
Adding decorative pebble pathways to your outdoor balcony can elevate the aesthetic appeal while creating a functional and low-maintenance design element for your plant space. Pebbles come in various colors, sizes, and textures, allowing you to customize a pathway that complements your balcony’s style and plant arrangements. This simple DIY project can define specific areas, such as a walking path between potted plants or a border around a seating nook, while also helping to reduce soil erosion and retain moisture for nearby plants.
To create a pebble pathway, start by planning the layout and marking the desired path with string or chalk. Lay down a weed barrier fabric to prevent unwanted growth, then spread a layer of pebbles evenly over the area, ensuring a depth of about 2-3 inches for stability. You can mix different pebble types or add larger stones for visual interest, making the pathway a striking feature that ties your balcony garden together.
Constructing a Mini Greenhouse Frame
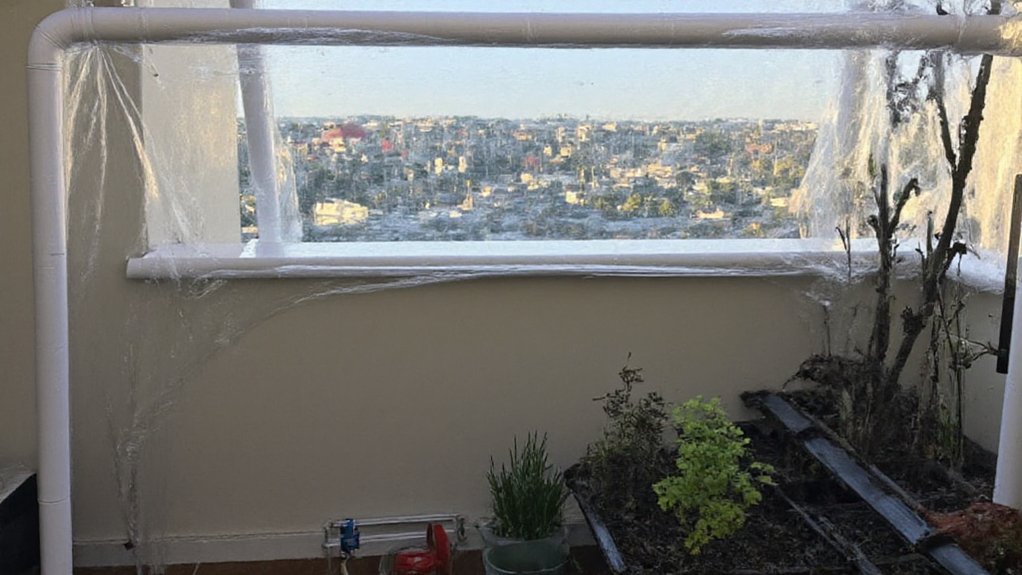
Constructing a mini greenhouse frame is a fantastic way to protect your balcony plants from harsh weather and extend their growing season. This simple structure can be made using affordable materials like PVC pipes, wood, or metal rods, and covered with plastic sheeting or greenhouse film to create a controlled environment. Start by measuring your balcony space to determine the size of the frame, ensuring it fits comfortably without obstructing walkways. Assemble the frame by creating a rectangular or dome-shaped structure, securing the joints with connectors or screws for stability.
Once the frame is built, cover it with your chosen material, ensuring it is tightly secured to withstand wind and rain. Add a door or flap for easy access to tend to your plants, and consider placing the greenhouse in a spot that receives ample sunlight. This mini greenhouse will help maintain warmth and humidity, ideal for starting seedlings or growing delicate plants year-round on your balcony.
Setting Up a Drip Irrigation System
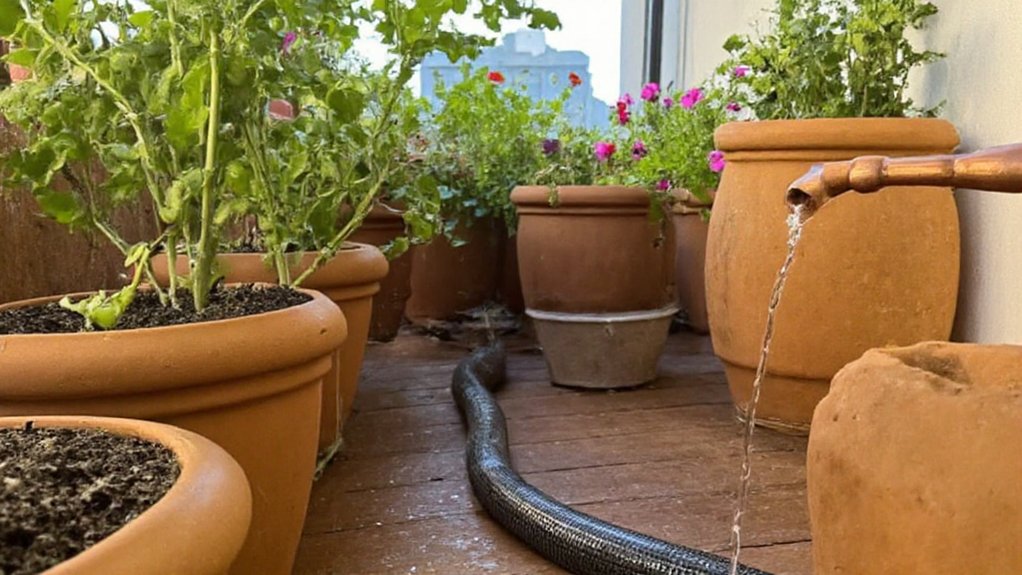
Setting up a drip irrigation system is a game-changer for maintaining a thriving balcony garden with minimal effort. This system delivers water directly to the roots of your plants through a network of tubes, emitters, and connectors, ensuring they receive a consistent and efficient supply of moisture. It’s especially useful for busy gardeners or those with limited time, as it automates watering and reduces water waste compared to traditional methods.
To set up a basic drip irrigation system, start by connecting a water source, such as a faucet or rain barrel, to a mainline tube. Attach smaller drip lines or emitters to target specific pots or planters, adjusting the flow rate to meet each plant’s needs. Many kits are available for purchase and come with easy-to-follow instructions, making installation straightforward even for beginners. With this system in place, your balcony plants will stay hydrated, allowing you to focus on enjoying your green space.