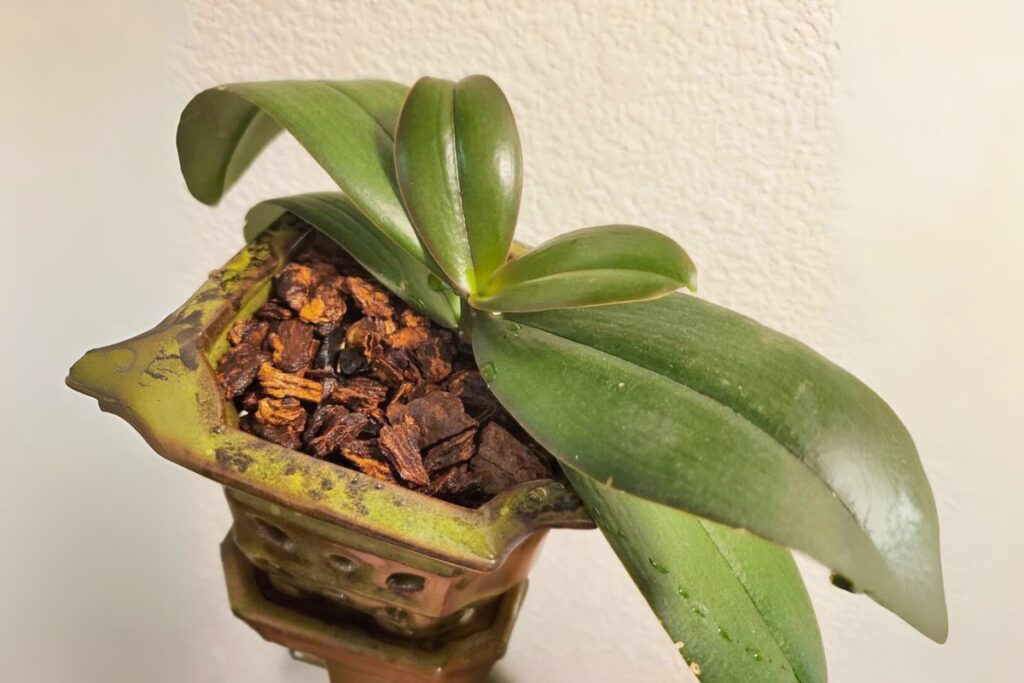
Picture an orchid clinging to a towering rainforest tree, its roots dancing in the humid air between fragments of bark and moss. You’ll find that recreating these natural conditions is vital for your orchid’s survival in an indoor environment. While you might be tempted to plant your orchid in regular potting soil, that’s a common mistake that can lead to root rot and plant death. Understanding why orchid bark is essential will transform how you care for these elegant plants.

Contents
- 1 The Natural Habitat of Orchids and Their Growing Requirements
- 2 What Makes Orchid Bark Different From Regular Potting Soil
- 3 Key Components and Types of Orchid Bark Mixes
- 4 Benefits of Using Orchid Bark for Indoor Cultivation
- 5 How to Choose the Right Orchid Bark for Your Plants
- 6 Proper Maintenance and Replacement of Orchid Bark Medium
The Natural Habitat of Orchids and Their Growing Requirements
While orchids can be found growing on almost every continent, most cultivated species originate from tropical and subtropical regions where they’ve adapted to life in the forest canopy. As epiphytes, they naturally grow attached to tree bark, collecting nutrients from rainwater and decomposing organic matter that falls from above.
In their native habitat, orchid roots receive excellent airflow and quick drainage. You’ll notice they don’t grow in soil but rather anchor themselves in loose, chunky materials. Their thick, white roots, called velamen, are specially designed to quickly absorb water and nutrients while allowing excess moisture to drain away.
What Makes Orchid Bark Different From Regular Potting Soil
The fundamental difference between orchid bark and regular potting soil lies in their structure and water retention properties. While regular potting soil is dense and holds water like a sponge, orchid bark creates air pockets that allow roots to breathe and drain quickly.
You’ll notice that orchid bark consists of large, chunky pieces of fir or pine bark, ranging from 1/2 to 1 inch in size. This coarse texture mimics the natural environment where orchids grow as epiphytes, clinging to tree bark in tropical forests.
Unlike potting soil’s compact nature, orchid bark’s loose structure prevents root rot and provides essential airflow to your orchid’s root system.
Key Components and Types of Orchid Bark Mixes
Professional orchid growers typically blend several key materials to create ideal bark mixes for different species. You’ll find fir bark as the primary component, usually in medium-grade chunks that measure 1/2 to 3/4 inch across.
Most quality mixes also contain perlite and charcoal, typically in a 5:2:1 ratio with bark. The perlite improves drainage and prevents compaction, while horticultural charcoal helps purify the root zone and absorb excess nutrients.
For moisture-loving orchids, you’ll want to add sphagnum moss at 10-20% of the total volume. This helps retain water without making the mix too soggy or dense.
Benefits of Using Orchid Bark for Indoor Cultivation
Three major advantages make orchid bark an excellent substrate choice for indoor orchid cultivation. First, you’ll notice superior drainage and aeration, as the chunky texture creates air pockets that prevent root rot and allow roots to breathe properly.
Second, bark’s natural decomposition process gradually releases nutrients over 12-18 months, providing a steady food source for your orchids. You’ll need to repot less frequently than with moss or soil-based media.
Finally, bark’s weight and stability help anchor your orchids securely, preventing toppling while allowing roots to grip and expand naturally through the medium. This mimics their natural epiphytic growing conditions.
How to Choose the Right Orchid Bark for Your Plants
Selecting proper orchid bark often puzzles both new and experienced growers. When choosing bark, you’ll want to match the size to your orchid’s roots – fine grade (1/8 to 1/4 inch) for smaller species like Phalaenopsis, medium grade (1/2 inch) for standard-sized Cattleyas, and large grade (3/4 to 1 inch) for mature specimens.
Look for fresh, high-quality bark that’s neither dusty nor decomposed. It should have a rich brown color and slight springiness when squeezed. Quality brands like Orchiata or Better-Gro offer pre-treated bark that’s ready to use, while generic options may need soaking for 24 hours before potting.
Proper Maintenance and Replacement of Orchid Bark Medium
You’ll need to replace your orchid’s bark medium every 1-2 years, as the organic materials naturally decompose and compact over time. Before using fresh bark mix, soak it in warm water for 24 hours to leach out any tannins and soften the pieces. To determine if it’s time for new bark, gently squeeze a handful of the existing medium – if it feels mushy or breaks down easily between your fingers, it’s ready for replacement.
When to Replace Bark
Regular replacement of orchid bark is essential for maintaining healthy roots and preventing common growing problems. You’ll need to replace your bark medium every 1-2 years, as it naturally decomposes and loses its ability to provide proper aeration and drainage.
Watch for these signs that it’s time to replace your bark: dark brown or black coloring, mushy texture when squeezed, or a strong, earthy smell. When your orchid’s roots start turning brown or rotting, that’s often a clear indicator your medium has broken down too much.
Plan your bark replacement for spring or early summer, when your orchid’s actively growing new roots.
Preparing Fresh Bark Mix
Before you introduce fresh bark into your orchid pot, proper preparation guarantees ideal growing conditions and prevents potential problems. Start by soaking your new bark mix in lukewarm water for 24 hours, which helps remove dust and begins the decomposition process.
Next, drain the bark and rinse it thoroughly with clean water. For best pH balance, you’ll want to boil the bark for 10-15 minutes, then let it cool completely. This sterilizes the medium and removes any tannins that could harm your orchid’s roots.
Finally, spread the bark on newspaper to dry until it’s just slightly damp, not wet, before use.
