Root rot strikes pothos plants with devastating efficiency, turning vibrant green foliage into yellowing, wilted disappointment within days. This silent killer operates below the soil surface, where waterlogged conditions create the perfect breeding ground for destructive fungi. Most plant owners discover the problem too late, when black, mushy roots have already compromised their beloved pothos beyond simple fixes, requiring immediate intervention to save what remains.

Contents
- 1 Recognizing the Warning Signs of Root Rot in Your Pothos
- 2 Why Root Rot Develops and Spreads So Quickly
- 3 Emergency Response: First Steps When You Suspect Root Rot
- 4 Surgical Precision: Removing Infected Roots Properly
- 5 Creating a Fresh Start With Proper Repotting Techniques
- 6 Transforming Your Watering Habits to Prevent Future Problems
- 7 Salvaging Hope: What to Do When Root Damage Is Extensive
- 8 Building a Defense System Against Future Root Rot Attacks
Recognizing the Warning Signs of Root Rot in Your Pothos
While Pothos plants are typically resilient houseplants, they can quickly succumb to root rot when conditions become too moist. Early root identification becomes essential when leaves suddenly wilt or yellow, especially multiple leaves along the same vine. Check for mushy, brown stems starting at the soil line, which signals advanced fungal damage.
Effective moisture management requires recognizing soggy soil conditions immediately. Stunted growth during peak seasons indicates compromised roots, while fungus gnats buzzing around your plant suggest overly wet conditions. The final confirmation comes from inspecting roots directly—healthy roots appear firm and white, not soft and brown.
Why Root Rot Develops and Spreads So Quickly
How does a seemingly healthy Pothos transform into a wilted, yellowing mess in just days? The root causes stem from fungal diseases that thrive in waterlogged conditions. When moisture levels remain consistently high, oxygen gets displaced from soil pockets, suffocating the roots. This creates perfect breeding grounds for harmful fungi that attack weakened root tissue.
Once established, these fungi spread rapidly through the root system, eroding plant material and blocking nutrient uptake. The damage escalates quickly because compromised roots cannot absorb water properly, creating a cascade effect that impacts the entire plant within days.
Emergency Response: First Steps When You Suspect Root Rot
Speed becomes the deciding factor between saving a Pothos and losing it entirely to root rot. Emergency measures start with immediate plant removal from its container, as every hour counts when fungal disease spreads. The first immediate actions involve gently shaking off soil and inspecting the root system for brown, mushy sections. Gardeners should wash roots thoroughly under lukewarm water, removing all traces of contaminated soil. Quick assessment determines whether enough healthy, white roots remain for recovery. If soft, dark roots dominate the system, propagation becomes the only viable option for preserving the plant’s genetic material.
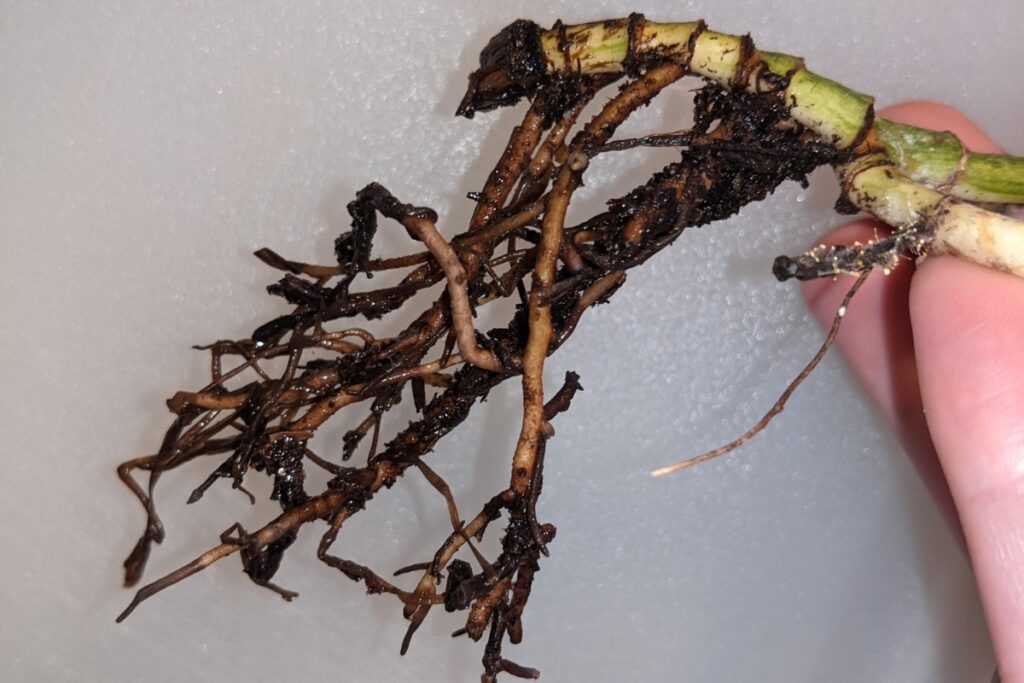
Surgical Precision: Removing Infected Roots Properly
Sharp, sterilized pruning shears become the surgeon’s scalpel in this critical phase of root rot treatment. Proper root assessment requires examining each root individually, identifying firm white sections versus soft brown decay. Cut decisively at least half an inch above any rotted area, ensuring no compromised tissue remains. Clean cutting techniques demand wiping shears with rubbing alcohol between cuts to prevent cross-contamination. Remove entire root sections if damage extends throughout, focusing on preserving healthy growth. Work methodically from most damaged to least affected roots. Remember, aggressive trimming now prevents future spread and gives your Pothos the best recovery chance possible.
Creating a Fresh Start With Proper Repotting Techniques
Every successful repotting begins with selecting the right container, one that provides adequate drainage while giving roots room to recover. Choose a pot slightly larger than the previous one, ensuring multiple drainage holes prevent future waterlogging.
Repotting essentials include fresh, well-draining potting mix specifically designed for houseplants. Avoid reusing old soil, which may harbor lingering fungal spores. Position the cleaned Pothos at the same depth as before, gently firming soil around healthy roots.
Quality soil selection makes the difference between recovery and relapse. Water lightly after repotting, allowing excess moisture to drain completely through the bottom holes.
Transforming Your Watering Habits to Prevent Future Problems
After successfully repotting a recovering Pothos, the most critical step involves establishing a watering routine that prevents moisture-related disasters from recurring. Proper watering frequency means checking soil moisture every 3-4 days during growing seasons, extending to weekly intervals in winter. Insert your finger 1-2 inches deep into the soil; only water when the top layer feels completely dry.
Consistent monitoring prevents the soggy conditions that foster fungal growth. Establish a weekly inspection schedule, noting how quickly your specific environment dries the soil. This personalized approach guarantees your Pothos receives adequate hydration without creating the waterlogged conditions that originally caused root rot problems.
Salvaging Hope: What to Do When Root Damage Is Extensive
Sometimes the damage runs too deep, leaving gardeners staring at a Pothos with completely brown, mushy roots that crumble at the slightest touch. When root inspection reveals total devastation, plant recovery becomes impossible through traditional repotting methods. The harsh reality is that severely damaged plants must be discarded.
However, hope isn’t lost. Before tossing everything, examine the vines for healthy sections above the soil line. Cut these healthy portions below nodes using sharp shears, then root them in water. This propagation method creates new plants from the original’s genetics, fundamentally giving your Pothos a fresh start.
Building a Defense System Against Future Root Rot Attacks
Prevention forms the strongest weapon against root rot, requiring gardeners to establish proper watering schedules and drainage systems from the beginning. Effective preventive practices include checking soil moisture weekly, allowing the top inch to dry between waterings, and ensuring pots have adequate drainage holes.
Smart soil selection plays a significant role in defense strategies. Choose well-draining potting mixes that contain perlite or bark chunks, avoiding heavy soils that retain excessive moisture. Regular plant inspections help catch early warning signs before damage spreads.
Consistent care routines, proper container sizing, and environmental monitoring create lasting protection against future fungal attacks.