Are you looking to add more monstera plants to your collection? Look no further, in this blog post, we will be discussing how to propagate monstera in an easy and detailed manner. Monstera plants are known for their large, tropical leaves and can be a beautiful addition to any home. However, purchasing new plants can get costly, that’s why propagating monstera can be a great way to grow new plants and expand your collection without breaking the bank.
We will be walking you through the steps of propagating monstera, from selecting the right stem to caring for your new plant, so you can have a successful propagation experience. Whether you’re a seasoned gardener or new to the game, this guide on will have you growing new plants in no time.

Contents
- 1 How To Propagate Monstera
- 2 How Long Do Monstera Cuttings Take To Root?
- 3 Can You Propagate Monstera From A Leaf?
- 4 Is It Better To Propagate Monstera In Water Or Soil?
- 5 How Long Do Monstera Cuttings Last In Water?
- 6 Can You Propagate Monstera Without Root?
- 7 Can I Propagate Monstera Without Node?
- 8 How Do You Find Nodes In Monstera?
- 9 Do You Need An Aerial Root To Propagate Monstera?
- 10 Conclusion
How To Propagate Monstera
1. Propagation By Stem Cuttings
Monstera plants can be propagated by stem cuttings, a method that involves taking a cutting from a mature plant and rooting it in water or soil to create a new plant. This method is relatively easy and can be a cost-effective way to expand your monstera collection.
To propagate monstera by stem cuttings, you will need the following materials:
- A healthy, mature monstera plant
- A clean, sharp pair of scissors or pruning shears
- Rooting hormone powder (optional)
- A small pot or container filled with well-draining potting mix (if rooting in soil)
- A container filled with water (if rooting in water)
- A plastic bag or clear plastic container (to create a mini greenhouse)
Rooting Cuttings In Soil
Here are the steps to propagate monstera by rooting stem cuttings in soil:
- Select a healthy stem that is at least 6 inches long and has at least 2-3 nodes (the small bumps on the stem where leaves will grow). Make sure the stem is not too thick or woody and that it is free of any pests or diseases.
- Using your scissors or pruning shears, make a clean cut just below a node. Try to make the cut at a 45-degree angle, this will increase the surface area for rooting.
- If desired, you can dip the cut end of the stem into rooting hormone powder to promote root growth.
- Next, insert the cutting into a small pot or container filled with well-draining potting mix. Make sure the cutting is firmly planted and the nodes are covered with soil.
- To create a mini greenhouse, you can place the pot or container in a plastic bag or clear plastic container. This will help keep the humidity and temperature high, which is ideal for rooting.
- Place the container in a warm and bright spot, but not in direct sunlight.
- Keep the soil consistently moist and make sure the humidity stays high by misting the leaves every other day.
- It can take several weeks for roots to form, so be patient. Once you see new growth, you can remove the plastic bag or container and begin to care for the new plant as you would a mature monstera.
Rooting Cuttings In Water
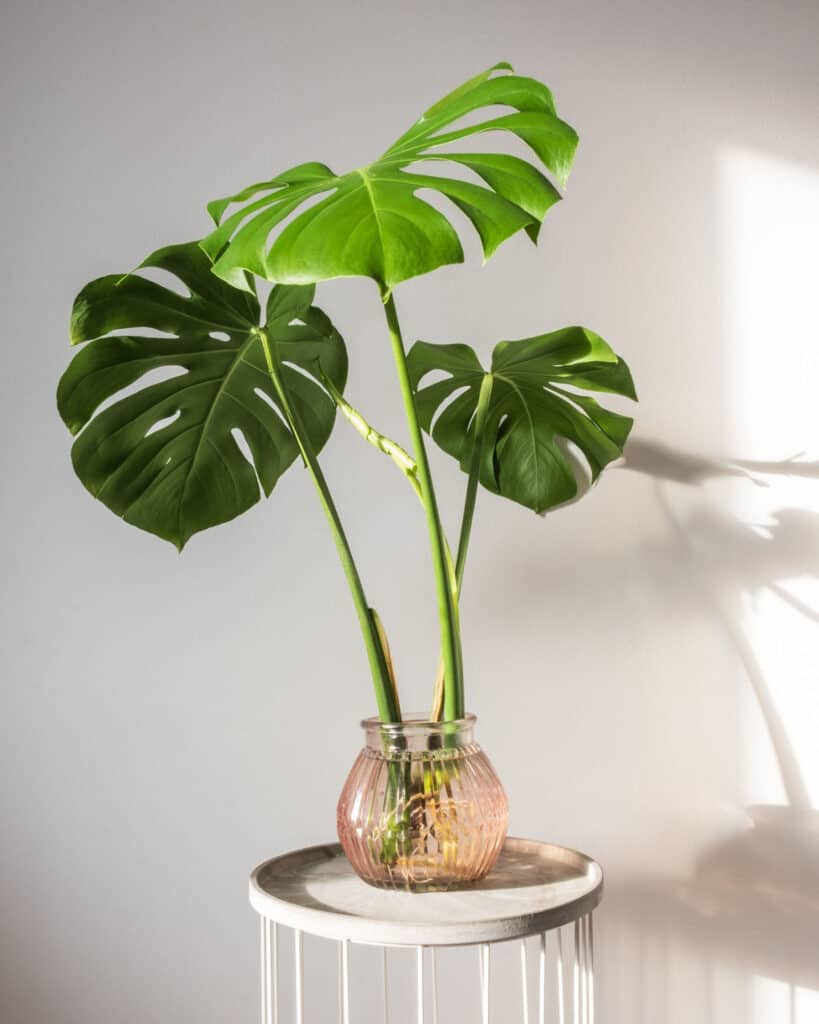
Rooting stem cuttings in water is a simple and effective way to propagate plants, including monstera. This method involves taking a cutting from a mature plant, submerging it in water, and allowing it to develop roots before transferring it to soil. Here are the steps to propagate monstera by rooting stem cuttings in water:
- Select a healthy stem that is at least 6 inches long and has at least 2-3 nodes (the small bumps on the stem where leaves will grow). Make sure the stem is not too thick or woody and that it is free of any pests or diseases.
- Using a clean, sharp pair of scissors or pruning shears, make a clean cut just below a node. Try to make the cut at a 45-degree angle, this will increase the surface area for rooting.
- Remove any leaves from the bottom 2-3 inches of the stem, as they will be submerged in water and can rot.
- Fill a container or glass with water and place the cutting in it. Make sure the water covers the nodes.
- Change the water every 3-5 days to keep it fresh and prevent bacteria growth.
- Place the container in a warm and bright spot, but not in direct sunlight.
- Be patient, it can take several weeks for roots to form. Once you see roots growing, you can transfer the cutting to a small pot or container filled with a well-draining potting mix.
- Care for the new plant as you would a mature monster.
Make sure to use clean and clear water, tap water or well water that has been left to sit for 24 hours to allow the chlorine to evaporate. Also, make sure the container or glass is clean and free of any debris or dirt.
2. Propagation By Air Layering
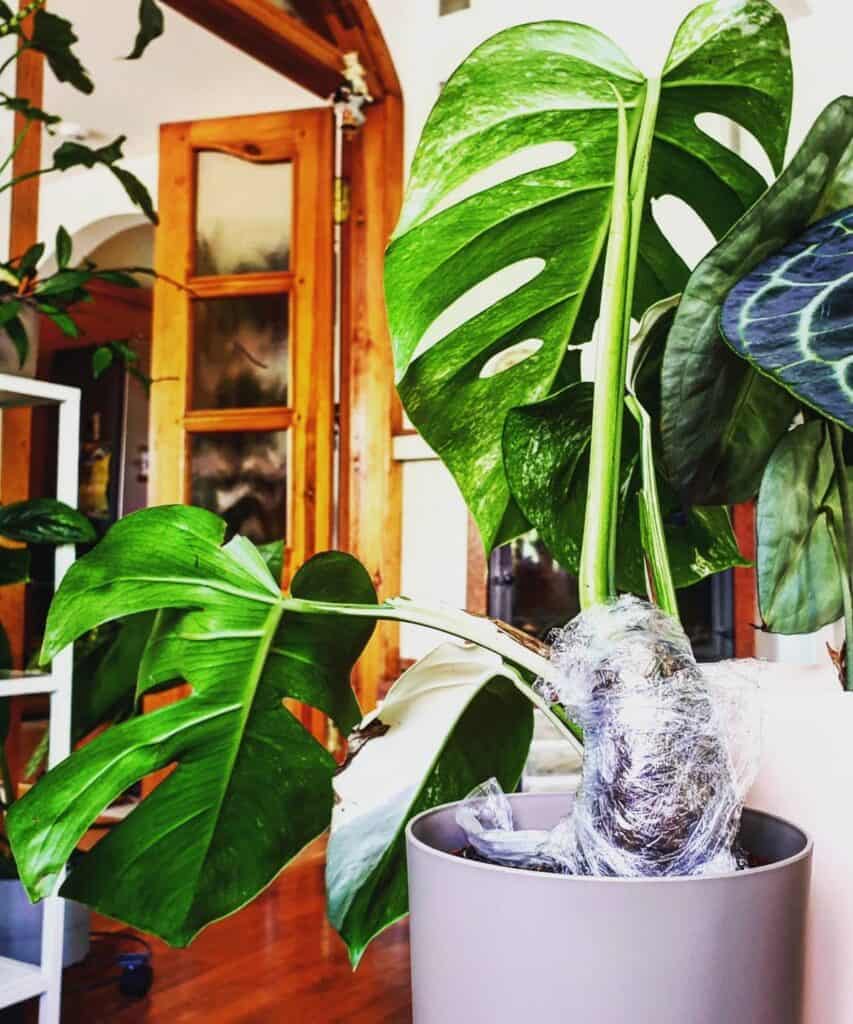
Air layering is a simple and reliable way to propagate monstera, also known as Swiss cheese plants. It’s an ideal method for propagating older plants that don’t root easily from cuttings. This method involves creating a wound on the stem of the plant, which is then covered with rooting hormone and soil to encourage the growth of roots. Here are the steps to propagate monstera by air layering:
- First, select a healthy stem that is at least 6 inches long and has at least 2-3 nodes (the small bumps on the stem where leaves will grow). Make sure the stem is not too thick or woody and that it is free of any pests or diseases.
- Using a clean, sharp knife or razor blade, make a clean cut around the stem about 6-8 inches long. This cut should be about 1/4 to 1/2 inch deep and should be done at a node.
- Use a toothpick or small stick to make a small hole in the center of the cut, which will help the rooting hormone penetrate the stem.
- Apply rooting hormone powder to the cut area, and make sure to cover the entire area.
- Next, use a small piece of plastic wrap, cling film or a plastic bag to cover the cut and hormone-treated area. Secure it with tape or twist ties to make sure it stays in place.
- In order to keep the humidity high and the cutting moist, you can wrap it in damp sphagnum moss.
- Care for the plant as usual and keep it in a bright spot but not in direct sunlight.
After roots have formed
Once done, wait several weeks while monitoring progress carefully; if roots appear, then unwrap carefully and snip off below them with scissors. Plant in moist soil blend such as half potting mix and half perlite for good drainage. Adding some slow-release fertilizer will help your Swiss cheese plant establish better in its new environment. Place near bright indirect light and keep evenly moist but not soggy wet throughout its growing season (spring-fall).
Propagation via air layering can be rewarding since it’s often successful even with challenging species like monstera! With proper care, your newly rooted plant should start producing leaves within one month.
3. Propagation By Division
Propagating monstera by division is a simple and effective method that involves separating the root ball of a mature plant and replanting the sections to create new plants. This method is best for monstera plants that have become overcrowded or have multiple shoots growing from the base. Here are the steps to propagate monstera by division:
- First, water your monstera plant well a day or two before you plan to divide it. This will make it easier to separate the roots.
- Carefully dig up the monstera plant, being careful not to damage the roots.
- Gently shake off the excess soil and examine the root ball. Look for natural divisions or separate the root ball with a clean, sharp knife or pruning shears.
- Each section should have at least one shoot and a good amount of roots.
- Plant each section in a small pot or container filled with well-draining potting mix.
- Water the new plants well and place them in a warm, bright spot, but not in direct sunlight.
- Care for the new plants as you would a mature monstera.
It’s important to note that dividing the monstera plant can be quite difficult, so it’s best to do it when the plant is well established, and the root ball is healthy and mature. Also, make sure that each section you divide has enough root and shoot to sustain the plant.
By following these steps, you can propagate your monstera plant by division, and enjoy your new plants in no time.
How Long Do Monstera Cuttings Take To Root?
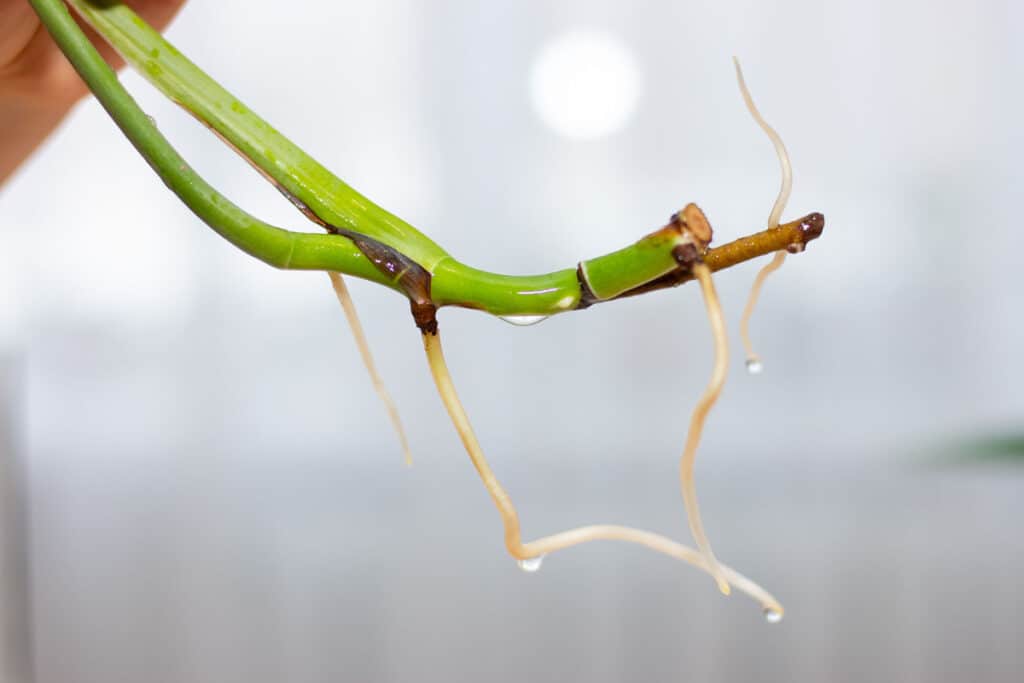
The time it takes for monstera cuttings to root can vary depending on several factors such as the size of the cutting, the method used for propagation, and the environmental conditions. However, on average, it can take several weeks for roots to form.
When rooting monstera cuttings in soil, it can take anywhere from 4 to 12 weeks for roots to form. The process may be slower if the cutting is taken from a woody stem or if the environmental conditions are not ideal.
When rooting monstera cuttings in water, it can take around 2-4 weeks for roots to form, but it can take longer if the conditions are not ideal.
Here’s an overview of what you can expect in general:
- 2-4 weeks: Cuttings should show signs of root growth within two to four weeks under optimal conditions.
- 4-6 weeks: It could take up to six weeks if environmental conditions or other factors delay development.
- 6+ weeks: In rare cases where conditions are not ideal, it may take even longer than six weeks before any progress is seen.
How to increase rooting success
There are several steps you can take to increase the chances of success when rooting monstera cuttings:
- Choose healthy, mature stems: Select stems that are at least 6 inches long, have at least 2-3 nodes and are free of pests or diseases.
- Make clean cuts: Use a clean, sharp pair of scissors or pruning shears to make a clean cut just below a node. Try to make the cut at a 45-degree angle, this will increase the surface area for rooting.
- Use rooting hormone: Rooting hormone powder can be used to promote root growth. Dip the cut end of the stem into rooting hormone powder before planting it.
- Create a mini greenhouse: To keep the humidity and temperature high, which is ideal for rooting, you can place the pot or container in a plastic bag or clear plastic container to create a mini greenhouse.
- Keep the soil consistently moist: Make sure to keep the soil consistently moist and mist the leaves every other day to keep the humidity high.
- Provide the right amount of light: Place the container in a warm and bright spot, but not in direct sunlight. Direct sunlight can damage the cutting.
- Take multiple cuttings: Not all the cutting will root, so it’s a good idea to take multiple cutting to increase the chance of success.
- Be patient: Rooting can take several weeks, so be patient and don’t give up too soon.
By following these tips and being consistent with care, your monstera cuttings will have a higher chance of success and you’ll be able to enjoy your new plants in no time.
Can You Propagate Monstera From A Leaf?
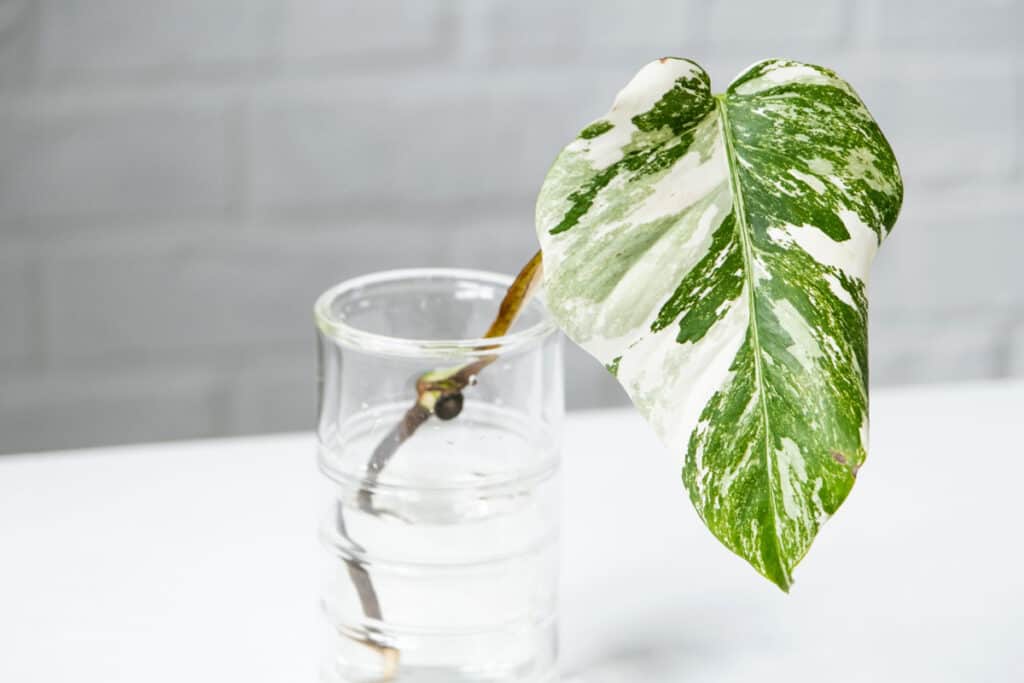
It is possible to propagate monstera from a leaf, although it is not as common as propagating from stem cuttings or air layering. However, it is important to note that when propagating monstera from a leaf, only roots will be produced and not a new plant.
This is because when a leaf is cut from the stem, it lacks the necessary nodes that are needed to produce new shoots. Nodes are the small bumps on the stem where new leaves and shoots grow, and they are the source of energy for the plant. Without them, the leaf cutting will only produce roots, but no new growth.
Is It Better To Propagate Monstera In Water Or Soil?
Both propagating monstera in water and soil are viable methods, and the choice of which one to use will depend on personal preference and the resources available.
Propagation in Water
Propagating monstera in water has several advantages. It’s quick and easy—the roots typically appear within two weeks—which means that you don’t have to wait too long for your new plants to take off. Additionally, since the rooting process happens underwater, there are fewer issues with disease-causing organisms such as fungi and bacteria. This makes propagation in water ideal for beginner gardeners who might not be familiar with proper sterilization protocols when planting cuttings directly into soil.
Propagation in Soil
On the other hand, propagating monstera in soil also has its benefits. For starters, once planted into soil, a cutting will develop stronger root systems than if it were left submerged in water for an extended period of time. Furthermore, because air exchange is possible through aerated potting mix, this method helps prevent any potential rot from occurring on the stem of the cutting due to lack of oxygen intake from being kept constantly wet like it would be while rooting in water. While propagation may take longer using this method (up to four weeks), having healthier roots at the end result is worth it!
At the end of the day, both methods can lead to successful propagation; however, depending on your experience level and preferences you may want to consider one over the other. If you’re looking for faster results with minimal fuss involved then going with water might be best; otherwise go ahead and try out soil instead!
How Long Do Monstera Cuttings Last In Water?
The duration of how long monstera cuttings can last in water can vary depending on several factors such as the size of the cutting, the environmental conditions, and the care provided. However, generally speaking, monstera cuttings can last in water for several weeks while they develop roots.
First and foremost, when using the water propagation method for monstera plants, the quality of the water should be taken into consideration. Tap water or distilled water is best because it does not contain chemical additives or salts that could harm the plant’s roots. The container used for growing must also be kept clean at all times to prevent disease from spreading among other cuttings. Additionally, regular changes of fresh water ensures proper oxygenation and reduces bacterial buildup which could cause root rot if left unchecked.
The ideal temperature range for growing Monstera cuttings in water lies between 65-85 degrees Fahrenheit (18-29 degrees Celsius). Anything outside of this range may result in slowed growth or even death of your rooting cutting. Furthermore, keeping humidity levels high with misting every few days helps ensure successful propagation by minimizing wilting and promoting healthy leaf growth.
It’s crucial to check the cutting regularly and if the leaves start to yellow or the stem starts to rot, it’s best to discard the cutting, as it’s an indication that it’s not going to root.
Can You Propagate Monstera Without Root?
Propagating Monstera without root is possible and can be done through a few different methods. The most common one is air layering, which involves making a wound on the stem of the plant and then wrapping it in moist sphagnum moss until roots start growing from the cut area. This method takes some patience but allows for successful propagation without having to wait for a cutting to grow its own roots.
Another way to propagate monstera without root is stem tip cuttings. These involve removing just the tips of stems with at least three nodes on each piece and planting them directly into soil where they eventually form their own roots over time. In comparison to air layering, this method may take longer but does not require any special tools or materials.
TIP: When propagating your Monstera plants without rooting them first, make sure you are using sterilized scissors or garden shears! This ensures that no bacteria or other contaminants will get transferred onto your new plants during the process.
Can I Propagate Monstera Without Node?
Propagating monstera without nodes is not recommended because the nodes are an essential part of the plant’s growth and reproduction process. They contain buds which will eventually grow into new leaves and shoots, providing the energy needed for the plant to grow. Without nodes, the cutting will lack the necessary structure to produce new growth and it will not be able to produce new leaves or shoots and it will only produce roots. This means that the new plant will not be able to photosynthesize, which is essential for the plant’s survival.
How Do You Find Nodes In Monstera?
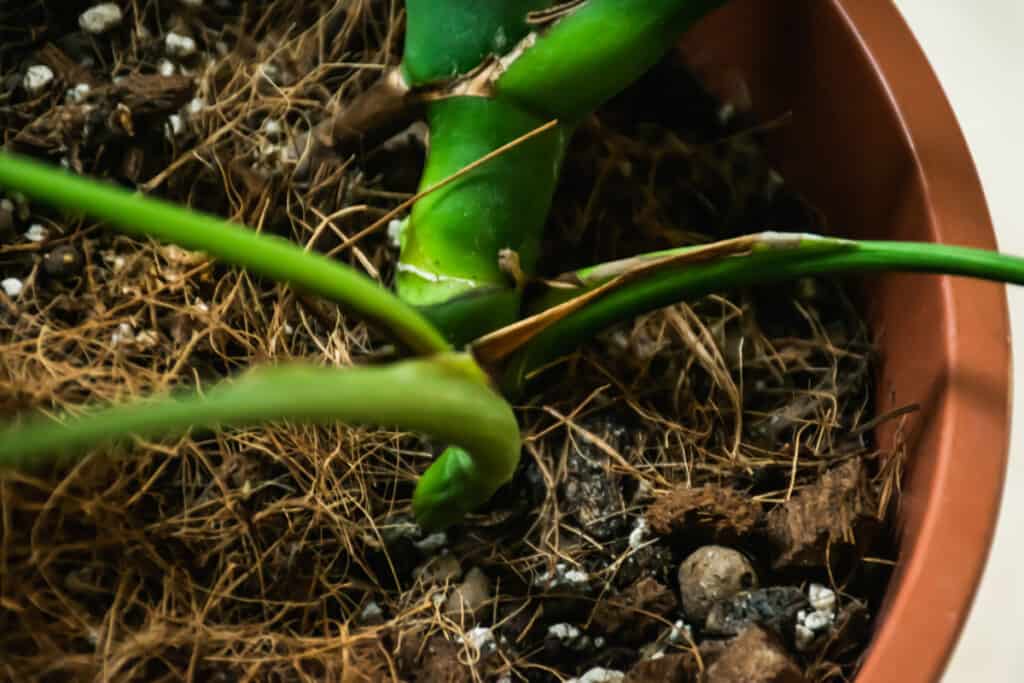
Nodes are small bumps or rings on the stem of a monstera plant where new leaves and shoots grow. They can be found by looking for small protuberances along the stem, usually at regular intervals. They are usually located about an inch or so apart and are slightly raised or sunken compared to the stem.
When looking for nodes, you may also notice small aerial roots growing out of the nodes, which are roots that grow above the soil surface. These aerial roots help to anchor the plant and absorb moisture.
You can also identify nodes by looking for leaf scars, which are small marks on the stem where previous leaves have fallen off. These leaf scars are located directly above the nodes.
It’s important to note that when propagating monstera, it’s best to take a cutting that has at least 2-3 nodes as this will increase the chances of success, as the cutting will have more energy source to produce new growth.
Do You Need An Aerial Root To Propagate Monstera?
Aerial roots are not necessary to propagate monstera, but they can be beneficial for the plant’s growth and survival. Aerial roots are roots that grow above the soil surface and they help to anchor the plant and absorb moisture.
Conclusion
Propagating monstera is a great way to expand your collection of this tropical beauty and share it with friends and family. Whether you choose to propagate monstera by stem cuttings, air layering, or division, it’s a fun and rewarding process that can be done with a little patience and care.
It’s also important to note that not all the cutting will root, so it’s a good idea to take multiple cutting to increase the chance of success. Be patient, it may take several weeks for roots to form. Once roots have formed, you can transfer the cutting to a small pot or container filled with well-draining potting mix and begin to care for it as you would a mature monstera.
In conclusion, propagating monstera is an easy and fun way to expand your collection and share it with others. By following these simple steps, you can enjoy your new plants in no time. Happy propagating!
